
Nothing beats the refreshing taste of fresh homemade juice, but many people struggle with their Oster juicer because they don’t know the proper techniques for setup, operation, and maintenance. Learning how to use an Oster juicer correctly transforms your experience from frustrating clogs and messy cleanups to producing smooth, nutrient-rich juice with minimal effort. Whether you just unpacked your new Oster juicer or haven’t used your model in months, this guide provides the exact steps to get optimal performance while extending the life of your appliance. You’ll discover the correct assembly sequence, ideal produce preparation methods, and cleaning techniques that prevent common problems—so you can start making delicious, healthy juice today.
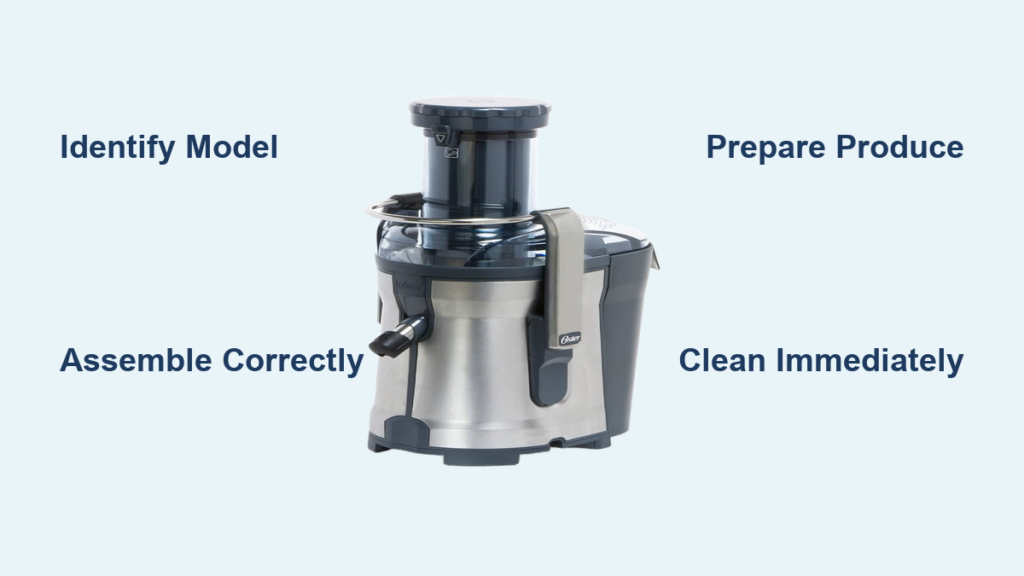
Identify Your Oster Juicer Model Components
Before attempting assembly, locate your specific Oster juicer model number usually found on the bottom of the motor base or in the documentation. Different Oster models have unique configurations—some feature vertical designs while others use centrifugal extraction systems—so identifying your exact model ensures proper setup. Remove all components from packaging and organize them on a clean, dry surface to verify you have the essential parts: motor base unit, juice pitcher, pulp container, filter basket, feed chute lid, food pusher, and any specialty attachments included with your model.
Check each component for shipping damage, particularly the stainless steel filter basket where dents or bends could compromise juice extraction. The filter mesh should appear uniform without holes or deformities that would allow pulp to mix with your juice. If any parts are missing or damaged, contact Oster customer support with your model number before attempting first use, as operating with incomplete or damaged components can cause leaks or motor strain.
Correct Assembly Sequence for Leak-Free Operation

Place the motor base on a dry, level countertop away from water sources and at least six inches from the counter edge to prevent accidental tipping during operation. Position the pulp collection container directly beneath the filter basket housing—this component catches the fibrous material after juice extraction. Insert the filter basket into the juicing chamber by aligning the tabs with corresponding slots, then rotate clockwise until it locks securely into place with an audible click.
Place the juice pitcher beneath the spout to catch your freshly extracted liquid, ensuring it sits squarely to prevent spills. Position the feed chute lid on top of the juicing chamber, then insert the food pusher into the chute opening. The pusher should slide smoothly without wobbling—if it feels loose or unstable, recheck that all components are properly locked. A properly assembled Oster juicer will sit firmly without vibration during operation and won’t leak juice between components.
Prepare Produce for Maximum Juice Yield

Wash all fruits and vegetables thoroughly under cool running water, scrubbing firm produce like carrots and beets with a vegetable brush to remove soil and residues. Remove stickers, damaged areas, and any non-edible parts—peel citrus fruits unless your Oster model specifically handles whole citrus. Cut produce into pieces approximately 1-inch cubes that fit comfortably through the feed chute without forcing.
Remove large pits from stone fruits and hard seeds from apples before juicing, as these can damage the filter basket or cause jams. Alternate between hard and soft produce during juicing—begin with cucumber or celery to create a pulp channel, then add carrots or beets, followed by leafy greens. This technique prevents clogs and improves extraction efficiency. Never feed extremely hard items like whole nuts or ice through your juicer, as these can damage the internal mechanisms.
Start Juicing with Proper Technique and Safety
Plug your Oster juicer into a dedicated electrical outlet that matches the voltage requirements specified on the motor base label. Never use extension cords or power strips with high-wattage appliances. Position your juice pitcher and have additional containers ready before starting to avoid interruptions during operation. Press the power button to activate the motor, allowing it to reach full speed for 5-10 seconds before introducing any produce.
Use only the provided food pusher to guide ingredients down the feed chute—never use your fingers, utensils, or other objects that could cause serious injury. Apply steady, moderate pressure downward while maintaining a consistent feeding pace that matches your juicer’s processing speed. If the motor slows or produces unusual noises, immediately stop feeding and allow the unit to clear before continuing. Process similar produce types together for optimal extraction—group citrus, then leafy greens, then harder vegetables rather than mixing types randomly.
Recognize and Respond to Safety Features
Your Oster juicer includes critical safety mechanisms that prevent operation when improperly assembled. If the motor doesn’t start when you press the power button, check that the pulp container, filter basket, and juice pitcher are fully locked in place—most models won’t operate without proper component alignment. Some Oster juicers feature automatic shut-off that activates when the motor overheats from excessive strain or prolonged use.
If your juicer shuts down unexpectedly during operation, unplug the unit immediately and allow it to cool for at least 15 minutes before attempting to restart. Never attempt to bypass safety features or force components into place. Check for visible obstructions in the feed chute and filter basket before resuming operation. If problems persist after cooling and clearing obstructions, consult your owner’s manual for model-specific troubleshooting guidance before continuing use.
Monitor and Manage Juice and Pulp Collection
Check the juice pitcher regularly during operation and replace it with an empty container before it reaches three-quarters full to prevent overflow. Fresh juice begins oxidizing immediately, so consume within 20 minutes for maximum nutrient retention or store in an airtight glass container in the refrigerator for up to 24 hours. The pulp container requires emptying when it reaches half to two-thirds capacity—stopping the juicer periodically to clear accumulated pulp maintains optimal extraction efficiency.
When processing large quantities, keep a damp cloth nearby to wipe juice splatters from the counter immediately, as dried juice becomes difficult to remove. Alternate between high-moisture and fibrous produce to help push pulp through the system—follow carrots with cucumber or apple to maintain flow. Never overfill the feed chute; adding too much produce at once strains the motor and reduces juice yield.
Immediate Post-Use Cleaning Protocol
Disassemble your Oster juicer immediately after finishing—residue hardens quickly and becomes much more difficult to clean. Unplug the unit and carefully remove each component, setting aside the motor base which should never be submerged in water. Rinse all removable parts under warm running water to remove bulk pulp and juice residue before it dries. Pay special attention to the filter basket, where fibers can become trapped in the mesh.
Wash components in warm, soapy water using a soft sponge or the cleaning brush provided with your model. Never use abrasive cleaners or scouring pads that could damage plastic components or scratch stainless steel surfaces. Clean the filter basket by gently brushing both sides of the mesh under running water—bending or damaging the delicate mesh reduces juice quality. Rinse all parts thoroughly to remove soap residue that could affect future juice taste.
Deep Cleaning for Optimal Performance
Soak stubbornly stained components like the filter basket in warm water with a small amount of mild dish soap for 10-15 minutes to loosen dried pulp. For orange or red stains from carrots and beets, create a paste of baking soda and water, apply to affected areas, and let sit for 5 minutes before gently scrubbing. Avoid using vinegar or harsh chemicals that could degrade plastic components over time.
Inspect the filter mesh closely after cleaning—hold it up to light to check for any clogged openings or damaged areas. Replace the filter basket if you notice holes, tears, or significant deformation that affects juice clarity. Allow all components to air dry completely on a clean towel before reassembly or storage—trapped moisture promotes mold growth and unpleasant odors. Never place juicer components in the dishwasher unless explicitly stated as dishwasher-safe in your owner’s manual.
Preventative Maintenance for Longevity
Store disassembled components in a dry cabinet with adequate air circulation—never stack wet parts together or store in sealed plastic bags where moisture can accumulate. Keep the motor base covered with a clean cloth when not in use to protect from dust and kitchen splatters. Periodically inspect the power cord for fraying, cracks, or other damage that could create electrical hazards.
Check all locking mechanisms periodically to ensure components fit together securely without excessive wobble. If your model includes removable blades or cutting discs, inspect these for dullness or damage that would affect performance. Most Oster juicers don’t require lubrication, but consult your specific model’s manual for any recommended maintenance procedures. Proper care can extend your juicer’s lifespan significantly beyond the standard warranty period.
Troubleshoot Common Operation Issues
If your Oster juicer won’t start, first verify all components are properly assembled—most models have safety interlocks preventing operation when incorrectly put together. Check that the power cord is fully inserted into both the juicer and wall outlet, and test the outlet with another appliance. For low juice yield, clean the filter basket thoroughly as clogs are the most common cause, and ensure you’re using produce with sufficient moisture content.
Excessive vibration typically indicates the unit isn’t sitting level on your countertop or a component isn’t properly seated. Strange noises often signal foreign objects caught in the mechanism or damaged filter components. If juice appears cloudy or contains pulp, the filter basket may be damaged or improperly installed. Always consult your owner’s manual for model-specific troubleshooting before disassembling internal components.
Create Perfect Juices with Proven Techniques
Start with simple combinations that showcase your Oster juicer’s capabilities—try cucumber, celery, and green apple for a refreshing green juice that’s gentle on beginners. Alternate between hard and soft produce during juicing to maintain optimal flow through the system. For leafy greens like kale or spinach, roll them into tight bundles and push through with a piece of cucumber or apple to improve extraction.
Experiment with seasonal produce to discover your favorite combinations while taking advantage of peak freshness and affordability. Always juice harder vegetables like carrots before softer fruits to prevent clogs. Remember that proper produce preparation and feeding technique matter more than the specific ingredients—you’ll achieve better results with correctly processed common vegetables than poorly handled exotic options.


