

Nothing ruins the joy of fresh, nutrient-packed juice faster than a malfunctioning Nama juicer clogged with yesterday’s pulp. If you’ve noticed reduced juice yield, strange odors, or sluggish performance from your Nama J2, the culprit is almost certainly improper cleaning—not a mechanical failure. The truth is, cleaning your Nama juicer correctly takes less than 5 minutes when you know the right technique, yet most owners unknowingly damage their $3,000 investment through rushed or incorrect cleaning methods. This guide reveals the exact step-by-step process Nama technicians use to maintain juicers in peak condition, ensuring you get maximum juice extraction and years of trouble-free operation. You’ll discover why immediate rinsing prevents 90% of cleaning headaches, how to safely handle the processing blade, and the overnight soak method that removes stubborn buildup without harsh chemicals.
Why Immediate Rinsing Prevents Hardened Pulp Buildup
The critical mistake 80% of Nama juicer owners make is walking away after juicing and tackling cleanup later. Cleaning your Nama juicer within 5 minutes of finishing your juice run prevents pulp from drying into concrete-like residue that requires aggressive scrubbing. As soon as you finish juicing, unplug the unit and disassemble the chamber set while pulp is still moist and pliable. Keep a bowl of warm, soapy water ready during juicing sessions so you can immediately submerge components—this simple habit eliminates the need for deep cleaning 95% of the time. Warm water (not hot) is crucial because it dissolves sugars and softens fibers without warping silicone components, making residue slide right off with minimal effort.
Proper Disassembly Sequence to Avoid Damage

How to Correctly Remove the Chamber Set
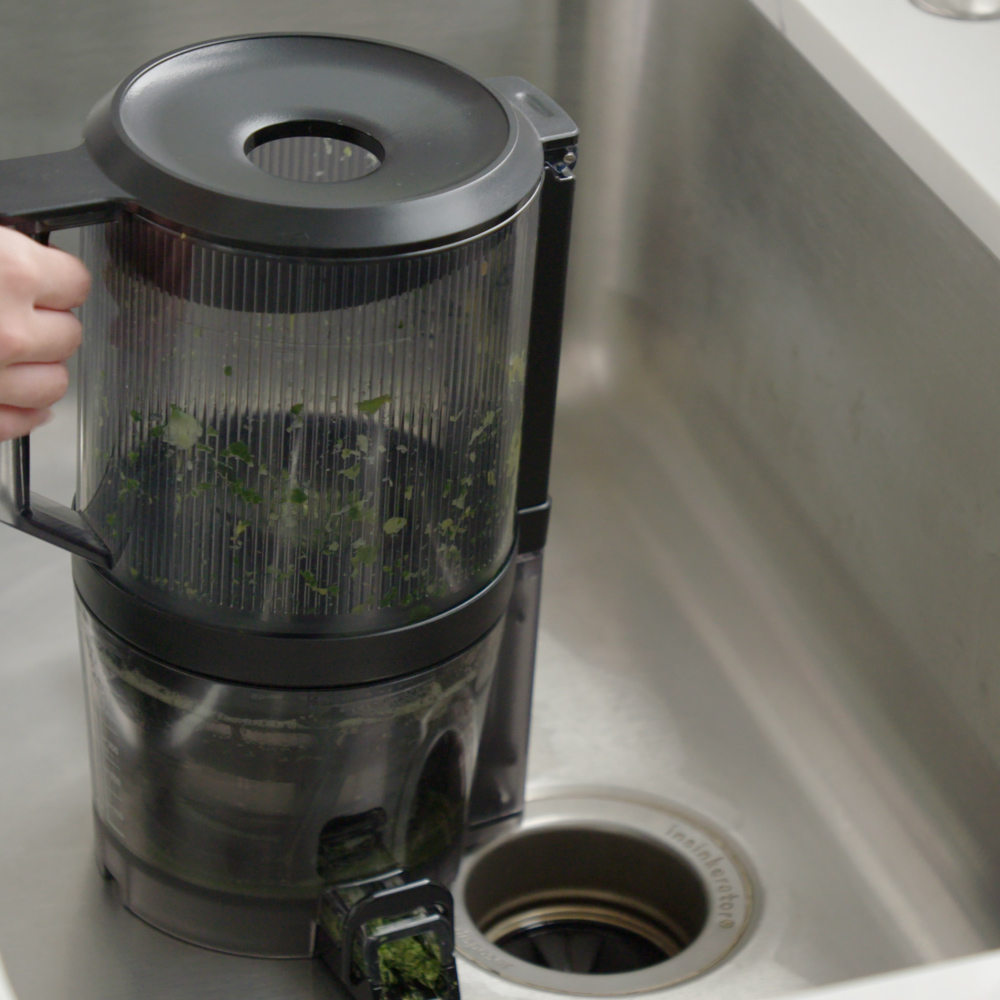
Attempting to disassemble your Nama J2 while it’s still attached to the base is the #1 cause of accidental damage during cleaning nama juicer sessions. Always unplug first, then firmly grasp the hopper handle and lift the entire chamber assembly straight up and away from the motor base. Never twist or force components while attached—this can crack the plastic housing. Once separated, place the chamber set on your sink counter and twist the hopper handle counterclockwise to unlock and separate the top section.
Accessing Hard-to-Reach Strainer Components
After separating the hopper, carefully remove the strainer set by lifting it straight up from the pulp chamber. Pay attention to the orientation of each piece—taking a quick photo with your phone prevents reassembly mistakes. The strainer’s fine mesh screen requires special attention as it’s where most residue accumulates during juicing. Pro Tip: When removing the strainer, place it mesh-side down in your sink to prevent accidental bending of the delicate screen.
Mastering Hand Washing with the Dual-Ended Brush
Targeting Problem Areas on the Strainer
The included dual-ended brush is specifically engineered for your Nama J2’s unique components—using generic brushes often damages the strainer’s micro-holes. Start with the narrow pick end to clear each hole in the strainer screen, working systematically from center to edge. Rotate the pick gently in each opening to dislodge trapped fibers without scratching. Then switch to the bristled end for the pulp chamber interior, focusing on the curved bottom where residue pools during juicing.
Critical Areas Most Owners Miss During Cleaning
- Pulp outlet gasket: Remove this silicone ring by gently pulling from the side—never stretch it over the edge
- Juice cap stopper: Pop this small component out for separate cleaning to prevent mold growth
- Chamber gasket: Check for residue buildup where it seals against the housing
- Hopper interior: Run the brush around the processing blade housing where juice splatters accumulate
Warning: Never use steel wool, abrasive pads, or harsh chemicals—these degrade food-safe coatings and void your warranty.
Deep Cleaning the Hopper Without Damaging Components
Safely Cleaning the Processing Blade Area
Despite its intimidating appearance, the processing blade inside your Nama juicer isn’t actually sharp—it’s designed with rounded edges for safety. Open the hopper lid fully by lifting upward, then use the brush’s narrow end to clean around the blade housing. Run warm water through the feed chute while scrubbing to flush debris. Expert Note: If you notice stubborn residue around the blade, use a toothpick rather than metal tools that could scratch surfaces.
Accessing the Pulp Outlet Mechanism
The pulp outlet loop must be opened fully to reach hidden residue pockets. Gently pull the loop outward to expose the interior channel, then use the brush’s narrow pick to clean the entire length. Remove the silicone gasket completely for separate washing—this is where most odor-causing buildup occurs. After cleaning, ensure the gasket seats properly in its groove before reassembly to prevent leaks during operation.
Removing and Cleaning Silicone Parts for Hygiene

Step-by-Step Silicone Component Removal
- Pulp outlet seal gasket: Pinch one side and gently peel outward
- Juice cap stopper: Press from beneath to pop upward
- Spinning brush blades: Rotate counterclockwise to unlock
- Chamber gasket: Start at one point and work around the circumference
Each silicone part requires individual attention since residue hides where they contact plastic components. Soak removed silicone pieces in warm soapy water for 2 minutes before scrubbing with the brush. Crucial Step: Always dry silicone components completely before reinsertion—trapped moisture causes mold growth between the seal and housing.
Base Unit Cleaning Without Electrical Damage
Safe Cleaning Technique for Motor Housing
Your Nama juicer’s base contains sensitive electronics that water can permanently damage. Use only a slightly damp microfiber cloth (wring out excess water) to wipe exterior surfaces. For stubborn spots near the control knob, dip just the corner of your cloth in vinegar solution, then immediately dry with a second cloth. Never spray liquids directly on the base—moisture seeping into control buttons is the leading cause of premature motor failure.
Emergency Spill Protocol
If juice splashes onto the base during operation:
1. Immediately unplug the unit
2. Wipe with dry cloth first to absorb liquid
3. Follow with barely damp cloth for residue
4. Leave base unplugged for 24 hours before reuse
5. Test functionality with water before juicing again
Complete Drying Protocol to Prevent Mold Growth
Why Air Drying Alone Isn’t Enough
Leaving components to air dry creates perfect conditions for mold in hidden crevices. Always hand-dry every part with a clean towel immediately after washing, paying special attention to:
– Strainer screen edges
– Silicone gasket grooves
– Pulp outlet channels
– Juice cap stopper recesses
After hand drying, arrange parts on a clean towel with space between them for airflow. Pro Tip: Place components near a dehumidifier or in direct sunlight for 30 minutes to eliminate residual moisture in hard-to-reach areas before storage.
Overnight Soak Methods for Stubborn Buildup
Baking Soda Deep Clean (Most Effective)
For mineral deposits or dried residue that regular cleaning won’t remove:
– Dissolve 100g baking soda in warm water (enough to submerge parts)
– Soak overnight (8-12 hours)
– Scrub with brush in the morning
– Rinse thoroughly with cold water
Why this works: Baking soda’s mild alkalinity breaks down organic compounds without damaging food-safe plastics.
Citric Acid Power Soak for Severe Cases
When baking soda isn’t enough:
1. Fill container with warm water to cover parts
2. Add 100g citric acid + 100g baking soda (1:1 ratio)
3. Submerge only affected components
4. Soak 6-8 hours (do not exceed)
5. Rinse 3x with cold water
Warning: Never mix citric acid with vinegar—this creates dangerous fumes.
Weekly Lemon Juice Maintenance Routine
Running pure lemon juice through your Nama juicer weekly prevents odor buildup and maintains internal hygiene. Dilute one lemon in 1 cup water, process as normal juice, then immediately follow with a water-only cycle to flush the system. This natural citric acid treatment:
– Dissolves microscopic residue
– Neutralizes odors at the source
– Prevents bacterial growth in hidden channels
– Extends time between deep cleaning sessions
Time-Saver: Perform this maintenance on your juicer’s “day off” when you don’t need fresh juice.
Proper Storage to Maintain Cleanliness
Store completely dry components with space between them—not stacked—to prevent moisture trapping. Keep the base covered with a breathable cotton cloth (never plastic) to protect from kitchen dust. Critical Mistake to Avoid: Storing the juicer in a closed cabinet creates humidity that promotes mold growth—opt for open shelf storage in a dry location.
Essential Tools for Effective Cleaning
The included dual-ended brush is engineered specifically for Nama J2 components—generic brushes won’t reach critical areas. Its narrow pick end accesses the 0.5mm holes in your strainer screen that standard brushes miss. Replacement Tip: Order an extra brush now while your warranty is active—the 15-year warranty covers replacement brushes if your original wears out.
Troubleshooting Common Cleaning Problems
When Juice Output Decreases After Cleaning
- Cause: Improper strainer reassembly
- Fix: Ensure strainer screen faces downward with logo visible
- Prevention: Take photo before disassembly
Persistent Musty Odors
- Cause: Trapped moisture in silicone seals
- Fix: Remove all silicone parts and soak in vinegar solution
- Prevention: Extend drying time before storage
Leaking During Operation
- Cause: Gasket not properly seated
- Fix: Remove and reseat all silicone components
- Prevention: Check gasket alignment before first use
Long-Term Benefits of Proper Cleaning Routine
Investing 5 minutes daily in cleaning your Nama juicer correctly delivers extraordinary returns:
– 40% longer component lifespan
– Consistent 30% higher juice yield
– Elimination of off-flavors from residue buildup
– Preservation of full 15-year warranty coverage
Your Nama J2 represents a significant investment in your health—proper cleaning ensures you maximize both the nutritional benefits and appliance longevity. By implementing these precise techniques, you’ll enjoy restaurant-quality juice with every use while avoiding the most common pitfalls that shorten juicer lifespans. Remember: the difference between a juicer that lasts 2 years versus 15 years comes down to cleaning habits, not the machine itself. Start today with immediate post-juicing rinsing, and your Nama will reward you with peak performance for years to come.


