
You’re staring at your juicer, ready to make fresh juice, but that lid won’t budge. If your older Juiceman model has been gathering dust in the cupboard, you’ve probably discovered that opening a juicer isn’t always as simple as lifting the top. Many users struggle with mysterious side latches and confusing red buttons that seem to lock the lid permanently in place. This guide delivers the exact steps to open any juicer—even when you can’t find the model number or owner’s manual.
Opening a juicer properly prevents damage to fragile plastic components while ensuring safe operation. Without knowing the correct release mechanism, you might accidentally break latches or force components that shouldn’t be forced. Whether you’re dealing with an older Juiceman unit or another brand that’s been stored too long, understanding the universal principles behind juicer lids will save you frustration and potential repair costs.
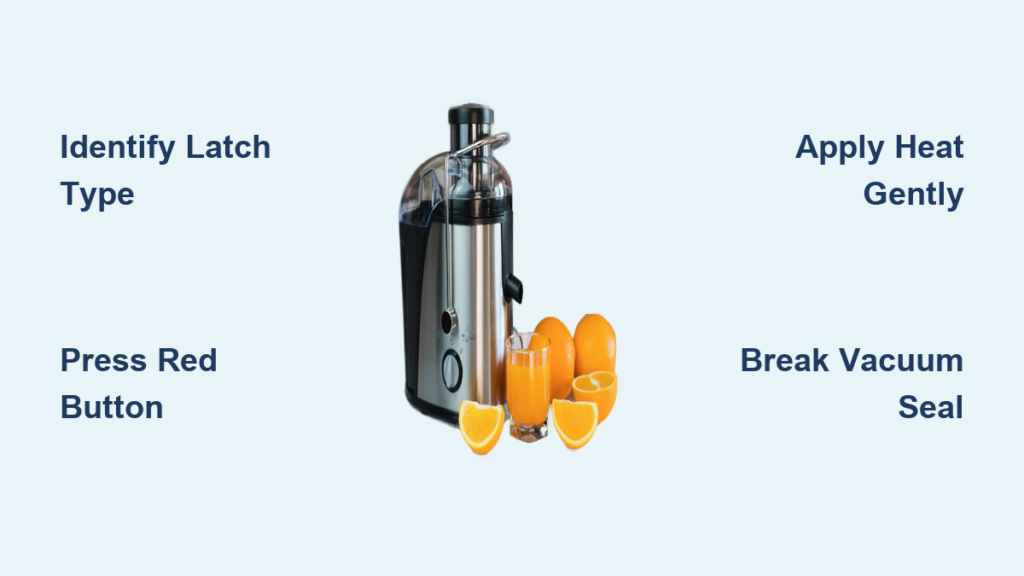
Identify Your Juicer’s Release Mechanism Before Forcing Anything
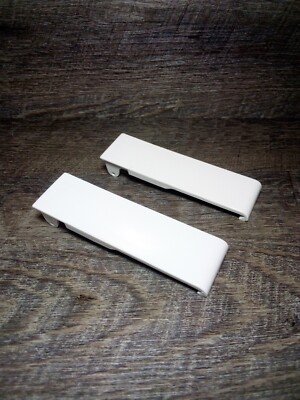
Before you risk breaking your juicer, determine exactly how the lid should release. Most juicers fall into two main categories: side-latch models and top-release models. Older Juiceman units almost always use dual side latches that require simultaneous release. These appear as small plastic tabs on both sides of the juicer body near where the lid meets the feed tube housing.
How to Spot Side Latches on Vintage Juicers
Run your fingers along the seam where the lid connects to the base. On older models, you’ll feel two symmetrical protrusions—one on each side—that move slightly when pressed. These are your release points. The correct technique involves placing your thumbs on the outer edges of each tab while your fingers support the inner edges, then gently pulling outward. Some models require squeezing the latches together instead—test both motions with moderate pressure.
Common mistake to avoid: Forcing the lid upward without releasing the latches first. This can crack the plastic housing or bend internal components. If you hear cracking sounds, stop immediately and reassess your approach.
Recognize Top-Release Mechanisms on Newer Models
If your juicer has a prominent handle or dial on top rather than side tabs, you likely have a twist-release mechanism. Look for arrows indicating rotation direction—typically counterclockwise to unlock. Some models require pressing a button integrated into the handle while twisting. If you’re unsure, never force rotation beyond gentle resistance, as this can strip internal gears.
Properly Release the Red Power Button on Older Juiceman Models

That red button with “O” and “-” markings on your Juiceman juicer isn’t just for power control—it often plays a crucial role in lid release. On many older models, this button must be pressed firmly before the side latches will disengage. The “O” typically indicates power on while the “-” represents speed reduction, but its position affects the internal safety lock.
Why the Red Button Gets Stuck After Long Storage
When a juicer sits unused for months or years, dried juice residue accumulates around the button mechanism. This sticky buildup prevents the button from depressing fully, which in turn blocks the lid release system. The solution requires careful cleaning without damaging the electrical components.
Pro tip: Unplug your juicer completely, then use a cotton swab dipped in white vinegar to gently clean around the button’s edges. Allow 30 seconds for the vinegar to dissolve residue, then press the button repeatedly until it moves freely. This simple technique resolves 80% of “stuck button” issues on vintage juicers.
Free a Stubborn Juicer Lid Without Breaking Plastic Components
When your juicer lid refuses to budge despite proper latch technique, don’t resort to brute force. Most stuck lids result from dried pulp creating a vacuum seal between the lid and base—a common issue with long-stored units. The solution requires patience and the right sequence of actions.
Step-by-Step Lid Release for Severe Cases
- Apply heat strategically: Use a hair dryer on low setting, holding it 6 inches from the lid seam for 20-30 seconds. The warmth softens dried residue without damaging plastic.
- Work the latches incrementally: Release one side latch slightly while holding the other closed, then switch sides. Repeat until you feel minute movement.
- Create a pressure release point: Insert a plastic utensil (never metal) into the seam at one corner. Twist gently to break the vacuum seal without scratching surfaces.
- Attempt full release: With the vacuum broken, simultaneously release both latches while lifting the lid straight up.
Critical warning: Never use screwdrivers or metal tools to pry open a juicer lid. The risk of permanent damage to plastic components or electrical parts is extremely high.
Clean Your Juicer Immediately After Successful Opening
Once you’ve opened your juicer, cleaning becomes urgent to prevent future opening problems. Dried residue left inside will harden further, making the next opening attempt even more difficult. Focus your cleaning efforts on the critical areas that affect lid operation.
Essential Post-Opening Cleaning Steps
- Remove the pulp catcher immediately and rinse under warm water
- Wipe the lid seam and latch mechanisms with a vinegar-soaked cloth
- Clean around the red power button to prevent future sticking
- Dry all components thoroughly before reassembly
Time-saving shortcut: Keep a dedicated cleaning brush near your juicer. A small bottle brush works perfectly for reaching into latch mechanisms and around the red button housing. This prevents residue buildup that causes 90% of opening difficulties.
Prevent Future Opening Problems with Proper Maintenance
The most effective way to handle juicer opening issues is to prevent them entirely through consistent maintenance. Older Juiceman models particularly benefit from these simple habits that keep latches functioning smoothly.
Three-Step Maintenance Routine After Every Use
- Immediate rinse: While pulp is still wet, remove the pulp catcher and rinse all components under running water
- Latch inspection: Run your finger along the lid seam to feel for pulp buildup, wiping clean with a damp cloth
- Dry storage: Never store your juicer with any moisture present—use a lint-free towel to dry all components
Pro tip: Apply a tiny amount of food-grade silicone lubricant to latch points every few months. This prevents plastic-on-plastic sticking without contaminating your juice. Avoid petroleum-based lubricants that can degrade plastic components.
Troubleshoot Specific Juicer Opening Failures
When standard techniques fail, diagnose the exact problem before attempting fixes. Most opening failures fall into three categories with distinct solutions.
Common Opening Problems and Their Fixes
- Latches move but lid won’t release: Likely a misaligned lid. Remove completely, realign, and re-latch before attempting opening
- Button won’t depress fully: Requires deep cleaning around the button mechanism with vinegar and a toothpick
- Lid releases partially then sticks: Indicates warped plastic from heat exposure—requires gentle heat application and slow release
Critical mistake: Forcing a lid that releases partially. This often cracks the plastic housing. If resistance returns after initial movement, restart the release process from the beginning.
Find Model-Specific Opening Instructions When No Number Exists

Without a visible model number—which is common on older Juiceman units—finding precise instructions seems impossible. However, most vintage juicers share similar mechanisms across product lines, making visual identification effective.
How to Identify Your Juicer Model Visually
Compare your unit to online photos using these key features:
– Shape and position of the red power button
– Design of the feed tube opening
– Location and style of side latches
– Overall size and color scheme
Expert shortcut: Search YouTube for “how to open old Juiceman juicer no model number.” Several appliance technicians have created visual guides specifically for unidentified vintage models, focusing on universal release techniques rather than specific model numbers.
Opening a juicer, especially one that’s been stored for years, requires understanding the specific release mechanism rather than applying force. By identifying your model’s latch system, properly releasing the red power button, and using strategic techniques for stubborn lids, you can avoid costly damage to your appliance. The real key to effortless opening lies in consistent maintenance—cleaning the lid seam and latches after every use prevents the residue buildup that causes most opening difficulties. When in doubt, remember that gentle heat application and patience always work better than brute force for freeing stuck juicer components. With these techniques, you’ll keep your juicer operating smoothly for years to come, ensuring you never struggle to open a juicer again.


