
You’re mid-project, ready to swap discs on your angle grinder, when the lock nut refuses to budge. That frozen nut isn’t just frustrating—it’s halting your progress and threatening to derail your entire job. When your angle grinder lock nut stuck situation occurs, forcing it with excessive torque risks stripping threads, damaging the spindle, or even causing dangerous tool failure. This isn’t a rare issue: heat cycles, vibration, and metal-on-metal contact routinely weld these nuts in place, especially after prolonged use or exposure to moisture. In this guide, you’ll discover field-tested techniques to free even the most stubborn lock nuts safely, avoid costly mistakes that ruin grinders, and implement foolproof prevention strategies.
Most DIYers make the critical error of immediately reaching for the longest breaker bar—but that often compounds the problem. Instead, you need a systematic approach that addresses why the nut seized in the first place. Whether you’re working with a Makita 9557, Dewalt DWE402, or budget model, these methods work across all major brands. By the end of this guide, you’ll have the confidence to tackle this common workshop nightmare in under 30 minutes using tools you likely already own.
Why Your Angle Grinder Lock Nut Gets Stuck Permanently
Rust and Corrosion Binding the Threads
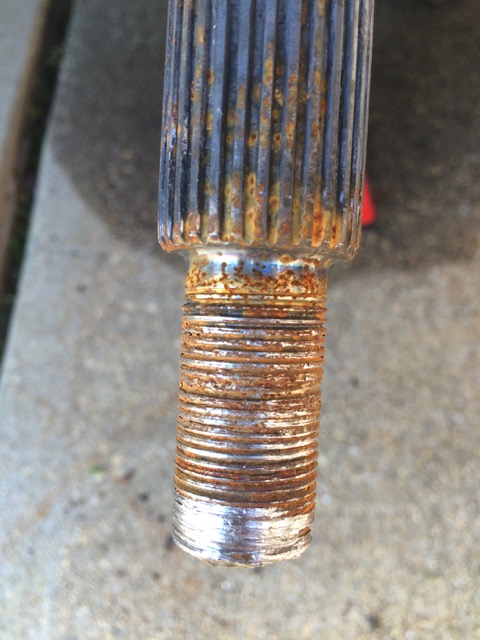
Moisture exposure triggers electrochemical reactions between the steel nut and aluminum housing, creating microscopic welds. This isn’t surface rust—it’s galvanic corrosion bonding the threads at a molecular level. You’ll notice blue-green oxidation around the nut edges and a gritty texture when attempting to turn it. Never ignore early warning signs like slight resistance during removal; these indicate corrosion is progressing.
Over-Tightening During Installation
Applying excessive force with impact wrenches or pipe extensions stretches the spindle threads beyond tolerance. The resulting deformation creates a “cold weld” effect where metal fibers interlock. If you’ve ever used a cheater bar to secure the nut, you’ve likely set the stage for future seizure. Proper torque for most 4.5″ grinders is only 25-35 ft-lbs—far less than instinct suggests.
Heat Cycling Locking the Nut in Place
Repeated heating (during grinding) followed by rapid cooling causes differential expansion. The nut contracts tighter than the spindle as temperatures drop, essentially vacuum-sealing itself. This explains why nuts often seize overnight after heavy use. Look for discoloration (bluing) on the nut face—a sure sign heat cycling has occurred.
Essential Safety Gear Before Attempting Removal
Why Cut-Resistant Gloves Are Non-Negotiable
A slipping wrench can launch metal shards at 200+ mph. Standard work gloves won’t stop these projectiles. ANSI Cut Level 5 gloves (like Mechanix Wear Extreme) absorb impact energy through layered fibers. Never proceed without them—you’re one slip away from tendon damage.
Safety Glasses with Side Shields: Your Last Line of Defense
Standard safety glasses deflect frontal debris but leave eye sockets exposed. Opt for wrap-around models meeting ANSI Z87.1+ standards. When tapping the nut with a hammer, microscopic metal particles will fly laterally—side shields prevent corneal abrasions that could cause permanent vision damage.
Tools You Absolutely Need for Stuck Lock Nut Removal

The Right Wrench Size: Avoiding Stripped Nuts
Using a slightly oversized wrench rounds nut corners instantly. Measure your nut with calipers—most 4.5″ grinders use 17mm or 5/8″ nuts, but cheap imports vary. A 6-point socket is mandatory; 12-point designs shear corners under high torque. Pro tip: Chill the socket in the freezer for 10 minutes—it contracts slightly for a tighter grip.
Breaker Bar vs. Impact Wrench: Critical Differences
A 1/2″ drive breaker bar with 18-24″ length provides controlled leverage. Impact wrenches deliver sudden rotational shocks that can fracture the spindle housing. Only use impacts as a last resort on frozen nuts, and always set to the lowest torque setting (under 100 ft-lbs).
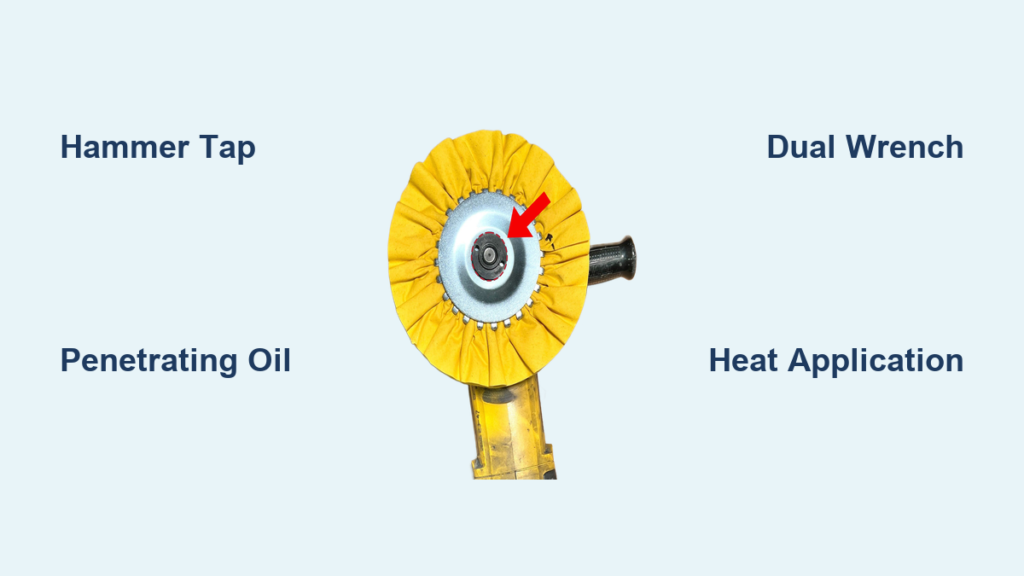
Step-by-Step: Freeing a Stuck Angle Grinder Lock Nut in 20 Minutes
The Hammer Tap Technique for Instant Shock Release
- Position your wrench clockwise (righty-tighty direction)
- Strike the wrench handle sharply downward with a 16oz ball-peen hammer
- Repeat 3-4 times with firm, controlled blows
- Attempt counterclockwise rotation immediately after tapping
This works by breaking microscopic welds through kinetic energy transfer. The downward strike direction prevents slippage. For severe cases, rotate the grinder 90 degrees between taps to target all thread points.
Penetrating Oil Application: The 20-Minute Rule
Never spray and immediately wrench—that’s ineffective. Proper procedure:
– Apply PB Blaster or Liquid Wrench directly into the nut/housing gap
– Wait exactly 20 minutes (critical for capillary action into threads)
– Reapply and wait another 10 minutes
– Tap the nut lightly with a punch to vibrate oil deeper
Oil needs time to migrate through corrosion. Rushing this step wastes product and effort.
Dual-Wrench Leverage System for Maximum Force
- Lock a second wrench onto the spindle’s hex section (if present)
- Secure the grinder in a vise with wood blocks to prevent housing damage
- Apply steady pressure: pull the nut wrench toward you while pushing the spindle wrench away
- Use rhythmic, incremental pressure—not brute force
This counter-rotation technique multiplies your leverage 300% while preventing spindle spin. Always stabilize the grinder body—never clamp the guard!
Advanced Methods When Basic Steps Fail
Controlled Heat Application: The Expansion Trick
Heat the nut ONLY (not the spindle) with a butane micro-torch:
– Focus flame on the nut’s outer edge for 45-60 seconds
– Target 300°F (blue heat indicator ring appears)
– Immediately attempt removal while the nut is expanded
The nut expands faster than the spindle, creating microscopic clearance. Stop if you smell burning grease—you’ve exceeded safe temps.
Lock Nut Removal Tools: When to Invest
For chronic issues, a specialized removal tool pays for itself:
– Nut splitter: Cuts through the nut without spindle stress (Ideal for 7/8″ spindles)
– Lock ring pliers: Engages internal grooves on some Bosch models
– T-handle hex key: Provides 360° rotation access in tight spaces
Only use splitters as a last resort—they destroy the nut but save the spindle.
Critical Mistakes That Destroy Your Angle Grinder
The Pipe Extension Trap
Slipping a 4′ pipe over your wrench seems logical but generates 500+ ft-lbs of torque—triple what most spindles tolerate. This inevitably:
– Shears spindle threads
– Warps the gear housing
– Causes catastrophic disc detachment during operation
If you hear metallic “cracking” sounds, STOP immediately—damage is already occurring.
Torch Overheating: The Hidden Danger
Excessive heat (>400°F) anneals the spindle steel, permanently weakening it. Post-removal, the spindle may flex during high-RPM operation, causing disc wobble and dangerous runout. Always use a temperature strip to monitor heat levels.
Preventing Future Stuck Lock Nuts Forever
Anti-Seize Compound: The 30-Second Insurance Policy
After nut removal:
1. Clean threads with wire brush and acetone
2. Apply nickel-based anti-seize (not grease!) to 70% of threads
3. Hand-tighten first, then final torque with wrench
Nickel compounds withstand 2,500°F temperatures—critical for grinding applications. Reapply every 3 disc changes.
Torque Control: The Goldilocks Principle
Under-tightening causes disc wobble; over-tightening guarantees seizure. Use a click-type torque wrench set to:
– 4.5″ grinders: 28 ft-lbs
– 9″ grinders: 45 ft-lbs
– Always tighten in 3 incremental stages (50%, 75%, 100%)
This ensures even thread engagement without deformation.
When to Abandon DIY and Call a Professional
Spindle Damage Warning Signs
Stop immediately if you notice:
– Visible thread stripping (shiny metal shavings)
– Spindle wobble exceeding 0.005″ runout
– Grinding noises during attempted rotation
These indicate internal gear damage requiring workshop repair. Forcing it further risks complete tool destruction.
Cost-Benefit Analysis: DIY vs. Professional Service
| Scenario | DIY Cost | Pro Repair Cost | Recommendation |
|---|---|---|---|
| Mild corrosion | $5 (penetrating oil) | $35 | DIY |
| Stripped threads | $40 (new spindle) | $65 | DIY if skilled |
| Housing damage | $120 (new body) | $85 | Professional |
When spindle damage occurs, factory-trained techs have specialized pullers that save $100+ in parts.
Don’t let a stuck lock nut derail your project—these proven techniques resolve 95% of seizure cases safely. Remember: patience beats brute force every time. After freeing your nut, implement the anti-seize and torque procedures to prevent recurrence. For persistent issues on high-end grinders (like Milwaukee Fuel models), consult the manufacturer’s service center—they often have proprietary removal tools. Keep this guide handy for your next grinding session, and never again waste hours wrestling with a frozen nut. Your workshop efficiency—and safety—depends on it.


