
Imagine trying to cut through a rusted steel pipe during a home renovation project, only to have your hacksaw blade snap for the third time. This frustrating scenario is exactly why learning how to use an angle grinder to cut metal transforms DIY projects from impossible challenges into manageable tasks. Angle grinders deliver the cutting power of stationary equipment in a handheld format, making them indispensable for metal fabrication, automotive repairs, and home improvement projects. But with great power comes great responsibility—improper use can lead to dangerous accidents or subpar results. This guide provides the exact steps you need to safely and effectively cut through steel, stainless steel, and aluminum using an angle grinder. By the end, you’ll know precisely which safety gear to wear, how to position the tool for clean cuts, and the critical mistakes that cause most beginner accidents.
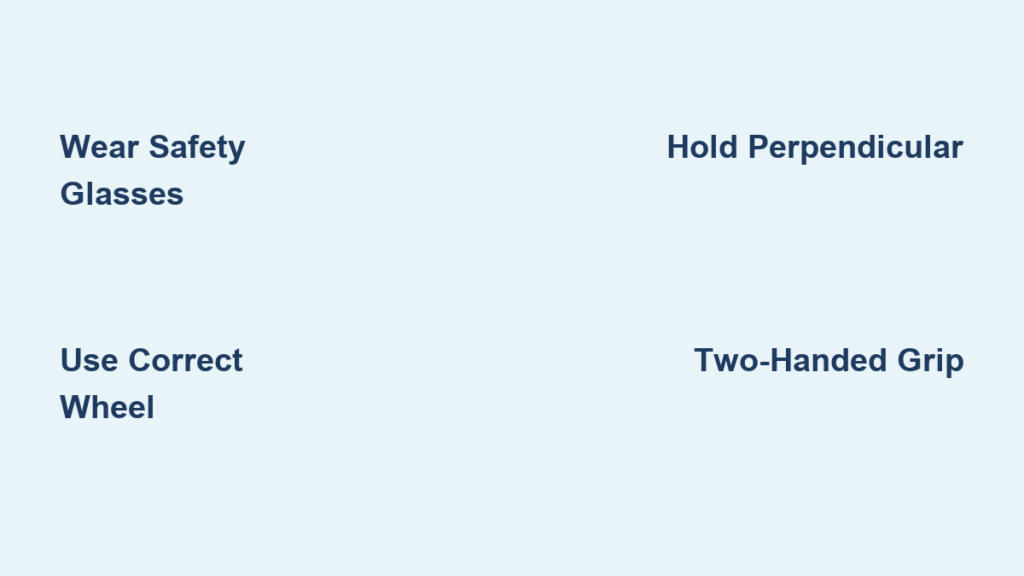
The difference between a professional-quality cut and a dangerous mishap often comes down to three factors: proper protective equipment, correct wheel selection, and disciplined technique. Many DIYers rush into metal cutting without understanding that angle grinders operate at 10,000+ RPMs—fast enough to turn a cracked wheel into deadly shrapnel. This guide eliminates guesswork by walking you through each step of the process with specific, actionable instructions. Whether you’re trimming rebar for a concrete project or cutting sheet metal for a custom fabrication, these techniques will help you achieve clean, precise cuts while keeping you safe.
Essential Protective Gear
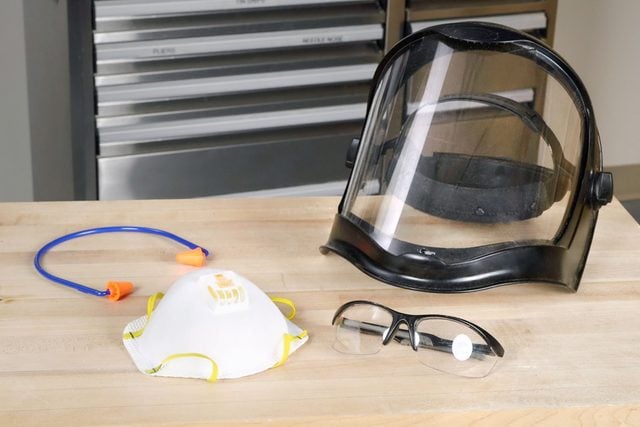
Operating an angle grinder to cut metal generates serious hazards that demand comprehensive protection. The tool produces intense sparks, propels hot metal debris at dangerous velocities, and the spinning cutting wheel itself poses amputation and injury risks if contact occurs. Protecting yourself isn’t optional—it’s the absolute foundation of safe operation.
Safety glasses represent your most critical line of defense when cutting metal with an angle grinder. Standard prescription eyeglasses simply don’t provide adequate protection against the high-velocity sparks, grinding wheel fragments, and metal shrapnel that the tool generates during operation. You need safety glasses rated for impact resistance, or ideally a full face shield that protects your entire face and eyes from flying debris. Inspect your protective eyewear before each use to ensure there are no scratches, cracks, or damage that could compromise its protective capability. Pro tip: Look for safety glasses with anti-fog coating—your vision will stay clear even during extended cutting sessions in humid conditions.
Work gloves protect your hands from the intense heat generated during metal cutting. Friction between the spinning wheel and metal produces significant thermal energy, and direct contact with hot metal or sparks causes serious burns. Beyond heat protection, gloves improve your grip on the tool, helping you maintain control throughout the operation. Choose gloves designed specifically for metalworking that balance protection with dexterity—gloves that are too bulky will reduce your ability to feel and control the tool’s position. Leather welding gloves provide excellent protection but may be too stiff for precision work on thinner metals.
Hearing protection shields your ears from the substantial noise angle grinders produce during operation. Prolonged exposure to this noise, even at levels that might seem tolerable in short bursts, causes cumulative hearing damage over time. Foam earplugs or earmuff-style protectors both work effectively; just ensure you’re wearing them throughout the entire operation from startup through shutdown. For extended projects, consider dual protection—earplugs underneath earmuffs—for maximum noise reduction without compromising your ability to hear warning sounds from the tool.
Position the Safety Guard Correctly
The safety guard on your angle grinder serves as your primary barrier against sparks, debris, and potential wheel failure. This adjustable metal shield attaches to the tool’s housing and must be properly configured before you begin cutting. Position the guard so it deflects sparks and debris away from your body, hands, and face. The guard should create a protective barrier between the cutting zone and your position without obstructing your view of the cut line.
Rotate the guard to find the optimal position for your specific cutting orientation, then verify it’s securely locked in place before powering on the tool. A loose or improperly positioned guard defeats its own purpose, leaving you exposed to the very hazards it’s designed to prevent. Take an extra moment during setup to confirm the guard is correctly installed and tightened—it’s a small investment of time that provides significant protection. For right-handed users cutting from left to right, position the guard to cover the upper right portion of the wheel; left-handed users should reverse this positioning.
Select the Right Cut-Off Wheel for Your Metal Type
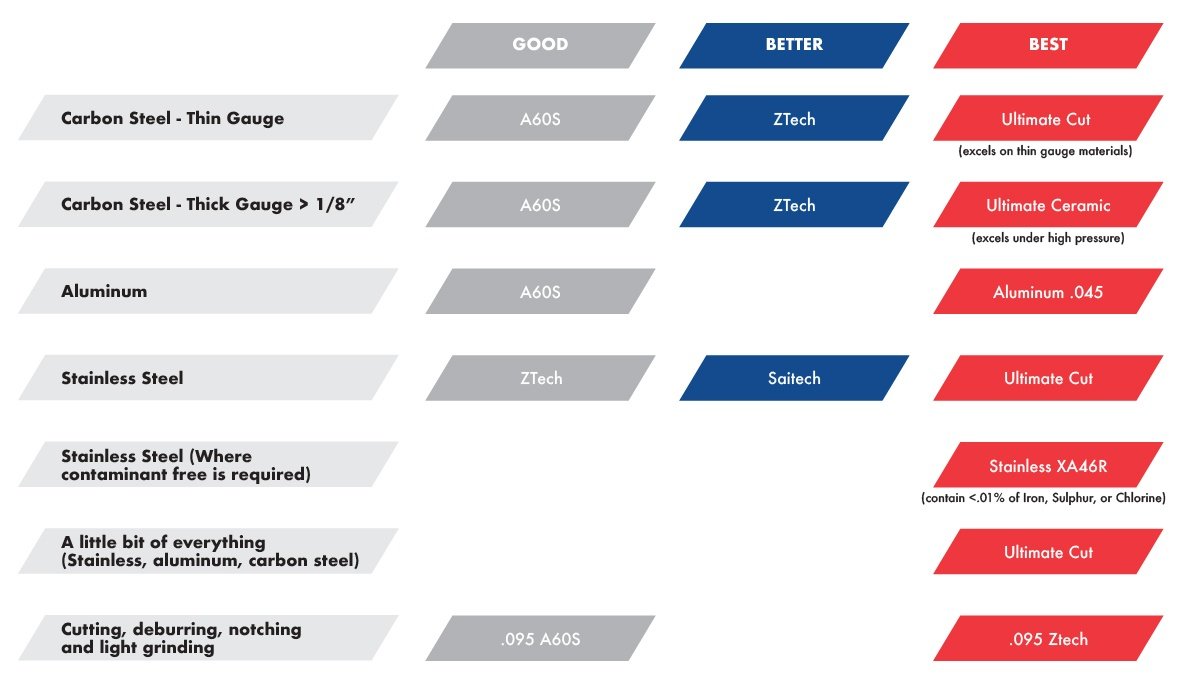
Not all angle grinder wheels are designed for cutting metal, and using the wrong wheel leads to poor results and potential safety hazards. Cut-off wheels are specifically engineered for cutting operations—they’re thin, reinforced discs that remove material along a narrow kerf. These wheels differ dramatically from grinding wheels, which have a thicker profile designed for material removal rather than precision cutting.
When learning how to use an angle grinder to cut metal, selecting the appropriate wheel for your specific metal type matters enormously. Cut-off wheels for steel differ from those designed for aluminum or stainless steel, and using the wrong wheel can contaminate the metal, produce poor-quality cuts, or create safety risks. Check the wheel packaging for compatibility information and select a wheel rated for the specific metal you’ll be cutting. The wheel should be undamaged, within its service life, and properly rated for the speed your angle grinder produces.
Inspect the wheel before installation for any cracks, chips, or signs of damage. Even minor visible damage can escalate into wheel failure during operation, sending dangerous fragments flying at high velocity. If you notice any damage, dispose of the wheel properly and select a replacement rather than risking operation with a compromised disc. Remember: a typical 4.5-inch cut-off wheel for steel is approximately 1/16 inch thick and can cut through 1/4 inch of steel in about 15-20 seconds with proper technique.
Maintain Proper Wheel Orientation During Cutting
The angle at which you hold the cutting wheel relative to the metal determines both cut quality and safety. For cutting operations, the cutting wheel must remain perpendicular to the workpiece surface throughout the entire cutting motion. This perpendicular orientation differs fundamentally from grinding technique and is non-negotiable for safe, effective cutting.
Holding the wheel at an angle other than perpendicular creates lateral stress that can cause the disc to bind, crack, or shatter mid-cut. The cutting edge of a cut-off wheel is designed to remove material through forward motion into the workpiece, not through pressure applied against the wheel’s face or side. Forcing or pressing the wheel against the metal generates dangerous stress concentrations that frequently result in wheel failure. Instead, guide the tool along your cut line with consistent forward pressure, letting the wheel’s cutting edge do the work at its own pace.
This perpendicular hold applies specifically to cut-off wheels used for cutting. If you’re grinding rather than cutting, the technique changes significantly—you’d hold the wheel at approximately 5 to 15 degrees from flat. Understanding this distinction is crucial for safe operation and quality results. When cutting thin sheet metal, apply less pressure to prevent the wheel from grabbing and causing an uncontrolled cut.
Execute the Two-Handed Grip Technique
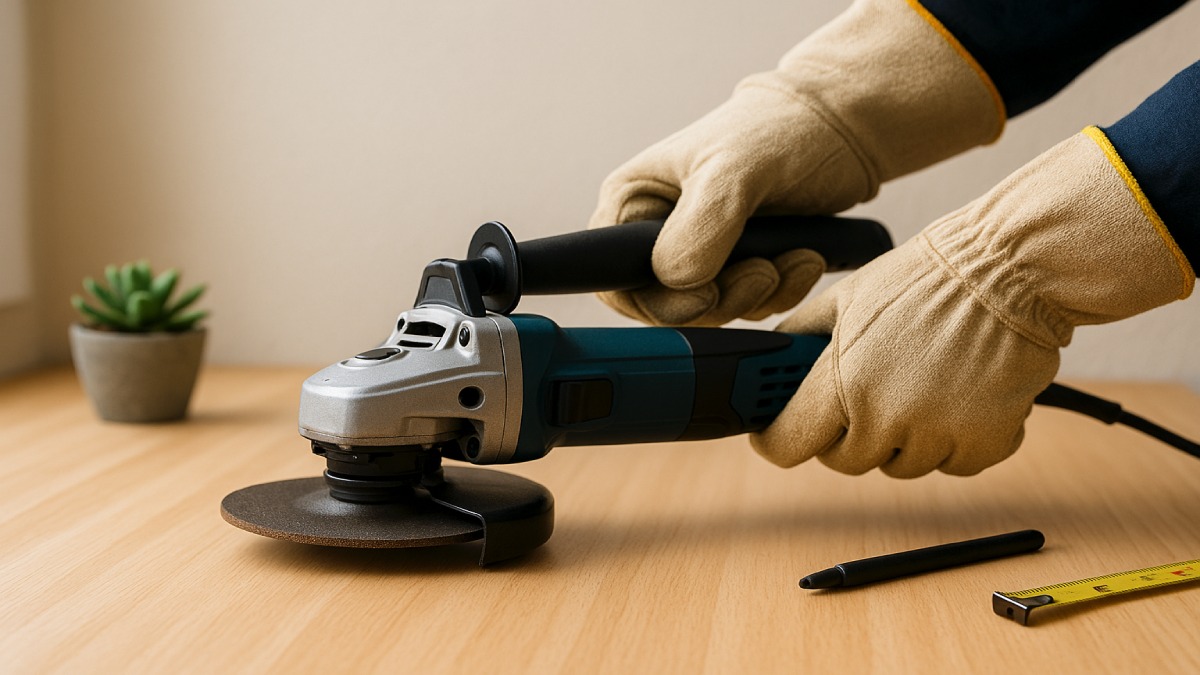
Maintaining control of the angle grinder during metal cutting requires using both hands throughout the operation. This two-handed grip provides maximum stability and response capability, significantly reducing the risk of the tool binding, kicking back, or escaping your control. Position your primary hand on the tool’s handle while your secondary hand grasps either the adjustable handle or the motor housing, depending on your model’s configuration.
Your body positioning matters as much as your hand placement. Stand to the side of the cutting line rather than directly in line with the potential path of wheel fragments should a failure occur. This stance provides a margin of safety while allowing you to apply consistent pressure throughout the cutting motion without straining into uncomfortable positions. Keep your arms close to your body for maximum control, and avoid extended reaching positions that reduce your ability to respond if the tool behaves unexpectedly.
The adjustable handle on most angle grinders allows you to optimize hand positioning for different cutting orientations. Reposition the handle before you begin cutting, positioning it on whichever side of the tool allows the most comfortable and controlled grip for your specific cut direction. Taking this time during setup rather than mid-operation keeps your focus on the task at hand. For overhead cutting, use the handle to create a stable triangular grip with both hands for maximum control against gravity.
Follow the Correct Cutting Sequence
Following a consistent operating sequence ensures safe, effective cuts every time you use your angle grinder to cut metal. Begin with both hands properly positioned on the tool and the cutting wheel held perpendicular to the metal surface at your starting point. Take a moment to verify your stance is stable and your grip is comfortable before proceeding.
Activate the power switch and allow the cutting wheel to reach full operating speed before making any contact with the workpiece. Rushing this step by engaging the wheel before it reaches speed places unnecessary stress on the motor and produces poor cutting performance. Once the wheel has reached full speed, gradually advance it into the metal at your starting edge, beginning the cut with a smooth, controlled motion.
Throughout the cutting process, maintain steady forward pressure while preserving the perpendicular wheel orientation. Avoid the temptation to force the tool through the material faster than it wants to cut—forcing generates excessive heat, accelerates wheel wear, and significantly increases the risk of wheel failure. Progress steadily without straining the tool, and let the wheel’s cutting action do the work. If you need to pause or reposition, release the power control and wait for the wheel to stop completely before setting the tool down.
Avoid These Common Angle Grinder Mistakes
Several recurring errors plague beginners learning how to use an angle grinder to cut metal, and avoiding these mistakes improves both safety and results. The most dangerous error involves pressing against the face or side of the cut-off wheel rather than allowing the cutting edge to do the work. This lateral pressure creates the exact conditions that cause wheel shattering, and it’s responsible for numerous serious injuries every year.
Starting cuts in the middle of a flat surface rather than at an edge creates unnecessary difficulty and risk. Beginning at an edge allows the wheel to engage the material gradually and provides visual reference for maintaining your cut direction. Starting mid-surface makes it harder to control the wheel’s path and increases the likelihood of the wheel binding or kicking back.
Neglecting workpiece security ranks among the most common safety oversights. An unsecured workpiece shifts during cutting, causing the wheel to bind unexpectedly or the cut to deviate from your intended line. Always clamp or secure your metal before beginning any cut, and verify the workpiece won’t move under the forces of cutting. Taking this simple precaution dramatically improves both safety and cut quality. For thin sheet metal, use a sacrificial backing board to prevent warping during cutting.
Master Safe Metal Cutting Techniques
Learning how to use an angle grinder to cut metal safely requires consistent attention to technique and safety protocols throughout every operation. The tool’s portability and power make it invaluable for metalworking, but those same qualities demand respect and proper handling. Every cutting session should begin with donning appropriate protective gear—safety glasses, gloves, and hearing protection are non-negotiable requirements.
Position the safety guard to deflect sparks away from your body, select the correct cut-off wheel for your metal type, and ensure your workpiece is securely clamped before beginning. Maintain a two-handed grip with the cutting wheel perpendicular to the metal, and never press against the wheel’s face or side. Allow the tool to cut at its own pace with consistent forward pressure, and wait for the wheel to stop completely before setting the tool down.
By internalizing these principles and practicing them consistently, you transform the angle grinder from a potentially dangerous power tool into a reliable asset for metal cutting projects. The key to mastery lies not in flashy techniques but in disciplined attention to safety and proper method. Respect the tool’s capabilities and hazards, develop good habits from your very first cut, and you’ll build skills that serve you reliably across every metalworking project you tackle. Remember: a clean, precise cut isn’t just about aesthetics—it’s proof you’ve mastered the balance between power and control that defines professional metal cutting.


