
A dull tool is more dangerous than a sharp one—it requires excessive force, slips unpredictably, and delivers poor results. Learning how to use a bench grinder to sharpen tools properly transforms your workshop efficiency and tool longevity. Whether you’re struggling with chisels that tear wood instead of cutting cleanly, drill bits that wander instead of penetrating, or axes that crush rather than slice, mastering bench grinder sharpening puts professional-level tool maintenance within your reach. This guide delivers actionable techniques that move beyond basic wheel operation to achieve razor-sharp edges on common workshop tools while avoiding the costly mistakes that ruin expensive implements.
Essential Bench Grinder Setup for Precision Sharpening
Your bench grinder’s setup directly determines whether you’ll achieve crisp edges or accidentally reshape your tools beyond recognition. Begin by securing your grinder to a vibration-resistant surface—concrete blocks or a heavy workbench—ensuring it won’t shift during operation. The ideal height positions the wheel centerline at your elbow level when standing naturally, allowing controlled downward pressure without straining your wrists.
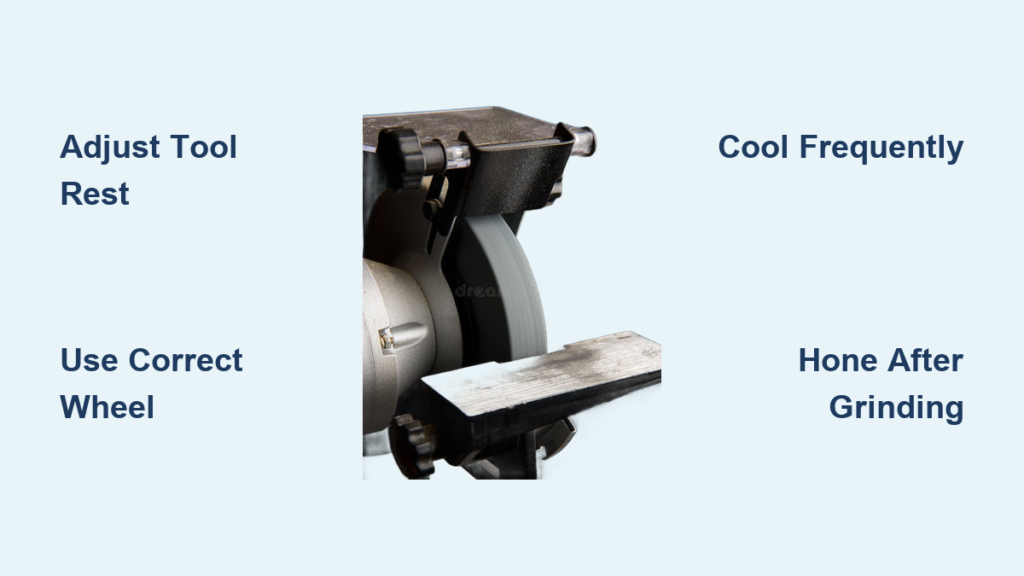
Critical adjustments separate effective sharpening from frustrating results. Set the tool rest to within 1/8 inch of the wheel surface; any greater distance allows tools to catch and potentially kick back toward you. Verify wheel alignment by observing rotation—excessive wobble indicates improper mounting or a damaged wheel requiring replacement. Before sharpening begins, dress the wheel using a diamond dresser held firmly against the spinning surface until the abrasive appears uniformly textured, removing glaze and exposing fresh cutting particles for optimal performance.
Selecting the Correct Grinding Wheel Configuration
Choosing inappropriate wheels is the fastest way to ruin tool edges through overheating or improper material removal. For most woodworking tools like chisels and plane blades, install a 60-80 grit aluminum oxide wheel that effectively cuts high-speed steel without excessive heat buildup. When working with hardened steel tools or aggressive reshaping, supplement with a coarser 40-50 grit wheel for initial material removal before finishing on the finer surface.
Wheel hardness significantly impacts heat generation during sharpening. Softer wheels (designated with “L” or “M” in their specification code) work better for harder tool steels as they wear faster, continuously exposing fresh abrasive particles that prevent heat buildup. Harder wheels (marked “H” or “I”) suit softer metals but quickly glaze over when used on hardened tool steel, causing dangerous overheating. Verify wheel specifications match your primary sharpening tasks before installation.
Safety Gear You Must Wear When Operating a Bench Grinder

Never operate a bench grinder without proper eye protection—standard glasses won’t stop high-velocity metal fragments from causing permanent eye damage. Industrial safety goggles with side shields meeting ANSI Z87.1 standards provide essential coverage against sparks and wheel debris. Pair these with a NIOSH-approved N95 respirator to prevent inhaling fine metal particles that accumulate in your lungs during extended sharpening sessions.
Your clothing choices impact safety more than many realize. Remove loose sleeves, jewelry, and gloves that could catch in the spinning wheel—numerous workshop accidents occur when fabric snags the grinding surface. Tie back long hair and avoid wearing scarves or dangling necklaces that might become entangled. Position yourself slightly off-center from the wheel’s rotation direction so any potential wheel fragments travel away from your body rather than toward you.
Mastering Tool Holding Techniques for Consistent Edges
The difference between professional results and ruined tools often comes down to how you hold the workpiece against the grinding wheel. Always maintain two-handed control with your fingers positioned behind the cutting edge, never in front where they could contact the wheel if the tool slips. For flat tools like chisels, lay the existing bevel flat against the tool rest while applying moderate, consistent pressure across the entire edge.
When sharpening curved tools like plane blades, use a sweeping motion that follows the tool’s natural contour while maintaining constant angle. This requires practice to develop muscle memory—begin with slow wheel speeds and make frequent visual checks of your progress. For drill bits, employ a specialized jig that locks the bit at the correct angle while allowing controlled rotation to maintain consistent geometry across both cutting lips.
Sharpening Chisels: Step-by-Step Technique
Chisels demand precise angle consistency to maintain their cutting effectiveness. Begin by identifying the existing bevel angle—most woodworking chisels use 25-30 degrees. Hold the chisel firmly with both hands, positioning the bevel flat against the tool rest while maintaining this angle throughout the sharpening process. Apply light, consistent pressure as you move the chisel side-to-side across the wheel face, ensuring even material removal along the entire edge.
Watch carefully for heat discoloration—straw yellow indicates acceptable temperature, but blue or purple hues signal dangerous overheating that ruins the steel’s temper. If discoloration occurs, immediately cool the chisel in water before continuing with lighter pressure. After establishing a new edge across the entire width, refine the bevel by reducing pressure and making shorter passes until the edge appears uniformly bright with no dark spots indicating uneven contact.
Drill Bit Sharpening Without Specialized Jigs
Sharpening drill bits freehand requires understanding three critical geometry elements: the cutting lip angle (typically 59-60 degrees for standard twist bits), the chisel edge thickness, and the relief angle behind the cutting lip. Hold the bit with the cutting lip horizontal to the wheel face, then tilt the shank downward until the existing relief angle matches your reference. Apply gentle pressure while rotating the bit slowly to maintain consistent material removal across both lips.
The chisel edge—the short web connecting the two cutting lips—requires careful attention. Too thick, and the bit won’t center properly; too thin, and it becomes fragile. When viewed from the point, the chisel edge should appear slightly curved rather than straight across. After sharpening, test the bit on scrap material—properly sharpened bits penetrate cleanly without wandering or excessive force.
Cooling Techniques to Preserve Tool Hardness
Overheating during sharpening is the silent killer of tool performance—steel that turns blue has lost its temper and will dull rapidly despite appearing sharp. Implement a strict cooling protocol: after every 5-10 seconds of grinding contact, dip the tool in water for at least 15 seconds. This brief cooling period prevents heat from penetrating deep into the metal structure.
For critical tools like high-speed steel drill bits, consider using a water drip system that continuously cools the workpiece during sharpening. This specialized setup maintains optimal temperature without interrupting your workflow. Remember that cooling isn’t just about preventing burns—it preserves the molecular structure of the steel that gives your tools their cutting ability.
Honing: The Final Step to Razor-Sharp Edges
Grinding creates the edge geometry, but honing produces the actual cutting surface. After grinding, remove the microscopic burr (called a wire edge) using a fine water stone (1000+ grit) or leather strop charged with honing compound. Maintain the same angle established during grinding while making light, consistent strokes away from the cutting edge.
For woodworking tools, finish with a 6000+ grit stone or leather strop for mirror-polished edges that slice wood fibers cleanly. Test sharpness by attempting to cleanly cut a piece of paper—properly honed tools should slice through with minimal pressure. This final step typically takes less than two minutes but dramatically improves cutting performance and edge longevity.
Common Mistakes That Ruin Tools During Sharpening
Excessive pressure remains the most frequent error when learning how to use a bench grinder to sharpen tools. Forcing the tool against the wheel generates dangerous heat, accelerates wheel wear, and creates uneven edges. Let the abrasive do the work with moderate, consistent pressure—your hands should guide rather than push the tool.
Neglecting wheel dressing causes poor cutting performance and overheating. Glazed wheels appear shiny rather than textured and require dressing with a diamond tool before effective sharpening can resume. Similarly, failing to adjust the tool rest as the wheel wears creates dangerous gaps that allow tools to catch and potentially kick back toward you.
Maintaining Your Bench Grinder for Reliable Performance
Regular maintenance prevents dangerous operating conditions and ensures consistent sharpening results. Before each use, inspect wheels for cracks or damage by tapping them lightly with a non-metallic object—a clear ringing sound indicates integrity, while a dull thud suggests internal damage requiring replacement.
Keep the tool rest clean of metal buildup that could interfere with proper workpiece positioning. Adjust the wheel guards to within 1/4 inch of the wheel surface for maximum protection without obstructing your view. When wheels wear down to half their original diameter, replace them—thinner wheels operate at higher effective speeds that increase the risk of catastrophic failure.
Mastering how to use a bench grinder to sharpen tools properly delivers immediate workshop benefits—you’ll revive neglected tools, extend the life of expensive implements, and achieve cutting performance that rivals professional results. Start with simple flat tools like chisels to develop consistent technique before progressing to more complex geometries like drill bits. Remember that patience and proper technique yield better results than aggressive material removal—sharp tools require minimal force to cut effectively. With these techniques, you’ll transform your bench grinder from a simple abrasive tool into a precision sharpening system that keeps your entire workshop operating at peak performance. Regular sharpening sessions become quick maintenance tasks rather than dreaded chores, ensuring your tools remain ready for any project that comes your way.


