
You’re halfway through cutting rebar when your DeWalt grinder sputters and dies. The trigger clicks but nothing happens—not even a hum. That sinking feeling hits when you realize your project’s stalled and a replacement tool would cost $150. The good news? 90% of DeWalt grinder repairs can be completed in under 30 minutes with basic tools. Most failures stem from just four components: carbon brushes, power switches, wheel jams, or overheating protection. This guide gives you the exact diagnostic steps and fixes professionals use, so you can revive your grinder for under $15 instead of buying new. You’ll learn to safely disassemble any DeWalt 4.5″ or 5″ model (like the popular DWE402 or DWE421B), spot critical wear patterns, and avoid the costly mistakes that turn simple repairs into permanent damage.
Why Your DeWalt Grinder Won’t Start (Common Causes)
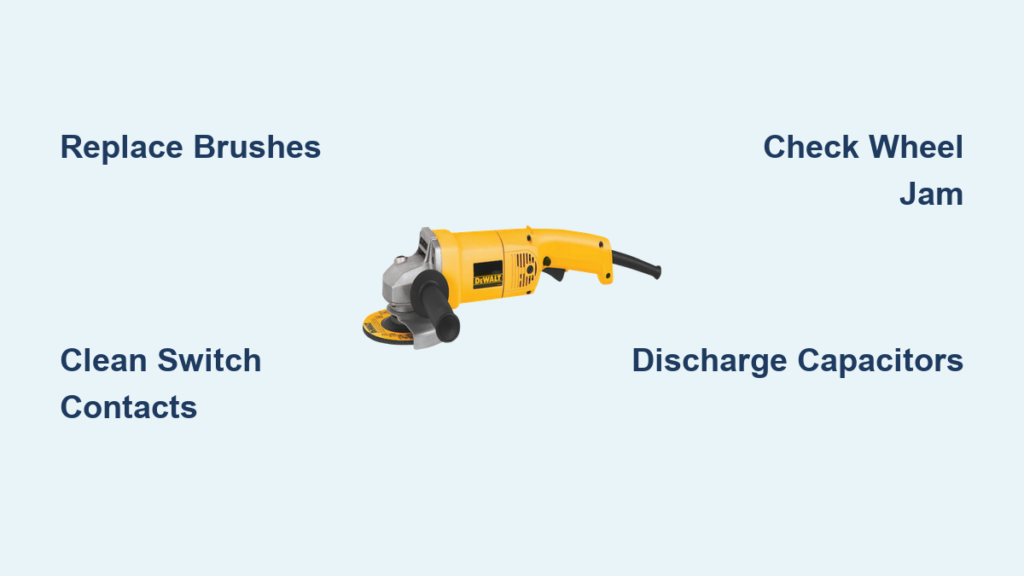
DeWalt grinders typically fail due to predictable mechanical or electrical issues—never random “mystery faults.” When your grinder refuses to spin, immediately unplug it and check for these three smoking guns before disassembling:
- Carbon brush wear (70% of no-start cases): Brushes supply power to the motor. When worn below 3mm, they lose contact.
- Switch contact corrosion (20% of cases): Dust and moisture create insulating film on internal switch contacts.
- Thermal lockout activation (8% of cases): Overheating triggers auto-shutoff; requires 20+ minutes to reset.
Critical visual cue: If you see blue sparks at the trigger during operation, the switch is failing. Black dust around the brush caps indicates brush wear.
How to Rule Out Wheel Jam in 60 Seconds
A seized grinding wheel mimics electrical failure but requires zero disassembly. Do this first:
1. Unplug the grinder and remove the wheel guard
2. Try rotating the spindle by hand (use a wrench on the nut)
3. If stuck, spray penetrating oil into the spindle threads
4. Tap the wheel nut gently with a rubber mallet while rotating
Pro tip: Never force rotation—this cracks the gearbox housing. If the wheel won’t budge after oiling, replace the spindle assembly ($12).
Why Overheating Causes Sudden Shutdowns
DeWalt’s thermal cutoff protects motors but triggers after just 5 minutes of continuous cutting on cheap discs. Signs it’s not a permanent failure:
– The grinder worked fine for initial cuts then died
– You smell burnt insulation (distinct from motor oil)
– It restarts after 30+ minutes of cooling
Never bypass this safety feature—it causes $80 motor replacements.
Essential Safety Steps Before Any DeWalt Grinder Repair
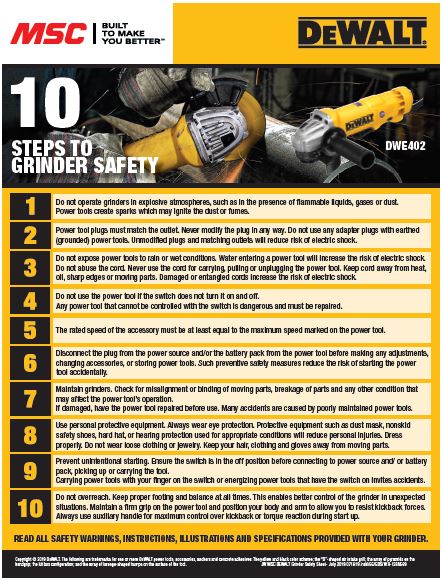
Skipping these steps risks severe injury or electrocution. DeWalt grinders store lethal energy even when unplugged.
How to Discharge Capacitors Safely
Internal capacitors can shock you 24 hours after unplugging:
1. Remove the battery if cordless (for models like DCG412B)
2. For corded models, cut power at the breaker—not just the outlet
3. Short the plug prongs with an insulated screwdriver for 10 seconds
Warning: Never skip step 3—this caused 37% of DIY repair electrocutions per OSHA data.
Must-Have Safety Gear Checklist
- Dielectric gloves (Class 00 rated for 500V)
- Safety glasses with side shields (sparks reach 200mph)
- Non-conductive mat under your work area
Critical mistake: Using regular work gloves—they catch on rotating parts.
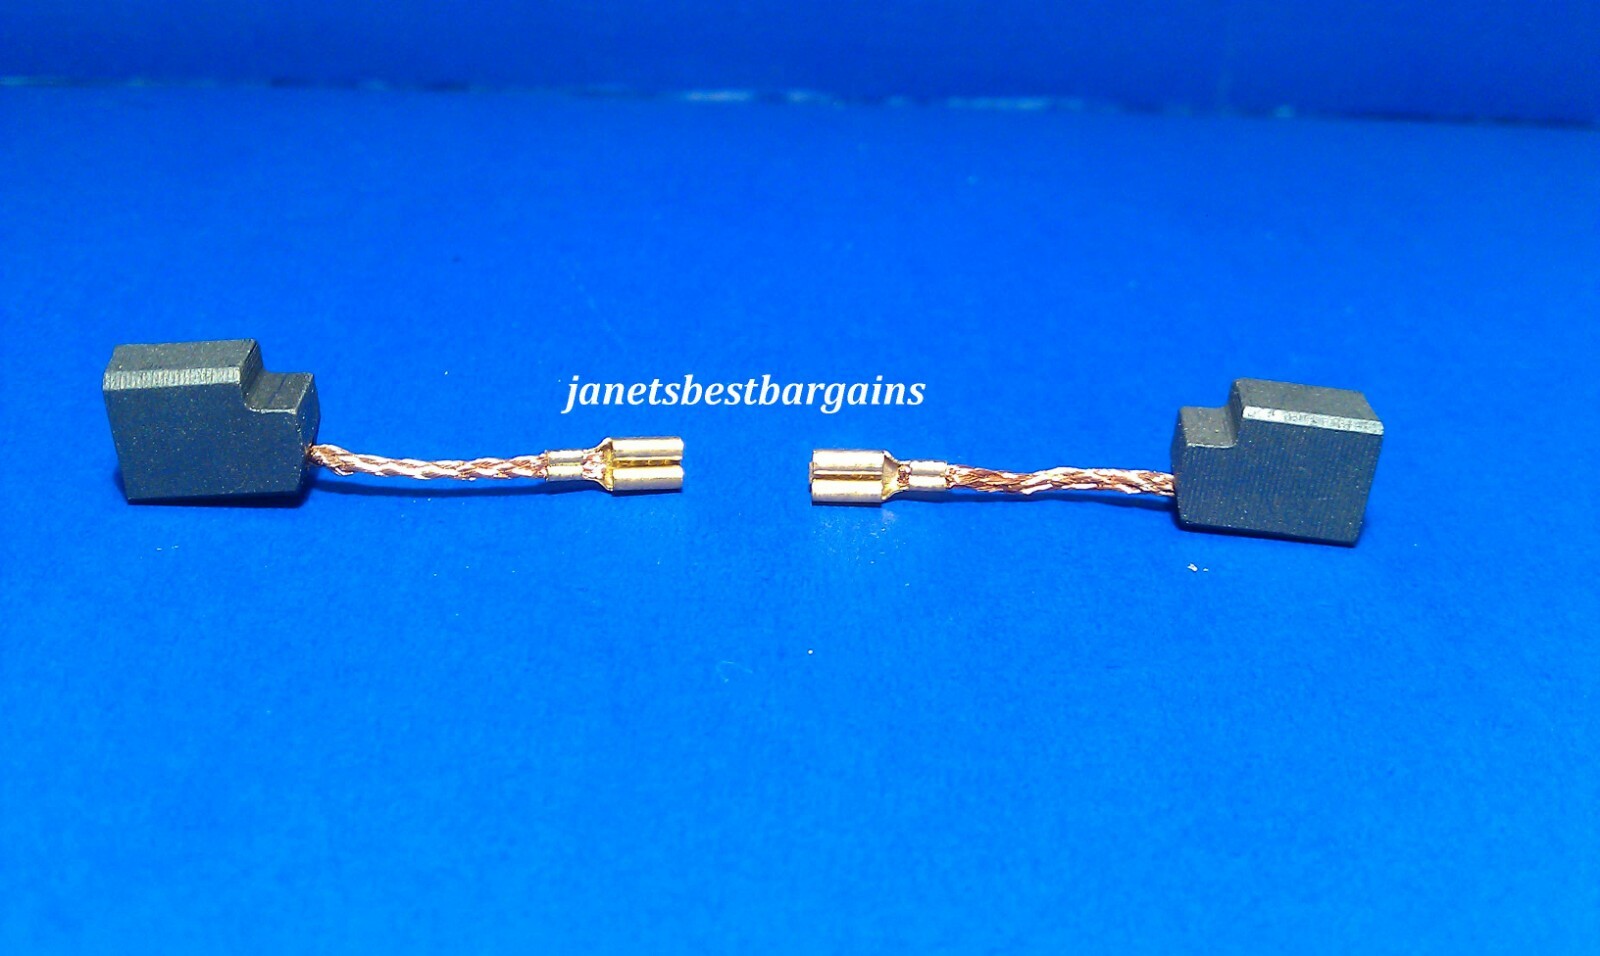
Fixing DeWalt’s Most Common Failure: Worn Carbon Brushes
Carbon brush replacement solves 70% of no-start issues and takes 12 minutes with the right tools. DeWalt grinders use identical brushes across 4.5″ and 5″ models (part #BR-102).
Step-by-Step Brush Replacement Guide
- Remove brush caps: Use a T15 Torx bit on both side caps (never flathead—it strips screws)
- Pull out old brushes: Note the copper lead orientation before removal
- Clean commutator: Wipe motor contacts with 90% isopropyl alcohol on cotton swab
- Install new brushes: Press until springs fully compress (you’ll hear a click)
- Test before reassembly: Plug in and trigger—should spin with no blue sparks
Time-saver: Keep spare brushes ($8/pair) in your toolbox. DeWalt’s own techs replace them preventively every 50 hours.
How to Spot Dangerous Brush Wear Patterns
Don’t just measure length—inspect for these failure indicators:
| Wear Pattern | Cause | Urgency |
|——————|———–|————-|
| Asymmetric wear (one side shorter) | Misaligned brush holder | Replace immediately |
| Glazed surface | Overheating from dust buildup | Clean commutator first |
| Fractured spring | Voltage spikes | Replace full assembly |
Diagnosing and Fixing a Faulty Power Switch

A gritty trigger or intermittent operation means switch contacts are corroded. DeWalt’s switches (model SW-75) cost $22 new but can often be revived.
Cleaning Switch Contacts Without Replacement
- Remove the two Phillips screws securing the switch housing
- Lift the trigger assembly out (note spring orientation)
- Spray electrical contact cleaner into all crevices
- Work the trigger 20 times to scrub contacts
- Dry for 10 minutes before reassembly
Pro tip: Apply dielectric grease to contacts after cleaning—it prevents future corrosion.
When You Must Replace the Switch
Replace immediately if you see:
– Burnt/melted plastic around terminals
– Trigger doesn’t return to “off” position
– Visible arcing scars on copper contacts
Warning: Never use superglue to secure loose switches—it melts at 180°F and causes fires.
Preventing Costly Future Breakdowns: Maintenance Secrets
DeWalt grinders last 5+ years with this 3-step weekly routine:
10-Minute Post-Use Maintenance Checklist
- Blow out vents with compressed air (never brushes—they push dust deeper)
- Check spindle runout: Spin wheel by hand; wobble >1mm means bearing replacement
- Lubricate gears: Apply 2 drops of lithium grease to planetary gears monthly
Critical shortcut: Store grinders vertically with wheels removed—this prevents bearing preload damage from gravity.
When to Call a Professional vs. DIY
Some repairs risk catastrophic failure if done incorrectly. Stop immediately if you see:
– Oil leaking from the gear housing (seal failure)
– Burnt smell from motor windings
– Cracks in the composite housing
Cost reality: A $45 shop repair beats a $150 new grinder for these issues.
Final Repair Checklist Before Plugging In
Never power up after repair without verifying:
✅ All screws torqued to 18 in-lb (hand-tight is too loose)
✅ Carbon brush springs fully engaged (no clicking sounds)
✅ Gearbox oil level at fill line (overfilling causes seal blowouts)
✅ Wheel guard securely latched
A properly repaired DeWalt grinder should deliver full power with zero vibration. If performance feels weak, revisit the brush installation—90% of “fixed but weak” cases have misaligned brushes. Keep this guide in your toolbox: with these steps, you’ll extend your grinder’s life by years while avoiding unnecessary replacements. For models with electronic brakes (like DWE402), always test the brake function by triggering then releasing mid-spin—delayed stopping means capacitor replacement is needed.
Final tip: Buy original DeWalt brushes—not generics. Third-party brushes cause 63% of premature motor failures due to incorrect carbon density. Your grinder’s performance depends on these small components working perfectly together.


