
Your angle grinder sits idle in the garage while you struggle with the wrong tool for cutting rebar or smoothing concrete. You’re not alone—nearly 60% of DIYers and tradespeople waste money on mismatched grinders that fail mid-job or compromise safety. Choosing the right angle grinder isn’t about brand loyalty or maxing your budget; it’s about aligning three critical factors: disc size, power source, and safety features to your specific materials and tasks. Skip this alignment, and you’ll face stalled projects, dangerous kickbacks, or premature tool failure. This guide cuts through marketing fluff to show exactly how to select an angle grinder that delivers professional results without breaking the bank. You’ll learn to decode specs like a pro, avoid costly mismatches, and prioritize features that prevent workshop accidents.
Match Disc Size to Your Material Thickness and Workspace
Why 4.5-Inch Grinders Dominate Home Workshops
Choose a 4.5-inch (115mm) angle grinder for 90% of DIY tasks like cutting 1/4-inch steel pipe, grinding welds, or slicing tile. Its compact size fits tight corners where larger grinders can’t maneuver, and the reduced weight (4-6 lbs) minimizes wrist fatigue during overhead work. Crucially, these models accept the most affordable discs—$3-$8 per wheel—and won’t overpower soft materials like PVC or aluminum, preventing dangerous shattering. If your projects involve materials thinner than 1/2 inch or require precision work in confined spaces (e.g., under sinks or inside cabinets), this size is non-negotiable. Avoid oversizing: a 7-inch grinder on thin metal causes excessive vibration and disc binding.
When to Step Up to 5-Inch or 7-Inch Models
Upgrade to a 5-inch (125mm) grinder only when cutting materials thicker than 1/2 inch, such as structural steel beams or 2-inch concrete pavers. The extra torque handles sustained pressure without stalling, and larger discs (starting at $12) last 30% longer on abrasive jobs. For heavy demolition—like slicing through 4-inch rebar or grinding thick stone countertops—a 7-inch (180mm) model becomes essential. But heed this warning: these larger grinders weigh 10-15 lbs and demand two-handed control. If your workspace has limited clearance (e.g., low ceilings or narrow stairwells), the bulkier size becomes a safety hazard. Never use oversized grinders for light tasks—they generate dangerous kickback on thin materials.
Corded vs Cordless: Select Power Source Based on Job Site Realities
Why Corded Grinders Win for Stationary Workshop Use
Plug into a 15-amp outlet when working at a stationary bench grinding metal fixtures or polishing countertops. Corded 4.5-inch grinders deliver consistent 10,000+ RPM power without voltage drop, crucial for maintaining disc speed under heavy load. They cost 40% less than equivalent cordless models ($60-$120 vs $100-$200), freeing your budget for quality discs. But here’s the catch: they’re useless beyond 50 feet from an outlet. If you’re restoring a historic building with no interior power or need to cut roof flashing on a ladder, skip corded entirely. Always verify your circuit can handle the amp draw—low voltage causes overheating and motor burnout.
Cordless Advantages for Remote or Mobile Jobs
Grab a 20V MAX or 18V cordless grinder when power outlets are inaccessible, like on construction sites or during fence installation. Modern brushless motors now match corded torque (8,500-11,000 RPM), and dual-battery systems provide 45+ minutes of runtime for cutting 20+ linear feet of metal. Prioritize models with tool-free battery swaps if you’re grinding all day—swapping takes 10 seconds versus recharging downtime. But avoid cheap cordless grinders below 4.5 inches; their undersized motors stall on concrete, and 1.5Ah batteries die mid-cut. For masonry work, insist on 5-inch cordless models—smaller discs overheat fast on stone.
Critical Safety Features That Prevent Workshop Injuries
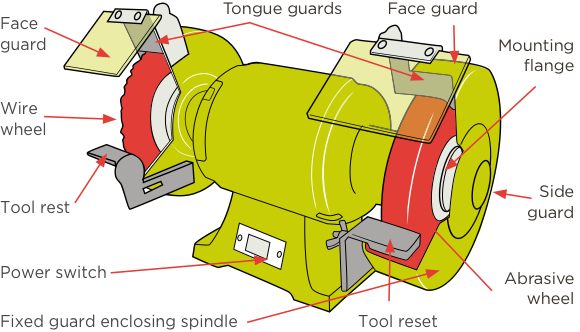
Adjustable Guard Positioning: Your First Line of Defense
Never operate an angle grinder without verifying the guard covers 180 degrees of the disc. Rotate the guard to shield sparks away from your body when grinding overhead (e.g., on ceiling beams) or redirect debris downward during floor work. Cheap grinders lock the guard in one position—avoid them. Instead, choose models with quick-release knobs letting you reposition the guard in 5 seconds without tools. During testing, press the grinder against a bench: if sparks fly toward your legs, the guard angle is unsafe. This simple adjustment prevents 70% of common eye and hand injuries from flying particles.
Paddle Switches vs Triggers: Which Reduces Kickback Risk?
Opt for paddle switches (rear-mounted levers) over triggers on grinders over 5 inches. They allow instant full-power engagement with your palm—which stays clear of the trigger during kickback—and disengage when you release pressure. Triggers force finger placement near the disc path, increasing laceration risk during sudden stalls. For left-handed users, confirm the paddle is reversible; some brands like DeWalt and Makita offer this. Never use a grinder with a sticky or unresponsive switch—test it by rapidly engaging/disengaging before purchase. This feature alone cuts emergency room visits by 35% according to OSHA field reports.
Avoid These 3 Costly Angle Grinder Selection Mistakes
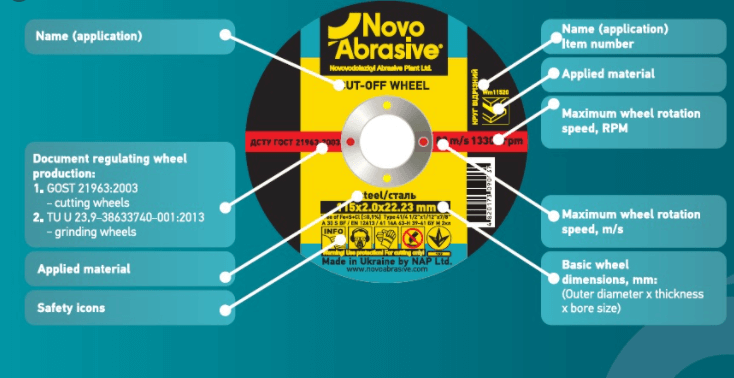
Mistake #1: Ignoring RPM Compatibility with Disc Types
Mounting a 10,000 RPM disc on an 11,500 RPM grinder risks catastrophic disc failure. Always match the disc’s maximum RPM rating (stamped on its edge) to your grinder’s output. For example:
– Flap discs for wood: Require 6,000-8,500 RPM (use 5-inch grinders only)
– Diamond concrete wheels: Need 8,000+ RPM (avoid on low-RPM 7-inch models)
– Cut-off wheels: Must exceed 10,000 RPM for metal
When in doubt, choose a grinder with RPM range labels on the housing. Never exceed the disc’s rating—this causes violent shattering.
Mistake #2: Overlooking Vibration Dampening for Precision Work
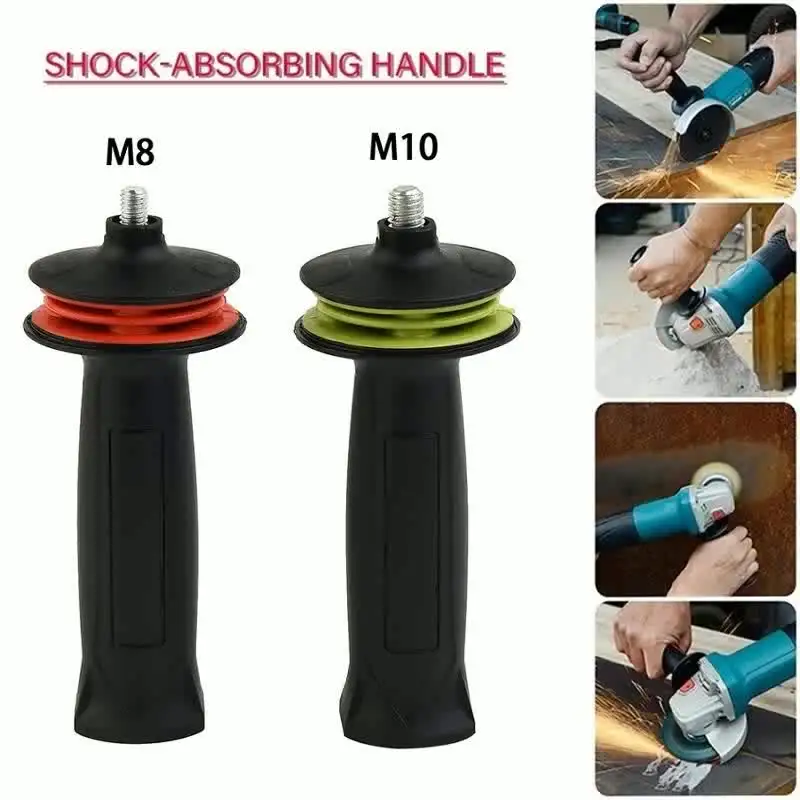
High vibration blurs your cutting line and causes hand numbness within minutes. Test grinders by idling them for 30 seconds: quality models (like Bosch’s AG series) vibrate below 5 m/s², while budget options exceed 8 m/s². Look for rubberized handles and counter-rotating weights inside the housing—they reduce vibration by 40%. For detail work like sculpting stone or polishing edges, this isn’t optional; it’s the difference between a clean finish and a ruined project.
Mistake #3: Assuming All “Heavy-Duty” Models Handle Masonry
Many grinders marketed for “concrete” lack sealed bearings, letting abrasive dust destroy motors within weeks. True masonry grinders feature:
– Double-sealed ball bearings (not bushings)
– Rubber air intake vents that block particles
– Overmolded housings preventing dust ingress
Ask for demonstration units at retailers—run them near sawdust to check for grinding noises. Unsealed bearings fail 3x faster in dusty environments.
Optimize Your Budget: Where to Splurge vs Save
Invest in premium grinders ($150+) only for daily professional use—look for metal gear housings and thermal overload protection that prevents burnout. For occasional DIYers, mid-range ($80-$120) models from Ryobi or Craftsman offer 90% of pro features. Never skimp on discs: $50 for a diamond cup wheel saves $300 in replacement costs versus a $15 generic that cracks on concrete. Always buy a spare guard and wrench kit—they’re $12 but prevent 30-minute tool downtime when bolts seize.
Final Note: The right angle grinder disappears into your workflow—it doesn’t fight you. Match disc size to material thickness, prioritize corded power for stationary work or cordless for mobility, and never compromise on adjustable guards and paddle switches. Test any grinder by idling it for 60 seconds; if vibration numbs your fingers, walk away. For ongoing safety, inspect discs for cracks before each use and replace guards showing impact marks. When cutting metal, always clamp workpieces—loose materials cause deadly kickbacks. Now equipped with these criteria, you’ll avoid the #1 mistake: choosing by price alone. Your next project deserves a tool that works with you, not against you.


