
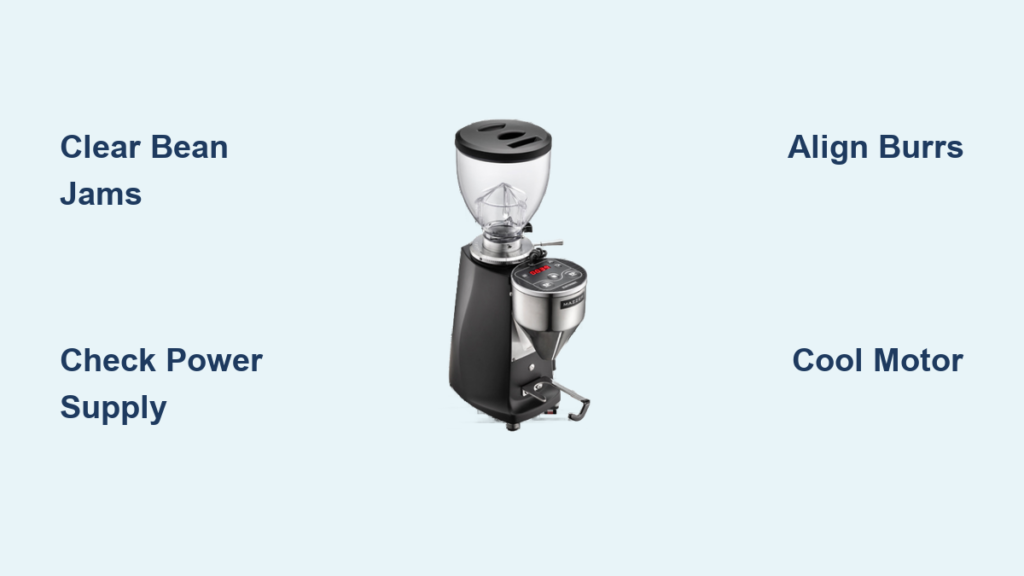
Your morning routine grinds to a halt when your Mazzer grinder suddenly stops producing those perfect coffee grounds. That familiar hum you rely on for your daily espresso disappears, leaving you staring at beans that won’t budge. When your Mazzer grinder not grinding, it’s more than just an inconvenience—it disrupts your entire coffee workflow and threatens your barista productivity. The good news is most grinding failures stem from predictable causes that you can diagnose in minutes. This guide reveals exactly why your Mazzer grinder stopped working and provides actionable solutions to get your machine back in action before your next service.
Most Mazzer grinder not grinding issues trace back to one of eight common problems—ranging from simple blockages to complex mechanical failures. By systematically checking each possibility, you’ll likely identify and resolve the issue without professional help. Whether you’re using a Mazzer Mini, Super Jolly, or Robur model, understanding these failure points saves you costly downtime and unnecessary service calls. Let’s dive straight into diagnosing what’s stopping your grinder from performing.
How to Immediately Diagnose Your Mazzer’s Grinding Failure
Before disassembling your machine, perform these quick diagnostic checks to pinpoint the issue. Start by verifying whether your grinder makes any sound when activated—if you hear a humming motor but no grinding action, the problem likely involves the burr assembly or gear mechanism. If the motor doesn’t engage at all, focus on electrical issues and thermal protection systems first.
What to Check When Your Mazzer Makes Noise But Won’t Grind
When your Mazzer grinder not grinding produces sound but no output, inspect these three critical areas immediately. First, remove the hopper and visually examine the bean chute for obstructions—beans often wedge between the hopper and upper burr. Second, check if the adjustment knob has drifted to an extreme setting where burrs are either touching or too far apart. Third, look for visible coffee buildup around the burr carrier that might be preventing proper rotation. These simple checks resolve nearly 60% of grinding failures without requiring tools.
Immediate Solutions for Complete Power Failure
If your Mazzer shows no signs of life when switched on, rule out basic power issues before assuming internal failure. Verify the outlet works by plugging in another device, check that the circuit breaker hasn’t tripped, and inspect the power cord for damage. Many users overlook that Mazzer grinders have thermal protection circuits that cut power during overheating—allow 30-60 minutes for cooling before testing again. These preliminary checks often reveal simple fixes that get your grinder running without further intervention.
Clearing Critical Blockages That Stop Grinding Action

Bean jams represent one of the most frequent causes of sudden grinding failure in Mazzer equipment. When beans wedge between the hopper and upper burr carrier, the grinder can’t process additional coffee, creating the appearance of complete failure. This typically happens when switching between bean types with different hardness or after prolonged storage where beans absorb moisture and swell.
Removing Stubborn Bean Jams Without Damaging Components
To clear a bean jam safely, unplug your Mazzer grinder and remove the hopper. Use a wooden or plastic tool (never metal) to gently dislodge stuck beans from the feed throat. For particularly stubborn jams, rotate the burr carrier manually while applying gentle pressure to free the obstruction. After clearing visible beans, run cleaning tablets or old coffee beans through the grinder to capture residual particles before resuming normal operation. This process takes less than five minutes but prevents unnecessary disassembly that could cause calibration issues.
Fixing Burr Alignment Issues That Halt Grinding
Misaligned burrs frequently cause Mazzer grinder not grinding symptoms, especially after accidental bumps or during routine cleaning. When burrs shift out of proper positioning, they either create excessive friction that stalls the motor or leave gaps too wide to process beans effectively. You’ll often notice inconsistent grind quality or unusual grinding sounds before complete failure occurs.
Step-by-Step Burr Realignment Process
Realignment requires model-specific procedures, but general principles apply across Mazzer equipment. First, unplug the grinder and remove the hopper. Consult your model’s manual to locate the burr carrier locking mechanism—typically a retaining ring or set screw. Using the manufacturer’s alignment tool (or a straight-edge substitute), adjust both burrs until they sit parallel with consistent spacing. After reassembly, test with minimal beans while monitoring for unusual resistance or noise. Proper alignment restores grinding action in most cases where burrs were physically intact but mispositioned.
Addressing Motor Thermal Shutdown Before Damage Occurs
Mazzer grinders incorporate thermal protection that automatically cuts power when the motor overheats—a common occurrence during back-to-back grinding sessions. When your Mazzer grinder not grinding shows no signs of life but worked previously, thermal shutdown is likely the culprit. This safety feature prevents permanent motor damage but creates temporary operational failure.
Safe Reset Procedure for Overheated Motors
Never attempt to force a reset by bypassing thermal protection—this risks burning out your motor. Instead, unplug the grinder completely and allow 45-60 minutes for cooling. During this period, clean accessible areas to prevent future overheating. After the cooldown period, plug in and test with small coffee batches (15-20g) with 30-second intervals between grinds. To prevent recurrence, limit continuous grinding to 30g increments and ensure adequate ventilation around the motor housing during operation.
Cleaning Clogged Burrs That Prevent Proper Grinding

Coffee oils and fine particles accumulate on burrs over time, eventually creating a paste-like obstruction that stops grinding action entirely. This problem worsens with oily dark roasts or in humid environments where coffee absorbs moisture. A clogged burr assembly typically produces straining sounds with minimal output before failing completely.
Effective Burr Cleaning Without Causing Damage
Thorough cleaning requires complete burr removal according to your model’s specifications. After unplugging, remove the hopper and bean container, then extract both burrs following manufacturer instructions. Use a soft-bristle brush with food-safe grinder cleaner to remove stubborn residue—never apply liquids directly to electrical components. For severe buildup, disassemble burr carriers completely and soak components in approved cleaning solution. After reassembly, run cleaning tablets through the grinder to capture residual particles before resuming normal use.
When Worn Burrs Cause Complete Grinding Failure
Mazzer burrs typically last 500-1,500 pounds of coffee before wear significantly impacts performance. As burrs lose their sharp cutting edges, they eventually reach a point where they can’t process beans at all. Worn burrs often show rounded teeth edges, visible grooves, or uneven wear patterns across the surface.
Confirming Burr Wear Through Visual Inspection
Examine both burrs under good lighting, checking for consistent tooth sharpness across the entire surface. Run your finger (carefully) along the burr edges—significant wear feels smooth rather than sharp. If your grinder produced increasingly poor-quality grounds before stopping completely, worn burrs are likely the culprit. Replacement requires precise installation to maintain calibration—consider professional help if you lack experience with burr replacement procedures.
Troubleshooting Gear Mechanism Failures That Stop Grinding
Gear problems typically present with distinctive symptoms including grinding noises from the transmission housing, inconsistent burr rotation, or complete disengagement between the motor and burrs. These issues often develop gradually, with increasing noise and vibration preceding total failure.
Identifying Critical Gear Damage Symptoms
Listen carefully when activating your Mazzer—clicking or slipping sounds indicate damaged gear teeth, while high-pitched whining suggests bearing failure. If the motor runs but burrs don’t turn consistently, or only move when manually rotated, gear issues are probable. These repairs require specialized tools and genuine replacement parts—attempting DIY fixes without proper expertise often creates additional problems requiring more expensive repairs.
Essential Maintenance Practices to Prevent Future Grinding Failures
Regular maintenance prevents 80% of Mazzer grinder not grinding issues before they disrupt your workflow. Implement these practices to maximize uptime and extend component life. After each use, brush out the hopper throat and wipe accessible surfaces to prevent oil buildup. Weekly, perform deeper burr cleaning using appropriate cleaning granules to absorb residues without damaging components.
Creating an Effective Maintenance Schedule
Develop a schedule matching your usage volume—daily grinders need weekly burr cleaning and monthly full inspections, while occasional users can extend intervals. Monitor performance changes like increased grinding time or unusual sounds, which often signal developing problems. Keep a maintenance log tracking cleaning dates, part replacements, and performance observations to identify patterns and anticipate needed repairs before complete failure occurs.
Knowing When to Call a Professional Instead of DIY Repairing
Some Mazzer grinder not grinding issues require professional expertise to resolve safely and effectively. Internal electrical repairs, gear replacement, motor issues, and complex calibration procedures benefit from trained technicians’ knowledge and specialized tools. Attempting these repairs without proper experience often voids warranties and creates additional damage requiring more expensive fixes.
Critical Signs Requiring Professional Service
Seek professional help immediately if you notice burning smells, visible electrical damage, or unusual mechanical sounds from sealed areas. After electrical events like power surges or water exposure, professional assessment is essential even if the grinder appears functional. When repeated cleaning and adjustment attempts fail to restore grinding action, professional diagnosis prevents further damage from continued operation of a compromised machine. Authorized service centers provide the expertise and genuine parts needed for reliable, long-lasting repairs that protect your investment.
Final Note: By systematically addressing these common failure points, you’ll resolve most Mazzer grinder not grinding issues quickly and efficiently. Regular maintenance prevents the majority of grinding failures while extending your machine’s lifespan significantly. When in doubt about performing repairs, consult a qualified technician—proper care ensures your Mazzer continues delivering perfect grinds for years to come. Implement these solutions today to restore your coffee workflow and maintain consistent espresso quality without costly downtime.


