

Your morning routine grinds to a halt when your coffee grinder stops working unexpectedly. That familiar frustration of pressing the button only to hear silence—or worse, a concerning hum without any ground coffee—is all too common for coffee enthusiasts. Approximately 30-40% of grinder not working issues stem from simple power connection problems, meaning most malfunctions can be resolved without professional help. Before you consider replacing your entire appliance, understand that burr obstructions, jammed beans, or simple wear could be the culprit behind your grinder not working properly. This guide walks you through systematic troubleshooting steps that address the most common causes, helping you restore your coffee grinding capability in under an hour. Whether you own a high-end burr grinder or a basic blade model, these diagnostic procedures apply to virtually all electric grinding equipment.
Verify Your Grinder’s Power Source Immediately
When your grinder not working situation strikes, begin with the most fundamental check—your electrical connection. Many users skip this critical step and dive straight into complex disassembly, only to discover later that the problem was a simple power issue. Confirm your grinder is plugged into a properly grounded 3-prong outlet, as these provide the stable electrical connection necessary for consistent motor operation.
Unplug your grinder completely and firmly reconnect it to the same outlet. This simple action often resolves temporary connection issues caused by minor power fluctuations or loose contacts. If your grinder remains unresponsive, check your home’s electrical panel for a tripped circuit breaker or blown fuse controlling that outlet. A tripped breaker appears in the middle position rather than firmly “on”—reset it by switching fully to “off” before returning to “on.” If a fuse has blown, replace it with one of identical amperage before attempting to operate your grinder again. Always address power supply issues first, as they account for the majority of grinder not working scenarios.
Test Your Electrical Outlet Thoroughly
Beyond basic connection checks, verify that your outlet itself delivers reliable power through systematic testing. Plug a different appliance like a lamp or phone charger into the same outlet—if it fails to operate, the outlet is faulty and requires electrician attention before you can safely use your grinder again.
Examine your grinder’s power cord for visible damage including frayed wires, kinks, or burn marks near the plug or where the cord enters the housing. Physical cord damage interrupts electrical flow and creates safety hazards. If your grinder has a removable power cord, try substituting with a compatible replacement to determine if the cord itself has failed. For built-in cords showing damage, discontinue use immediately and contact the manufacturer for replacement options rather than risking electrical shock or fire hazards. Remember, a grinder not working problem often originates outside the appliance itself.
Clear Obstructions From Cutting Burrs
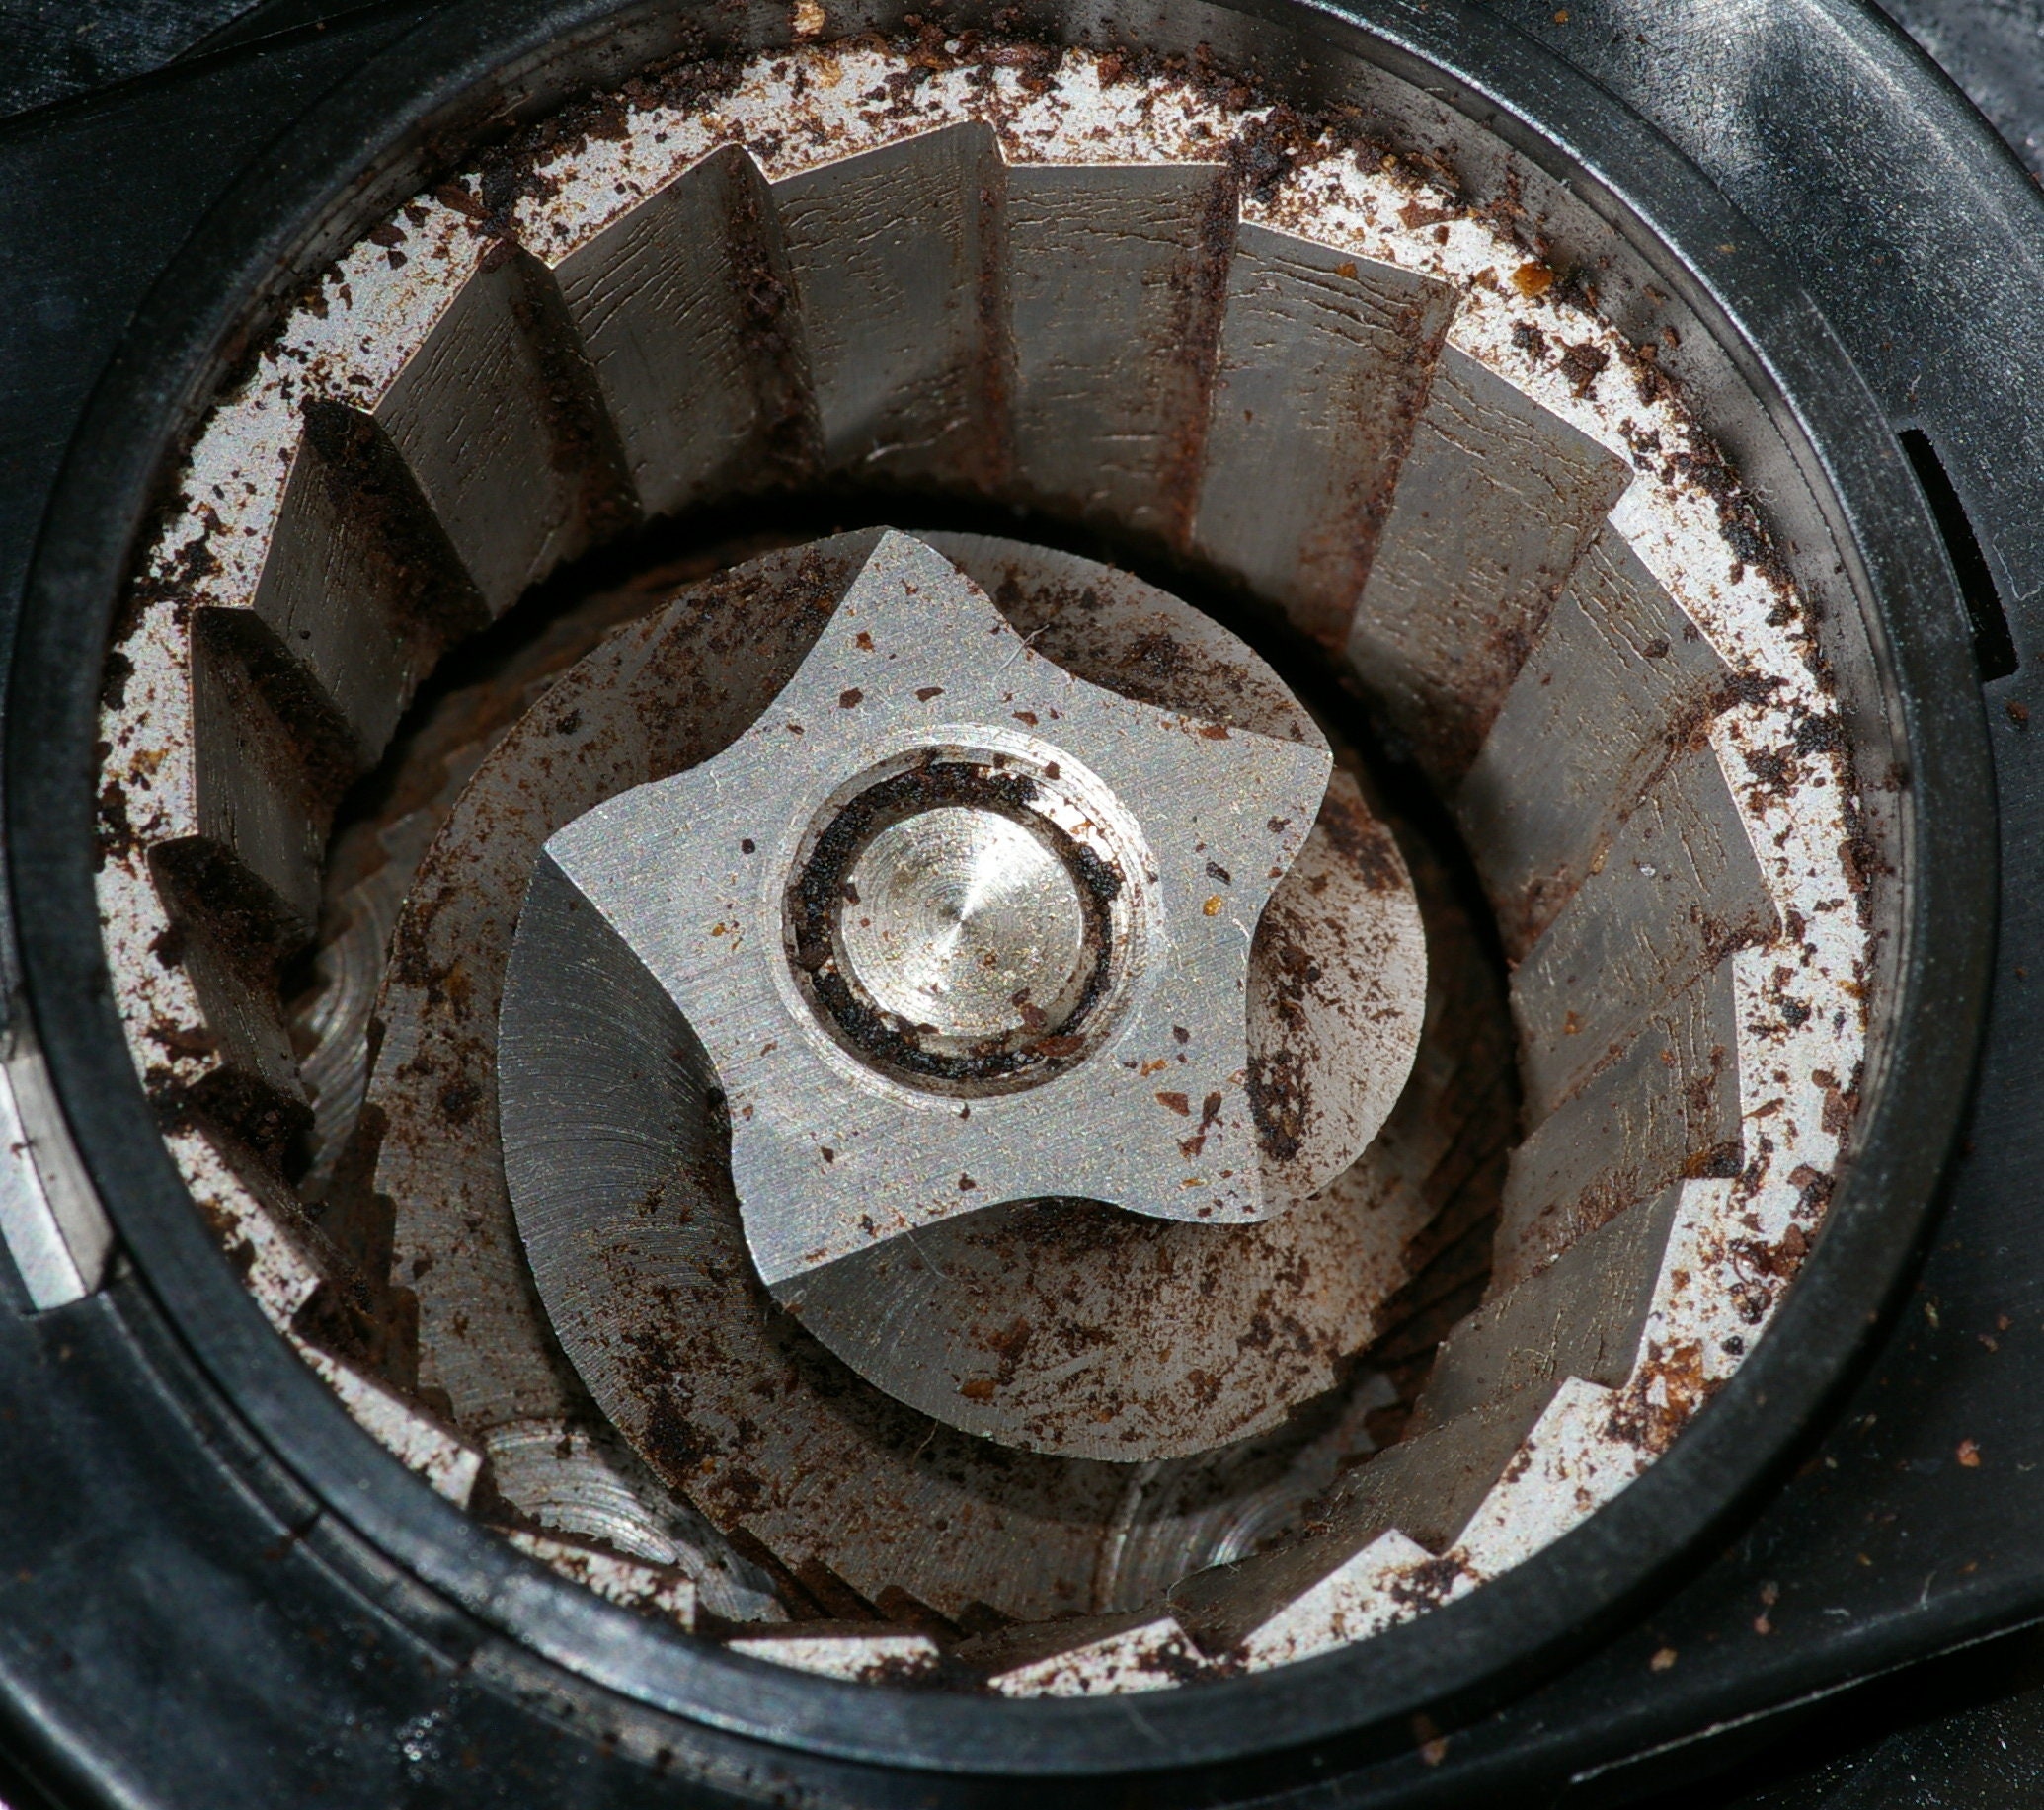
When your grinder’s motor runs but produces no ground coffee, inspect the burr assembly for obstructions—a common cause of grinder not working issues. Foreign objects like small stones accidentally mixed with beans, broken bean fragments, or accumulated coffee residue can become wedged between burr teeth, preventing proper rotation and grinding action.
Remove the hopper or grinding chamber cover according to your model’s instructions and visually inspect the burrs for any lodged material. Use a soft brush designed for coffee equipment to gently clean all burr surfaces, grooves, and crevices. For stubborn residue, apply a small amount of specialized burr cleaner or isopropyl alcohol (never while plugged in), focusing only on the burr assembly while avoiding electrical components. If cleaning doesn’t restore functionality and burrs appear smooth, rounded, or chipped along their edges, replacement may be necessary as worn burrs lose cutting efficiency over time.
How to Safely Remove Jammed Beans
If your grinder stops abruptly during operation, turn it off completely before attempting any intervention—never force restart a jammed unit as this can strip gears or burn out the motor. Allow the grinder to sit for several minutes after powering down, giving temporarily lodged beans a chance to settle.
Access the burr assembly by removing the hopper or grinding chamber cover, then carefully extract whole or partially crushed beans obstructing the burrs. Some grinders feature a reverse rotation function that can help dislodge jams—activate this briefly while monitoring burr movement through the grinding chamber. Once you’ve completely cleared the obstruction and verified free burr rotation by hand, restart the grinder. Prevent future jams by inspecting beans before grinding and avoiding overfilling beyond recommended capacity.
Adjust Burr Spacing for Optimal Performance
Grinders that produce inconsistent or unsatisfactory grind results often need burr spacing adjustments—a fixable issue that prevents your grinder from working properly. Modern burr grinders feature numbered settings that control the distance between cutting surfaces, determining particle size.
If your grind is consistently too coarse, the burrs are set too far apart—adjust incrementally toward finer settings. Conversely, if your grind is too fine or the grinder struggles across settings, increase the burr spacing for coarser results. Make small adjustments rather than large changes, testing grind quality after each modification. Some grinders require a brief run period after adjustment to stabilize the new burr spacing before you can accurately assess results. Proper adjustment prevents strain on the motor and ensures consistent coffee extraction.
Recognize When Burrs Need Replacement

Persistent poor grind quality despite thorough cleaning and proper adjustment signals worn burrs requiring replacement. Key indicators include:
- Consistently uneven particle size even at optimal settings
- Visible damage like chips, cracks, or severely rounded burr edges
- Noticeable increase in grinding time for standard bean quantities
Replacement burr assemblies are model-specific—consult your documentation for the correct part number. Installation generally involves removing the hopper, securing the new burr assembly, and reassembling in reverse order. If uncomfortable with this process, authorized service providers can complete the replacement while you wait, restoring your grinder to working condition.
Access Professional Repair Services
When DIY troubleshooting fails to resolve your grinder not working issue, manufacturer support provides reliable professional assistance. Schedule service appointments through the manufacturer’s website to connect with authorized technicians trained specifically on your model. Before contacting support, gather essential information including your model number, serial number, purchase date, and detailed symptom description to streamline the diagnostic process.
For out-of-warranty grinders, authorized service providers still offer repairs using manufacturer-approved components and procedures. Complex issues like internal motor damage, electrical faults, or gear assembly failures require professional tools and expertise that make DIY repair impractical or unsafe. Professional repair ensures your grinder is restored to proper working specifications while maintaining safety standards.
Consider Extended Service Protection
Protect your investment with extended service plans that cover mechanical and electrical failures beyond the standard warranty period. These plans typically offer coverage for motor burnout, gear failure, and other issues causing your grinder not working problems, potentially saving substantial repair costs.
Eligibility for maximum discounts (up to 25%) usually extends 30 days from purchase, so enroll while your grinder is new to secure coverage before normal wear might be excluded. Review specific terms to understand covered failures versus exclusions like damage from misuse or neglect. Extended protection provides peace of mind that unexpected breakdowns won’t disrupt your coffee routine or require premature equipment replacement.
Critical Troubleshooting Sequence for Grinder Failure
Follow this diagnostic sequence when your grinder not working problem occurs:
- Power verification: Check outlet functionality, circuit breakers, and cord integrity
- Burr inspection: Remove obstructions and clean thoroughly
- Jam assessment: Safely clear any lodged beans before restarting
- Adjustment testing: Verify proper burr spacing for optimal grind
- Wear evaluation: Determine if burr replacement is necessary
Regular maintenance including weekly burr cleaning, proper bean selection, and timely component replacement extends your grinder’s service life significantly. Implement these preventative measures to minimize future grinder not working incidents and ensure reliable morning coffee preparation. When all self-diagnostic steps are exhausted, manufacturer service options provide professional solutions for complex repairs that restore your grinder to full functionality.


