
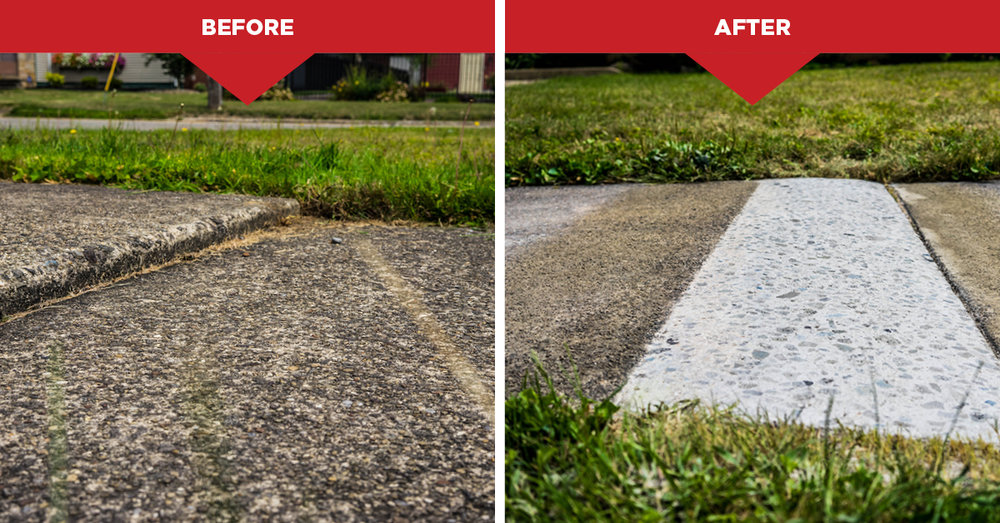
Concrete grinding is a common construction and renovation task that transforms rough surfaces into smooth, level foundations for flooring installations, coatings, or decorative finishes. When your concrete slab has imperfections, high spots, or needs preparation for epoxy coatings, knowing how to grind concrete with a grinder properly becomes essential. This guide provides practical, safety-focused instructions for achieving professional results while avoiding common mistakes that can damage your equipment or compromise your health.
Essential Safety Gear You Must Wear Before Starting
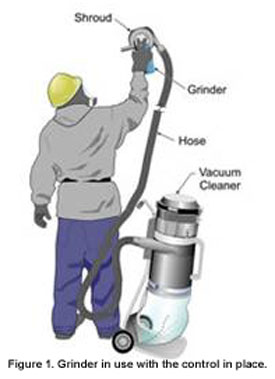
Concrete grinding creates hazardous silica dust that can cause serious respiratory issues with prolonged exposure. Before you even plug in your grinder, ensure you have these safety items:
- NIOSH-approved respirator rated for silica dust (N95 is insufficient – you need at least an N100, P100, or R100)
- Safety goggles with side shields to protect eyes from flying debris
- Hearing protection as grinders operate at high decibel levels
- Heavy-duty work gloves for grip and vibration protection
- Long sleeves and pants made of durable material
- Steel-toed boots with slip-resistant soles
Critical warning: Never operate a concrete grinder without proper respiratory protection. Silica dust exposure can lead to silicosis, a serious and sometimes fatal lung disease that develops gradually with repeated exposure.
Selecting the Right Grinder for Your Concrete Project
Determine Your Project Size Before Choosing Equipment
Small residential projects (garage floors, small patios):
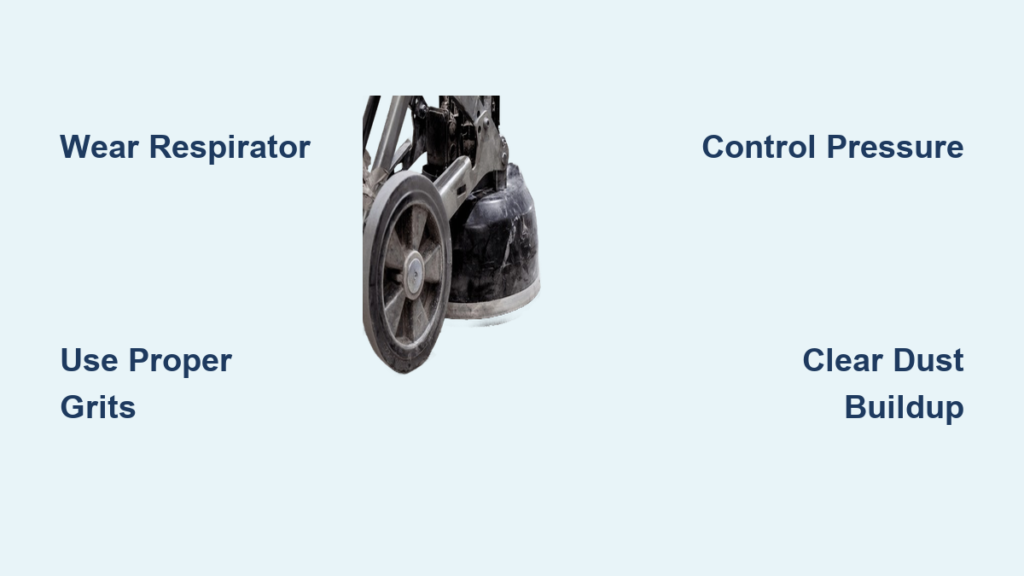
– Use a 4-7 inch angle grinder with a diamond cup wheel
– Lightweight and maneuverable for tight spaces
– Best for spot repairs and small areas under 100 square feet
Medium to large projects (basements, commercial spaces):
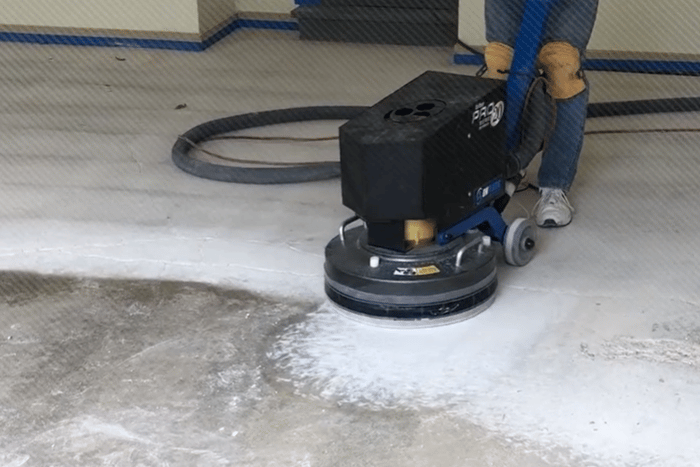
– Rent or purchase a walk-behind floor grinder (10-30 inch diameter)
– Features dust collection systems for safer operation
– More efficient for areas over 100 square feet
Diamond Tool Selection Guide Based on Concrete Hardness
Soft concrete: Use harder bond diamond segments (black or blue)
Medium concrete: Medium bond segments (green or yellow)
Hard concrete or aggregate-rich surfaces: Softer bond segments (red or pink)
Pro tip: Start with a coarser grit (30-40) for significant material removal, then progress to finer grits (60-100+) for smoothing. Each grit level should remove about 70% of the scratches from the previous pass.
Preparing Your Concrete Surface and Workspace
Clear and Inspect the Area Thoroughly
Remove all furniture, tools, and obstacles from the work area. Check for:
– Embedded metal objects (nails, rebar fragments)
– Previous coatings or adhesives
– Cracks or spalling that need repair first
– Drainage patterns if working outdoors
Common mistake: Skipping this inspection leads to damaged diamond tools when the grinder hits unexpected metal objects. Take 15 extra minutes to scan the surface with a metal detector.
Create Effective Dust Containment
For indoor projects:
– Seal doorways with plastic sheeting
– Position box fans to push air outward
– Use a shop vacuum with HEPA filter as secondary protection
For outdoor projects:
– Work during low-wind conditions
– Set up temporary barriers downwind
– Keep a water source nearby for dust suppression if permitted
Step-by-Step Concrete Grinding Process
Initial Pass: Establish Your Grinding Pattern
- Start the grinder away from the concrete surface
- Gradually lower the rotating wheel onto the concrete at a 10-15 degree angle
- Move the grinder in overlapping, straight lines (not circles)
- Maintain consistent speed and pressure – let the diamonds do the work
- Overlap each pass by 50% to ensure even grinding
Visual cue: Watch for consistent slurry formation. Too dry means insufficient water (if using wet grinding), too soupy means too much water.
Progressive Grit Sequencing for Professional Results
| Grit Level | Purpose | Expected Material Removal | Time Estimate per Pass |
|---|---|---|---|
| 30-40 | Heavy leveling, removing coatings | 1/16 inch | 30-45 min per 100 sq ft |
| 60-80 | Smoothing surface, removing scratches | 1/32 inch | 20-30 min per 100 sq ft |
| 100-120 | Final smoothing for coatings | Minimal | 15-25 min per 100 sq ft |
Critical step: Always clean the surface thoroughly between grit changes. Residual coarse grit in your diamond tool slots will scratch the surface during finer grinding passes.
Troubleshooting Common Concrete Grinding Problems
Why Your Grinder Keeps Catching or Chattering
Problem: The grinder jerks or vibrates excessively during operation
Solution:
– Check for uneven concrete surface causing sudden resistance
– Reduce downward pressure – concrete grinding requires light, consistent pressure
– Verify your diamond segments aren’t worn unevenly
– Ensure proper tool rotation speed for your diamond tool
Addressing Uneven Grinding Results
Problem: Visible high and low spots after grinding
Solution:
– Use a straightedge to identify problem areas
– Mark high spots with chalk for targeted grinding
– Switch to a smaller grinder for precision work on uneven areas
– Never attempt to remove more than 1/16 inch per pass
Maintaining Your Grinder During Extended Use
Concrete grinders generate significant heat during operation. To prevent motor damage:
- Work in 15-20 minute intervals followed by 5-minute cooling periods
- Keep ventilation ports clear of dust accumulation
- Check air filters frequently and clean as needed
- Listen for changes in motor sound that indicate strain
Expert note: If using a walk-behind grinder, periodically stop to inspect the machine’s base plate for debris buildup that can affect grinding consistency.
Post-Grinding Surface Preparation
Cleaning Methods Based on Your Next Step
For epoxy or coating applications:
– Use a HEPA-filtered vacuum followed by microfiber mops
– Perform a water break test to verify proper surface profile
– Allow 24 hours for complete drying before applying coatings
For decorative finishes:
– Progress through finer grits (200-800) for polished effect
– Consider chemical hardeners for enhanced durability
– Apply appropriate sealant based on final use requirements
Critical Mistakes That Ruin Concrete Grinding Projects
Applying Too Much Downward Pressure
Many beginners think pressing harder speeds up the process. In reality, excessive pressure:
– Blunts diamond segments prematurely
– Creates uneven surfaces and gouges
– Overheats the tool motor
– Increases vibration to unsafe levels
Correct technique: Use body weight gently, not arm strength. The grinder should move steadily across the surface with minimal resistance.
Skipping Grit Progression Steps
Rushing from coarse to fine grit without intermediate steps creates:
– Visible scratch patterns that show through coatings
– Inconsistent surface profiles
– Poor coating adhesion in problem areas
– Additional labor to correct mistakes
When to Call a Professional Concrete Grinding Service
Consider professional help if:
– Your project exceeds 500 square feet
– You need extremely precise flatness tolerances
– The concrete contains excessive metal reinforcement
– You lack proper dust collection equipment
– Previous DIY attempts resulted in uneven surfaces
Professionals have access to industrial equipment with integrated dust collection that significantly reduces health risks and improves results.
Final Note: Proper concrete grinding requires patience and attention to detail. By following these safety protocols and technique guidelines, you’ll achieve a surface ready for any finish while protecting your health from hazardous silica dust. Always prioritize safety gear over speed, and remember that proper grit progression creates better results than rushing through the process. For best outcomes, test your technique on a small, inconspicuous area before tackling your entire project.


