
Nothing derails your cooking plans faster than a meat grinder that chokes on what should be a simple task. You’ve prepped your chuck roast for burgers, loaded the grinder, and now you’re watching helplessly as large chunks spill out the other end or the motor strains to a halt. The good news? Most grinding failures have straightforward fixes that take less time than ordering takeout. Understanding why your meat grinder isn’t grinding properly saves you from unnecessary repairs and gets you back to making perfect sausage or juicy patties in minutes.
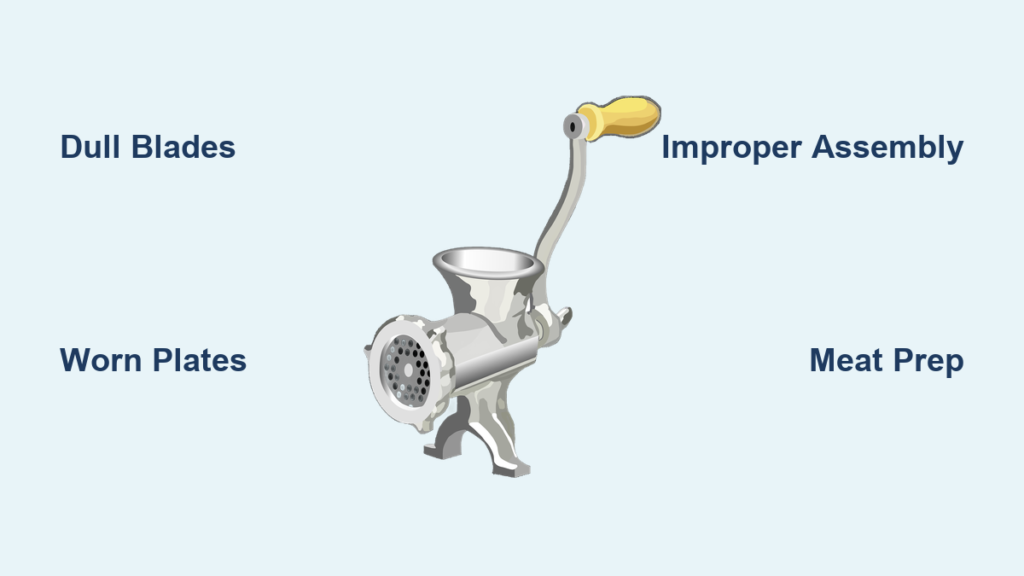
When your grinder underperforms, the culprit usually falls into one of five categories: dull blades, worn plates, improper assembly, motor strain, or debris buildup. Each issue creates distinct symptoms that guide your troubleshooting path. This guide cuts through the confusion with actionable steps to diagnose and fix your specific problem, whether you’re using a manual crank model or a powerful electric unit. You’ll learn exactly what to check first, how to identify worn components, and when replacement makes more sense than repair.
Why Your Meat Grinder Produces Chunky, Stringy, or Uneven Results
The moment you notice inconsistent texture—whether it’s large chunks mixed with fine particles or stringy strands instead of uniform grounds—you’re dealing with blade or plate issues. A sharp blade should slice cleanly through meat as the auger pushes it against the grinding plate. When blades dull from repeated use or contact with bone fragments, they tear rather than cut, creating that undesirable mushy texture with uneven chunks.
Examine your output closely: if meat emerges in long strands, your blade isn’t making clean contact with the plate. This happens when the blade sits too far from the plate due to improper assembly or when plate holes wear enlarged from use. Worn plates develop rounded edges around the perforations, preventing the blade from shearing meat properly. The solution requires either replacing the plate or ensuring proper blade-to-plate alignment during reassembly.
Stop Your Grinder From Jamming Mid-Operation
Jamming occurs when meat stops moving through the feed tube and the motor either strains loudly or shuts off completely. Before you panic, unplug the unit immediately—never attempt to clear jams while operating. Disassemble the grinder head completely and inspect three critical areas: the space between blade and plate, the auger shaft, and the feed tube throat.
Most jams stem from frozen meat chunks, tendon pieces, or improper meat preparation. Check for visible obstructions like sinew wrapped around the auger shaft or bone fragments wedged in the plate holes. Use a small brush to clean plate perforations thoroughly—this takes 2-3 minutes but prevents recurring jams. When reassembling, ensure the blade seats flush against the plate with its center hub properly aligned. A quarter-turn too loose on the retention nut creates enough gap for meat to slip through uncut.
Diagnose Motor Strain Before Permanent Damage Occurs
If your grinder runs but struggles to process even small amounts of meat, or emits a burning smell after brief use, you’re overloading the motor. This happens most often when users attempt to grind room-temperature meat with high fat content or force oversized chunks through the feed tube.
The immediate fix requires adjusting your technique: cut meat into 1-2 inch cubes and partially freeze for 30 minutes before grinding. Cold meat firms up, feeding more smoothly through the mechanism. Feed meat steadily without forcing—let the auger do the work. If the motor still strains after these adjustments, check the connection between the motor shaft and auger. Some models require periodic tightening of a set screw that can loosen with vibration. A quick 15-second inspection prevents hours of downtime.
Proper Assembly: The Hidden Cause of Most Grinding Failures
More grinding problems stem from incorrect reassembly after cleaning than actual component wear. The precise order and orientation of parts matters critically: blade facing the plate, plate grooved-side inward, retention nut tightened just enough to prevent movement without stripping threads.
Before your next grinding session, perform this 30-second verification: with the grinder unplugged, rotate the auger by hand. It should turn smoothly without catching or resistance. If you feel grinding or hear scraping, disassemble and check that the blade’s cutting edge faces the direction of rotation (typically toward the plate). Many users accidentally install blades backward during reassembly, creating immediate performance issues. The retention nut should be hand-tight plus a quarter-turn with the included tool—overtightening distorts components and causes premature wear.
Optimize Meat Prep to Prevent 80% of Grinding Problems
How you prepare meat before it hits the grinder determines success more than any mechanical factor. Start by trimming all tendons, silver skin, and connective tissue—these materials jam grinders and accelerate blade wear. Cut meat against the grain into uniform cubes that feed smoothly through the tube without forcing.
The temperature sweet spot makes all the difference: meat should be partially frozen but not solid. Thirty minutes in the freezer firms it enough to prevent smearing but keeps it pliable for clean cutting. For tough cuts like shoulder, try a two-pass approach—first through a coarse plate (4.5mm), then through medium (3mm)—for consistent texture without overworking the motor.
Replace Blades and Plates Before Performance Degrades

Most home users wait until grinding fails completely before checking blades, but proactive replacement prevents frustration. After 10-15 grinding sessions, inspect blades for visible wear: hold at an angle to the light and look for rounded edges rather than sharp, defined bevels. When blades lose their “bite” (test by gently running a fingernail across the edge—you should feel slight resistance), replace them immediately.
Grinding plates wear more slowly but require equal attention. Compare your plate against a new one by holding both up to light—worn plates show enlarged holes and rounded edges around perforations. Keep spare coarse and medium plates on hand; rotating between them extends overall lifespan. Replacement takes 2 minutes and costs less than the time spent troubleshooting poor performance.
Establish a 5-Minute Post-Use Maintenance Routine
Preventative care takes less time than fixing problems later. Immediately after grinding, disassemble and rinse all components under hot water—don’t let fat solidify in crevices. Use the included brush to clean plate holes and blade edges thoroughly. Dry all parts completely before storage; residual moisture causes corrosion that damages precision surfaces.
Apply a light coat of food-grade mineral oil to metal components before storage to prevent oxidation. Store plates and blades in a dedicated container to protect edges from damage. This 5-minute routine after each use prevents 90% of grinding issues and extends component life by 2-3 times compared to irregular maintenance.
When your meat grinder isn’t grinding properly, the solution usually lies in one of these critical areas: blade sharpness, plate condition, assembly accuracy, or meat preparation. By addressing these factors systematically, you’ll restore optimal performance within minutes for most issues. Remember that prevention beats troubleshooting—regular maintenance and proper meat preparation prevent most grinding failures before they start. Keep spare blades and plates on hand, follow the 5-minute post-use routine, and always prepare meat correctly for smooth operation. If problems persist despite these fixes, consult your model’s specifications for motor capacity limitations—some grinders simply aren’t designed for frequent heavy use. With these strategies, you’ll transform frustrating grinding sessions into reliable, consistent results every time you fire up your machine.


