
Your angle grinder suddenly stops spinning during a critical metal-cutting job? Before you toss it or buy a replacement, consider that most common grinder failures have straightforward DIY fixes costing a fraction of new tool prices. Whether your Makita stalls mid-operation or your Milwaukee overheats after minutes of use, this guide provides the exact steps to diagnose and repair the problem. You’ll learn to identify electrical failures, replace worn bearings, correct gear mesh issues, and apply proper lubrication—skills that can breathe new life into expensive tools. With basic tools, patience, and these proven techniques, you’ll save money while extending the service life of quality grinders that deserve repair over replacement.
Diagnose Why Your Angle Grinder Stopped Working
Pinpointing the exact failure mode saves hours of unnecessary part replacement. Electrical issues cause sudden stoppages while mechanical problems develop gradually with warning signs that many users ignore until complete failure occurs.
Identify Electrical Failure Signs in Your Grinder
When your grinder runs fine one moment then refuses to start the next, electrical components likely caused the failure. Sudden stoppage combined with no function suggests either a locked rotor condition or complete electrical failure preventing motor operation. Check for these critical indicators: intermittent operation, unusual humming without proper rotation, or no response when switching on. Visible scorch marks around the motor housing or burned insulation on field coils confirm electrical problems requiring component replacement.
Critical warning: Burning smells or discoloration near brush holders signal dangerous electrical issues—stop using the tool immediately to prevent further damage or fire risk.
Recognize Mechanical Failure Before It’s Too Late
Mechanical failures develop gradually with distinct warning signs. Slow spinning despite full power input indicates mechanical obstruction, bearing failure, or damaged armature affecting torque transmission. Your grinder should reach full speed within seconds—persistent sluggishness requires immediate attention. Excessive noise and vibration during operation point directly to bearing failure, improper gear mesh, or worn components creating destructive wear patterns.
Pro tip: If your grinder becomes too hot to handle after just 5 minutes of operation with a knotted wire wheel, inadequate gear-tooth contact or insufficient lubrication is likely the culprit—address this before complete failure occurs.
Perform These 3 Checks Before Disassembling Your Grinder
Before opening your grinder, verify these simple issues that resolve many “broken” tools without disassembly:
– Test the outlet with another device to confirm power availability
– Inspect the power cord for cuts, exposed conductors, or damaged strain relief
– Ensure the grinding wheel isn’t jammed or improperly mounted
These basic checks solve approximately 30% of apparent grinder failures—saving you unnecessary disassembly time.
Remove Damaged Bearings Without Destroying Housing
Bearing failure causes excessive vibration, noise, and heat buildup that damages other components. Proper bearing replacement requires specific techniques to avoid housing damage during removal and installation.
Extract Worn Bearings Safely
Original equipment bearings in many angle grinders (like Milwaukee models) use Chinese “Peer” brand components notorious for premature failure. To remove damaged bearings without damaging the housing:
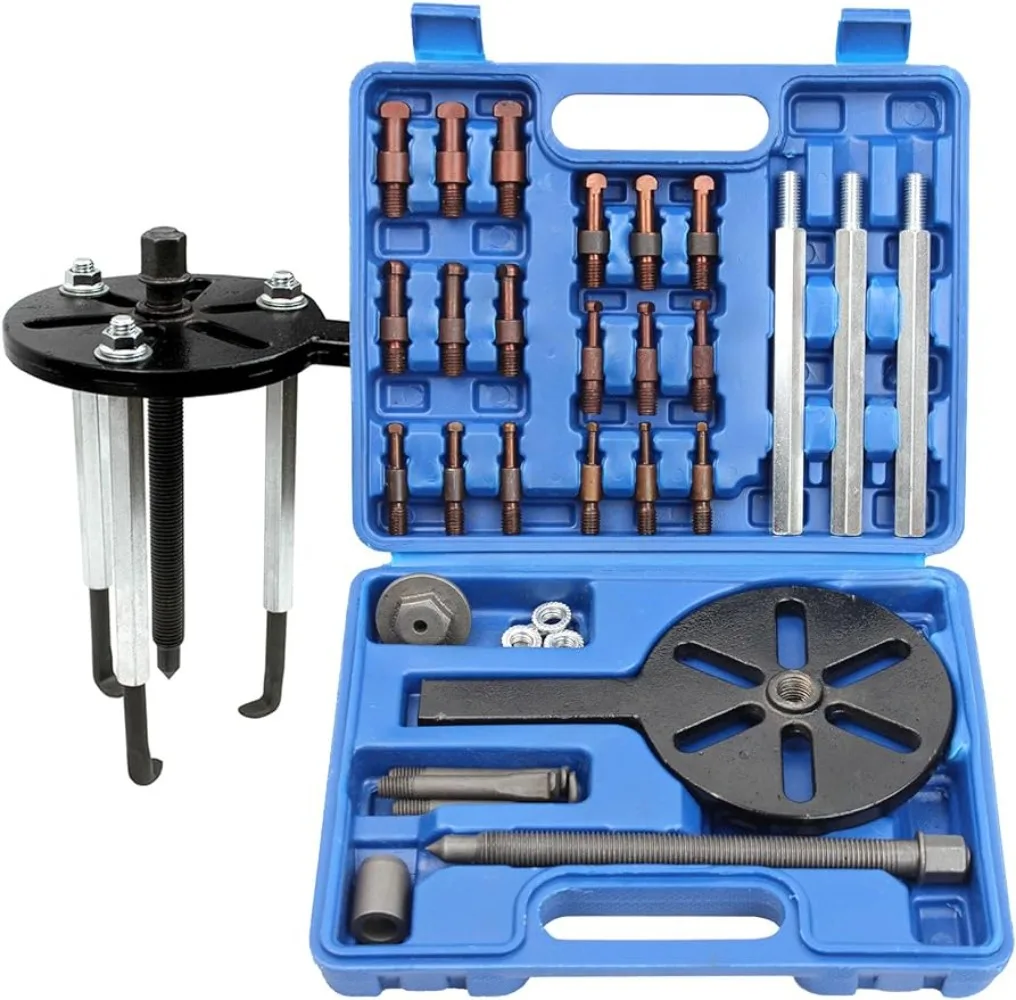
1. Use proper bearing pullers rather than improvised tools
2. Apply even pressure around the bearing outer race
3. Work slowly to avoid sudden release that could damage housing
Critical mistake to avoid: Never hammer directly on bearings during removal—this damages housing precision surfaces needed for proper reinstallation.
Install Replacement Bearings Correctly
When installing new bearings, select appropriate specifications for high-speed grinder applications. For most angle grinders, C3-rated bearings with rubber seals (2RSL models) provide optimal performance. Follow these steps:
– Press bearings squarely using proper tools (never strike directly)
– Apply pressure only to the outer race, not rolling elements
– Verify bearings spin freely without roughness after installation
Pro tip: When bearing numbers are unreadable, contact manufacturers like SKF directly—they often provide identification assistance based on physical measurements.
Fix Gear Mesh Problems Causing Overheating

Improper gear mesh creates excessive heat, noise, and premature wear. Many DIY repairs fail because they overlook critical shimming adjustments that control gear tooth contact patterns.
Why Your Grinder Overheats After 5 Minutes of Use
The documented Milwaukee repair revealed that missing shims caused immediate overheating during operation. Without proper shimming, gears engage too deeply (causing excessive friction and heat) or too shallowly (creating noise and poor power transmission). This explains why many “repaired” grinders still overheat—technicians replace components but neglect critical shimming adjustments.
Critical insight: The successful repair found that two shims positioned tooth contact perfectly in the middle of the tooth face—transforming an overheating unit into a cool-running machine.
Apply Prussian Blue to Verify Correct Gear Contact
Use this professional technique to confirm proper gear mesh:
1. Apply thin layer of Prussian blue marking compound to gear teeth
2. Rotate gears several times to transfer compound
3. Examine contact pattern—proper mesh shows contact across center of tooth face
Warning: Contact too deep toward the root causes excessive friction and heat buildup, while shallow contact near the tooth tip creates destructive noise and wear.
Source Obsolete Shims for Vintage Grinders
When manufacturer parts become obsolete, try these alternatives:
– Industrial liquidation facilities ($1 per shim as documented in Milwaukee repair)
– Local bearing suppliers with technical expertise
– Online communities specializing in vintage tool restoration
Pro tip: Document exact shim thickness measurements—many grinders use multiple thin shims to achieve precise adjustment.
Replace Motor Brushes Before Armature Damage Occurs
Worn motor brushes cause electrical arcing that damages commutators and eventually destroys armatures. Replacing brushes at the first sign of wear prevents costly armature replacement.
Identify When Brushes Need Replacement
Inspect brushes for these failure indicators:
– Worn to less than half original length
– Uneven wear patterns indicating misalignment
– Cracks, chips, or excessive debris buildup
– Weak spring tension failing to maintain commutator contact
Critical warning: Blackened commutator segments with visible grooves indicate advanced brush wear—replace brushes immediately to prevent armature destruction.
Install Brushes Using Proper Orientation
Follow these steps for correct brush replacement:
1. Note original brush orientation before removal
2. Clean brush holder channels of carbon buildup
3. Install new brushes with identical orientation
4. Verify spring tension provides consistent commutator pressure
Pro tip: For vintage Milwaukee units, New Old Stock (NOS) USA brushes often outperform modern replacements—check specialty suppliers before accepting inferior alternatives.
Apply Correct Lubrication to Prevent Premature Failure
Using the wrong grease causes more grinder failures than any other single factor. Proper lubrication requires matching specific NLGI specifications to your grinder model.
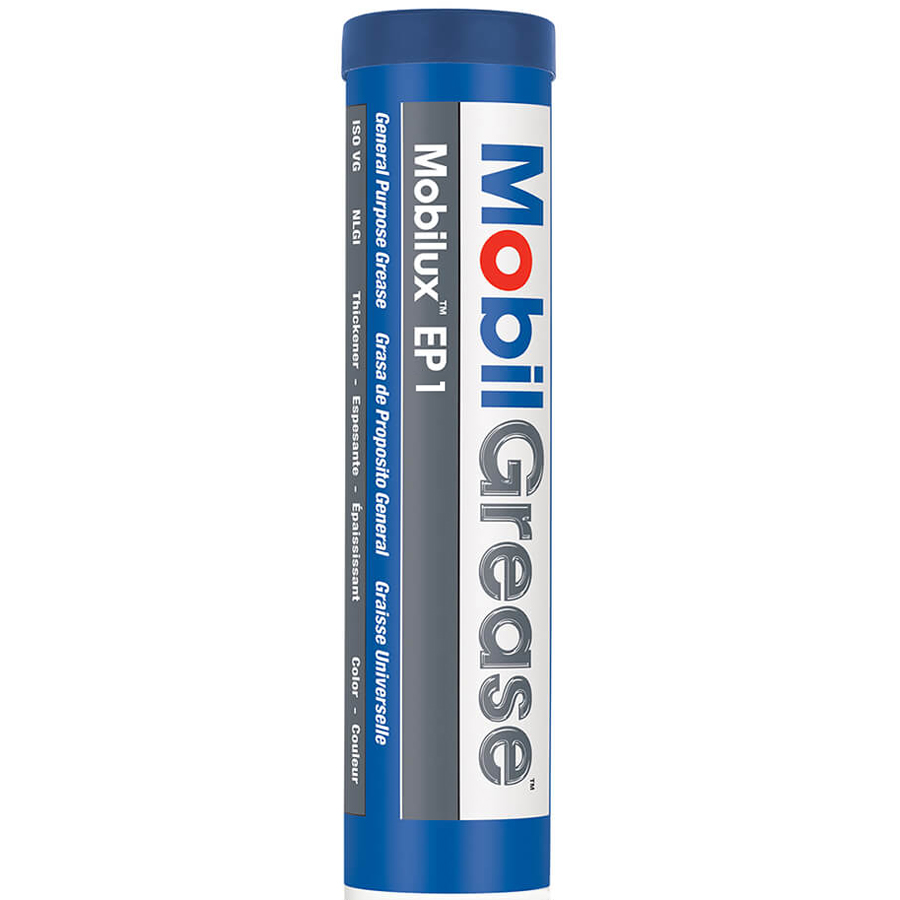
Use NLGI 1 Semi-Fluid Grease for High-Speed Operation
The documented Milwaukee repair specified Mobilux EP1 NLGI 1 grease—critical for units containing needle bearings in the head assembly. This semi-fluid lithium 12-type base lubricant maintains viscosity at high speeds where standard greases fail.
Critical mistake: Someone previously used red and tacky grease in the Milwaukee unit—this flung off during operation, causing gears to run dry and resulting in catastrophic noise and wear.
Apply Exactly 1/4 Ounce of Grease Per Service
Precision matters with lubrication quantities:
– Too little grease causes rapid wear and overheating
– Too much creates resistance, heat buildup, and fling-off
– The documented Milwaukee specification requires exactly 1/4 oz
Pro tip: Mobilux EP1 provides identical performance to manufacturer-branded grease at half the cost—Milwaukee charges $28 for 6 ounces while Mobilux costs significantly less.
Reassemble Your Grinder with Precision Alignment
Rushing reassembly introduces problems that diagnosis and parts replacement had resolved. Following documented positions ensures optimal performance and longevity.
Verify Gear Mesh Before Final Assembly
Before closing the housing:
1. Apply Prussian blue to confirm proper tooth contact
2. Adjust shims until contact pattern centers on tooth face
3. Ensure gears rotate freely without binding
Critical step: The successful Milwaukee repair verified that proper shim adjustment allowed five minutes of aggressive knotted wire wheel operation with only warm—not hot—temperatures.
Check Electrical Connections Before Power Application
Before plugging in your repaired grinder:
– Verify all wire connections are secure and properly insulated
– Confirm no bare wires contact metal housings
– Test switch operation manually before applying power
Safety essential: Always perform initial testing at low speed with light load—listen for abnormal noises and monitor temperatures before full operation.
Determine When Repair Makes Financial Sense
Not every broken grinder warrants repair investment. Evaluate these factors before starting:
Calculate True Repair Cost Versus Replacement
For quality tools like USA-made Milwaukee units, a $65-75 parts investment often justifies repair. Budget Chinese-manufactured grinders frequently cost more to repair than replace. Consider these factors:
– Manufacturing origin (USA-made tools justify repair)
– Component quality (better tools have replaceable parts)
– Remaining service life (repair extends value)
Pro insight: The documented Milwaukee repair restored a vintage grinder to outperform a newer 7.5A Makita unit—demonstrating the value of proper repair for quality tools.
Source Parts Through Reliable Channels
Avoid counterfeit components by using:
– Manufacturer parts departments (Milwaukee maintains support for vintage tools)
– Authorized bearing suppliers (SKF, INA USA)
– Specialty vintage tool restoration suppliers
Critical warning: Marketplace platforms often sell counterfeit bearings and greases that fail quickly—invest in quality components that match original specifications.
A successful grinder repair requires systematic diagnosis, quality components, proper lubrication, and careful assembly. Understanding specific requirements for your tool—particularly regarding lubrication specifications and gear mesh adjustments—ensures reliable restoration. Quality tools manufactured with durable components justify repair investment, while proper maintenance extends service life for years of dependable performance. With these techniques, you’ll transform seemingly dead grinders into like-new tools that deliver professional results without replacement costs.


