
That familiar morning ritual has hit a snag—your coffee grinder sputters to life but produces uneven grounds or worse, stops working entirely. Before you toss your trusty appliance and invest in a replacement, mastering how to open a coffee grinder could save you money and restore that perfect cup. Coffee grinders accumulate oils, residue, and debris that degrade performance over time, causing inconsistent grinding, strange noises, and eventual breakdowns. This comprehensive guide shows you exactly how to safely access your grinder’s internals for cleaning, maintenance, and minor repairs—whether you own a simple blade model or precision burr grinder.
Regular maintenance through proper disassembly prevents the bitter, stale flavors that come from old coffee oils turning rancid inside your machine. Many users don’t realize that 80% of grinder issues stem from neglected cleaning rather than mechanical failure. When you learn how to open a coffee grinder correctly, you gain the ability to address common problems before they escalate, extending your appliance’s lifespan by years. This guide covers every step you need to breathe new life into your coffee equipment without voiding warranties or causing accidental damage.
Why Your Coffee Grinder Needs Regular Internal Cleaning
Coffee beans release natural oils during grinding that coat internal components, attracting fine particles and creating a sticky residue that builds up over time. This buildup not only affects flavor quality but also creates additional friction that strains motor components. After just three months of regular use, your grinder can accumulate enough residue to slow the motor, increase heat production, and cause inconsistent grinding results. The telltale signs include uneven particle sizes, longer grinding times, and that unpleasant “stale coffee” taste that ruins your morning brew.
Neglecting internal cleaning leads to more serious mechanical issues down the line. Oil-soaked coffee grounds harden into a concrete-like substance that jams moving parts and insulates motor components, causing overheating. The abrasive coffee particles work their way into bearings and electrical contacts, accelerating wear beyond normal levels. Professional baristas recommend deep cleaning your grinder every 2-3 months for home use, or monthly for heavy usage. When you master how to open a coffee grinder, you take control of maintenance rather than waiting for problems to force your hand.
Critical Safety Measures Before Opening Your Grinder
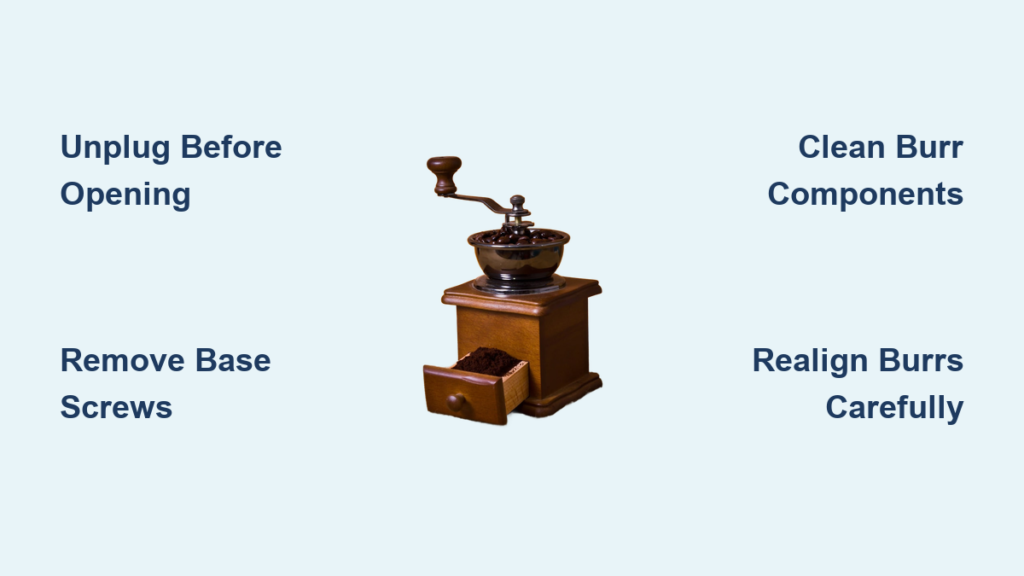
Never attempt to open your coffee grinder while it’s plugged in—this simple rule prevents serious electrical hazards. Unplug the unit and wait at least 15 minutes for internal components to cool completely, as motors retain heat long after shutdown. Remove all visible coffee beans and grounds from the hopper and grinding chamber first to prevent messes during disassembly. Place a soft towel on your work surface to protect both your grinder and the surface from scratches or impacts.
Gather these essential tools before beginning: a set of precision screwdrivers (both Phillips and flathead), needle-nose pliers, cotton swabs, a soft-bristle brush specifically for coffee grinders, and food-safe lubricant if needed. Take clear photographs at each disassembly stage—this visual reference proves invaluable when reassembling complex burr arrangements. If your grinder is under warranty, check manufacturer policies first as opening certain models may void coverage. For burr grinders, note the exact position of any alignment shims before removal; these tiny components dramatically affect grind consistency when misplaced.
What to Do When Screws Are Stripped or Seized
Stripped screw heads commonly occur when manufacturers use low-quality fasteners that deform under regular cleaning cycles. If you encounter a stubborn screw, apply a few drops of food-grade penetrating oil and wait 10 minutes before trying again. Use firm, downward pressure while turning to maintain engagement with the screw head. When all else fails, try wrapping rubber bands between the screwdriver and screw head for additional grip.
For completely stripped screws, carefully drill a small pilot hole and use a screw extractor kit designed for precision work. As a last resort, use a Dremel tool with a cutting wheel to create a new slot in the screw head, allowing you to remove it with a flathead screwdriver. Always replace stripped screws with higher-quality stainless steel versions during reassembly to prevent future issues.
Blade vs. Burr Grinder: Opening Procedures Compared
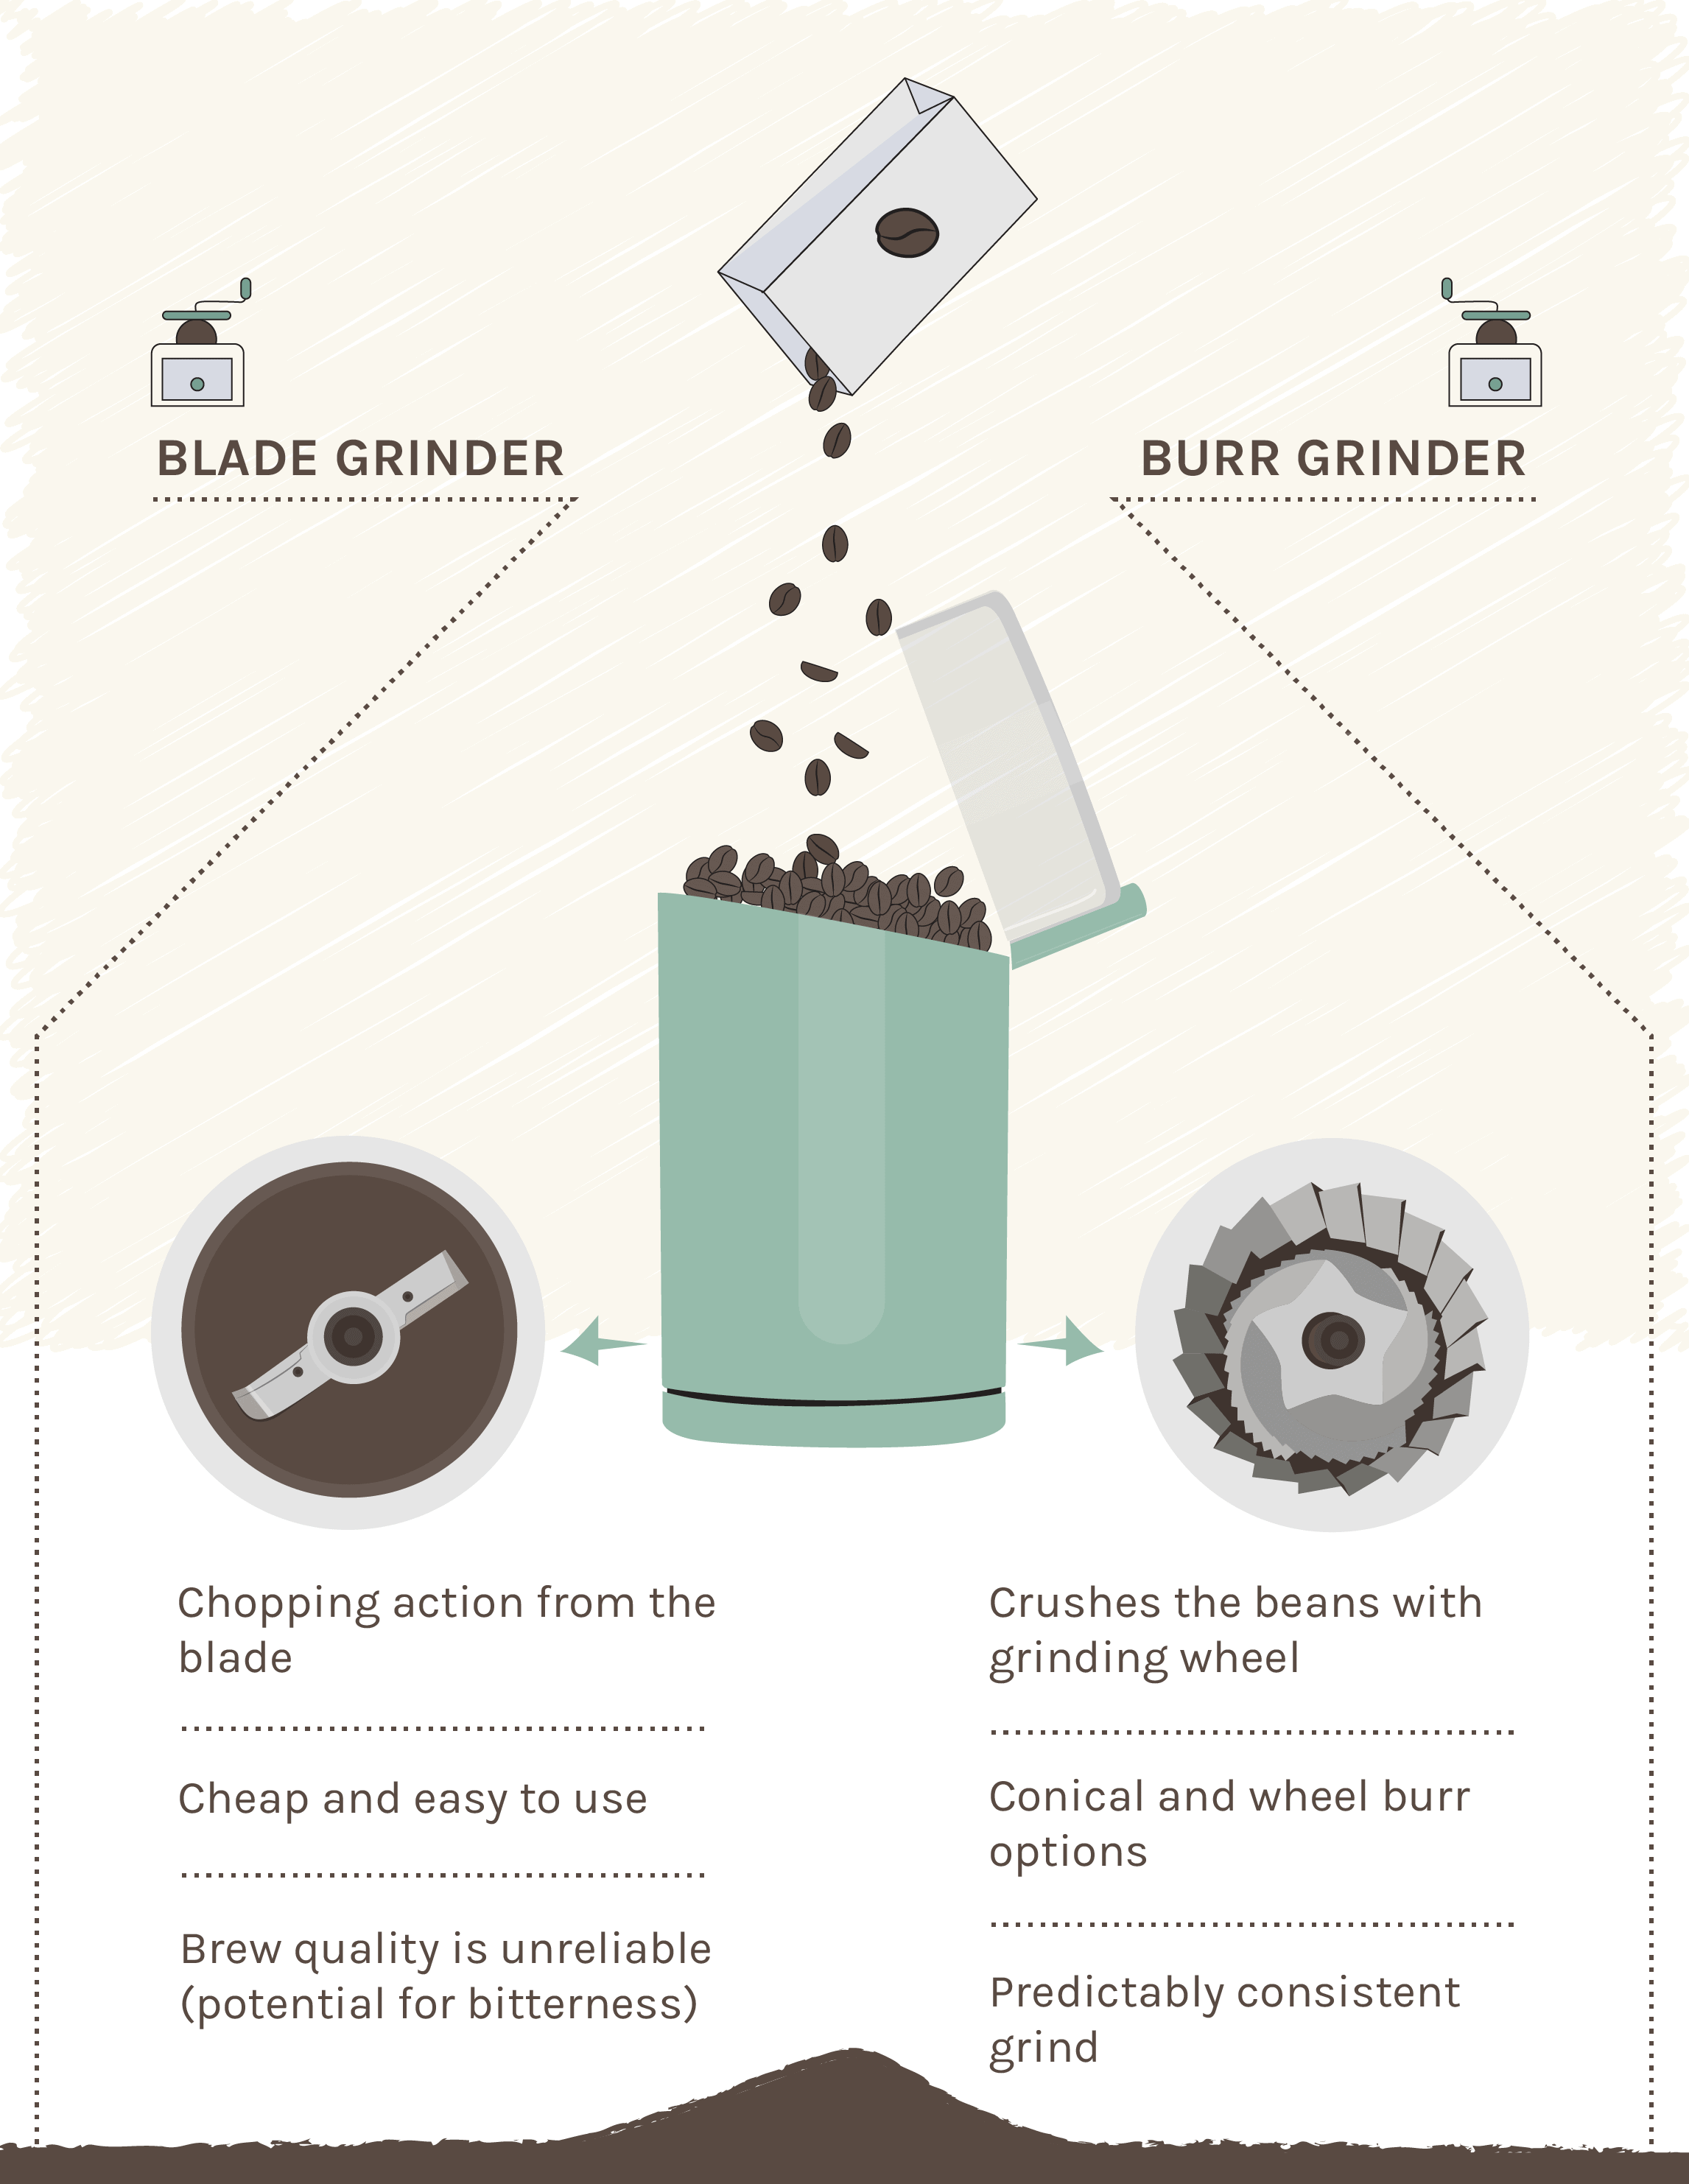
How to Open a Standard Blade Grinder
Blade grinders feature a simple design with fewer components to manage. Turn your grinder upside down and locate the 4-6 screws securing the base plate—these often hide beneath rubber feet or manufacturer labels. Remove each screw carefully and set them aside in a labeled container. Some models use security screws with special heads, so check if your grinder requires a Torx or hex driver.
Once screws are removed, gently separate the base from the grinding chamber. The blade assembly typically unscrews counterclockwise from the motor shaft—hold the shaft steady with pliers while turning the blade. Clean the blade thoroughly with a dry brush, checking for nicks or dulling that affects performance. Inspect the rubber gasket for cracks or deformation; replace it if compromised to prevent grounds from entering the motor housing. Reassembly requires careful alignment of the blade with the motor shaft before securing the base plate.
Opening Conical and Flat Burr Grinder Models
Burr grinders demand more precision during disassembly to maintain proper alignment. Start by removing the bean hopper and adjusting the grind setting to its coarsest position. On most models, the upper burr assembly unscrews counterclockwise—wrap a soft cloth around it for better grip if needed. Note the position of any washers or shims between the burrs; these micro-adjustments affect grind consistency significantly.
After removing the upper burr, use a dedicated burr brush to clean coffee residue from the lower burr without removing it. For complete access, you’ll need to open the base following similar steps to blade grinder disassembly. The lower burr attaches to the motor shaft via a central screw—apply gentle pressure while unscrewing to avoid damaging the shaft. Never touch burr surfaces with bare fingers as skin oils affect grinding performance; use cotton gloves when handling these precision components.
Troubleshooting Jammed Components During Disassembly
Removing Stubborn Coffee Buildup From Motor Shafts
Hardened coffee residue around the motor shaft causes grinding mechanisms to seize up. Apply a few drops of food-safe lubricant to the affected area and let it penetrate for 15 minutes. Use a soft brass brush (softer than steel to avoid scratching) to gently work loose the buildup while rotating the shaft by hand. For severe cases, carefully heat the affected area with a hairdryer for 30 seconds to soften the oils before cleaning.
Never use metal picks or sharp tools directly on motor shafts as microscopic scratches create points where future buildup accumulates faster. After cleaning, wipe the shaft thoroughly with a dry cloth before reassembly. Test rotation by hand to ensure smooth movement before powering on your grinder.
Fixing Misaligned Burrs After Reassembly
Improper burr alignment causes uneven grinding and excessive noise after reassembly. If your grinder produces inconsistent particle sizes post-cleaning, the burrs likely need realignment. Consult your manufacturer’s specifications for the correct spacing—typically between 0.1-0.5mm depending on model. Use feeler gauges to measure the gap at multiple points around the burr circumference.
Adjustment usually involves tightening or loosening the central burr screw by fractions of a turn. Make small adjustments and test grind quality between changes—over-tightening damages burrs while excessive clearance creates inconsistent grounds. Some high-end grinders require specialized calibration tools; if you can’t achieve proper alignment, professional service may be necessary.
Post-Cleaning Maintenance Best Practices

After successfully opening and cleaning your coffee grinder, implement these practices to maximize time between deep cleanings. Always wipe the grinding chamber with a dry brush immediately after each use—this simple habit removes 90% of daily buildup. For blade grinders, run a tablespoon of uncooked rice through the mechanism weekly to absorb residual oils (though this doesn’t replace thorough cleaning).
Store your grinder with the bean hopper empty if not using it for several days, as whole beans release oils that accelerate buildup. Keep your appliance in a cool, dry location away from steam or direct sunlight, which degrades internal components faster. Replace blades annually and burrs every 500-1,000 pounds of coffee processed—most home users need burr replacement every 3-5 years with regular maintenance.
When Opening Your Grinder Isn’t Enough
Certain problems indicate deeper issues that require professional attention despite proper cleaning. Persistent burning smells after cleaning suggest motor winding damage that creates fire hazards. Grinding noises that continue after thorough disassembly and cleaning often indicate failing bearings that require specialized replacement tools. Electrical issues like intermittent power or sparks near the switch mechanism should never be addressed by DIY repairs due to shock risks.
High-end burr grinders with electronic calibration systems often require factory reset procedures after disassembly that home users can’t replicate. If your grinder is under warranty, professional service preserves coverage while ensuring proper repair. For older models, weigh repair costs against replacement value—sometimes investing in a new grinder proves more economical than multiple professional repairs.
Preventative Maintenance Schedule for Longevity
Create a simple maintenance calendar to keep your grinder performing like new. Every week: wipe exterior surfaces and brush out visible grounds from the chute. Every month: disassemble removable parts (hopper, grounds container) for thorough cleaning. Every 3 months: perform the complete opening procedure outlined here for deep internal cleaning. Annually: inspect and replace worn components like blades, burrs, and rubber gaskets.
Track your coffee usage to anticipate part replacements—most manufacturers specify lifespan in pounds of coffee processed. Keep spare screws and small components in a labeled bag with your grinder to avoid panic when something goes missing during cleaning. With this routine, your coffee grinder will deliver consistent, flavorful results for many years, making the effort to learn how to open a coffee grinder one of the most valuable skills for any coffee enthusiast.


