
Your herb grinder’s performance directly impacts your experience, but sticky residue buildup can turn smooth grinding into a frustrating chore. When residue clogs the teeth and screens, you might find yourself wondering how to clean grinder without isopropyl alcohol—whether due to skin sensitivities, strong odor concerns, or simply preferring natural alternatives. The great news is you can achieve a deep clean using common household items that effectively dissolve stubborn buildup without harsh chemicals. This guide reveals proven alcohol-free methods that work on metal, acrylic, and wooden grinders while preserving flavor purity and extending your grinder’s lifespan.
Many users mistakenly believe isopropyl alcohol is the only effective cleaning solution, but numerous natural alternatives deliver equally impressive results with fewer drawbacks. You’ll discover how everyday kitchen staples like baking soda, vinegar, and lemon juice can tackle even the most stubborn residue, along with surprising solutions like denture tablets that require minimal scrubbing. Whether you’re dealing with light daily maintenance or heavy buildup from months of use, these methods restore optimal grinding performance while eliminating chemical aftertastes that compromise herb flavor.
Why Skip Alcohol When Cleaning Your Herb Grinder
Choosing to clean your grinder without isopropyl alcohol often stems from practical concerns that outweigh its solvent benefits. While alcohol effectively dissolves sticky residue, its strong chemical odor frequently lingers on grinder surfaces, transferring to your herbs and altering their natural flavor profile—a critical issue for connoisseurs who value pure taste. This residual smell proves particularly problematic for frequent users who notice their herbs developing an unpleasant medicinal aftertaste after alcohol cleaning sessions.
Skin sensitivities present another compelling reason to avoid alcohol-based cleaning. Repeated exposure to isopropyl alcohol during cleaning sessions can cause dryness, irritation, or allergic reactions for users with sensitive skin, especially when handling small grinder components that require thorough scrubbing. Religious or cultural considerations also drive many toward alcohol-free alternatives, as some belief systems prohibit alcohol use entirely. Additionally, households with children or pets often prefer storing non-toxic household items rather than keeping industrial solvents accessible, reducing accidental exposure risks and simplifying storage requirements without compromising cleaning effectiveness.
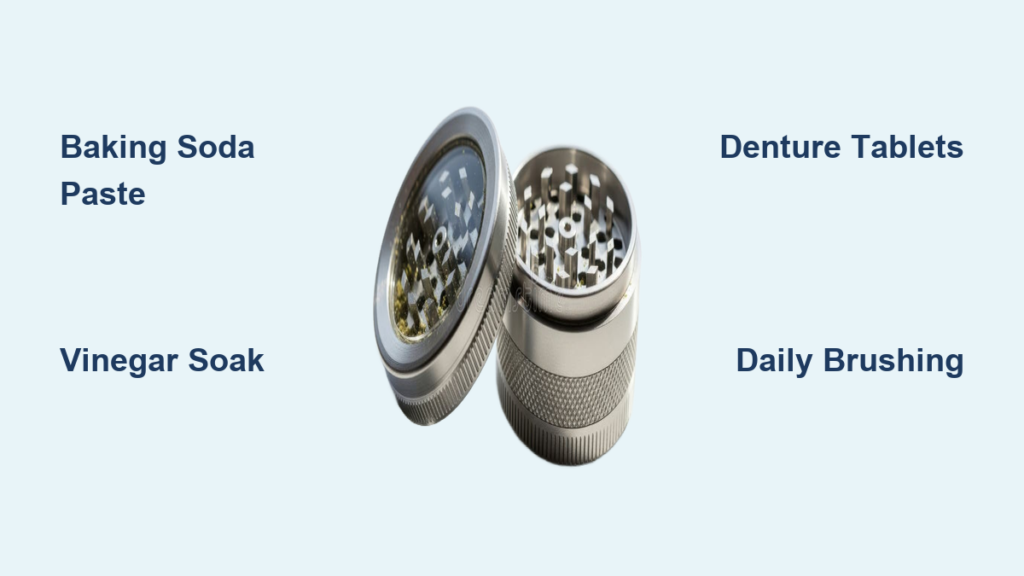
Baking Soda Deep Clean for Stubborn Residue

This baking soda method delivers powerful cleaning action for grinders with moderate to heavy buildup without damaging surfaces or leaving chemical residues. Start by completely disassembling your grinder on a clean workspace, separating the lid, grinding chamber, and kief catcher components while noting their arrangement for reassembly. For metal grinders, create a thick paste using three parts baking soda to one part warm water, applying it generously to all interior surfaces with a small brush. Focus extra attention on the grinding teeth and screen areas where residue accumulates most heavily.
Allow the paste to sit for 15-20 minutes—the dwell time is crucial as baking soda’s mild abrasive properties penetrate and loosen sticky oils. During this period, the alkaline nature of baking soda neutralizes acidic plant compounds that cause stubborn buildup. After soaking, use a soft-bristled toothbrush to scrub each component thoroughly, applying gentle circular motions to dislodge residue without scratching surfaces. For acrylic or plastic grinders, substitute room-temperature water to prevent potential warping from heat exposure while maintaining the same cleaning ratio.
Rinse each piece under warm running water for at least 30 seconds per component, ensuring all baking soda residue washes away completely from crevices and threads. Inspect your grinder under good lighting—properly cleaned teeth should appear uniformly colored without dark spots indicating remaining residue. Dry all components thoroughly with a lint-free cloth, then allow 15 minutes of air drying time before reassembly to prevent moisture-related issues like mold or rust. This method typically takes 30-40 minutes total and works best for grinders needing monthly deep cleaning.
Vinegar Soak for Heavy Buildup Removal
When residue has hardened over time, white vinegar’s acetic acid provides powerful cleaning action that dissolves mineral deposits and breaks down stubborn oils without harsh chemicals. Prepare a solution of equal parts white vinegar and warm water in a container large enough to fully submerge your disassembled grinder components. For metal grinders with extreme buildup, you can safely increase the vinegar concentration up to 3:1 (vinegar to water), but maintain the 1:1 ratio for acrylic or plastic models to prevent material degradation.
Submerge all components completely and allow them to soak for 2-4 hours, depending on buildup severity. The acetic acid works during this time to break the molecular bonds holding residue to surfaces—a process you can accelerate by gently swirling the container every 30 minutes to refresh the solution’s contact with surfaces. For best results, place the container in a warm location as heat enhances vinegar’s cleaning power (but avoid direct heat sources that could warp plastic components).
After soaking, immediately scrub each piece with a soft brush while the residue remains softened—delaying this step allows loosened material to re-adhere to surfaces. Pay special attention to screen components, holding them under running water while gently brushing from both sides to clear all openings. Rinse thoroughly for 2-3 minutes per component to eliminate all vinegar traces, as residual acidity could potentially affect future herb flavor. Complete drying requires 20-30 minutes of air drying time, making this method ideal for weekly maintenance sessions when buildup is caught early.
Denture Tablet Cleaning for Effortless Maintenance
Denture cleaning tablets offer a surprisingly effective solution that requires minimal scrubbing while reaching hard-to-access areas through effervescent action. Select a glass or ceramic container deep enough to submerge all grinder components, filling it with warm (not hot) water to activate the tablets’ cleaning properties. Drop 2-4 tablets into the water depending on container size—typically one tablet per 8 ounces of water—and wait for complete dissolution and vigorous bubbling before adding your grinder parts.
Submerge all disassembled components in the bubbling solution for 30-60 minutes, ensuring they remain fully immersed throughout. The carbon dioxide bubbles generated create gentle agitation that penetrates microscopic crevices where manual brushing can’t reach, dislodging residue through physical action rather than harsh chemicals. For grinders with severe buildup, extend the soak time up to 90 minutes but avoid exceeding this duration as prolonged exposure could potentially affect certain plastics.
After soaking, remove components and rinse under warm running water while gently brushing with a soft toothbrush—most residue will have already loosened, requiring only light brushing to remove remaining particles. This method works exceptionally well for delicate screen components that might tear during aggressive scrubbing. Complete the process with 15 minutes of air drying time before reassembly. The entire procedure takes approximately 45-75 minutes and serves as an excellent bi-weekly maintenance routine that prevents extreme buildup.
Complete Alcohol-Free Cleaning Procedure
Following this systematic approach ensures thorough cleaning regardless of your chosen method, restoring optimal grinding performance while protecting your grinder’s integrity. Begin by disassembling your grinder completely on a clean surface, tapping each section over a trash bin to remove loose herb particles before applying any cleaning solution—this prevents residue from turning into a muddy mess during cleaning. Use a small brush to remove debris from grinding teeth and screen areas, working from the top down to avoid pushing material deeper into crevices.
Select your cleaning solution based on residue severity and grinder material, applying it immediately after dry brushing while surfaces are still dry for maximum penetration. For baking soda paste, apply with a brush using firm pressure to work the abrasive into textured surfaces. With liquid solutions, ensure complete submersion and occasionally agitate components to refresh solution contact. Allow proper dwell time—15 minutes for baking soda, 30+ minutes for liquid solutions—before scrubbing, as rushing this step reduces effectiveness.
During rinsing, hold components under running water while rotating them to ensure water flows through all openings and threads. For screen components, hold them screen-side down initially to flush out loosened material, then flip to ensure complete clearance. Dry components thoroughly with a microfiber cloth, paying special attention to threaded areas where moisture can cause binding issues. Complete air drying for 15-20 minutes before reassembly ensures no hidden moisture remains in crevices. Test grinding action before regular use to confirm smooth operation—properly cleaned grinders should rotate with consistent resistance throughout the full turn.
Prevent Future Buildup With Simple Daily Habits
Implementing these preventative measures significantly reduces deep cleaning frequency while maintaining optimal grinder performance between thorough cleanings. After each use, spend 30 seconds tapping your grinder over a collection container and brushing out loose particles with a dedicated small brush—this simple habit prevents residue from hardening between sessions. For grinders with kief catchers, empty collected material every 2-3 uses to maintain proper airflow and prevent clogging that accelerates overall buildup.
Store your grinder in a cool, dry location away from direct sunlight and humidity sources, as heat and moisture accelerate resin hardening. Consider using a dedicated storage pouch with a small piece of natural wood like cedar, which naturally absorbs moisture and emits compounds that may help prevent sticky buildup. For daily users, perform a quick vinegar rinse (1 part vinegar to 3 parts water) weekly by swirling the solution through disassembled components for 5 minutes before thorough rinsing—this light maintenance prevents the extreme buildup requiring intensive cleaning sessions.
Schedule deep cleaning sessions based on usage: light users (1-2 times weekly) benefit from monthly deep cleaning, moderate users (3-4 times weekly) should deep clean every 2-3 weeks, and daily users require weekly deep cleaning to maintain peak performance. By staying ahead of residue accumulation with these simple habits, you’ll enjoy smoother grinding action, preserve herb flavor purity, and extend your grinder’s lifespan significantly—keeping cleaning sessions quick and straightforward while avoiding the need for harsh chemical solutions.


