That sinking feeling when you crave a frosty shake but your blender’s gathering dust—or worse, you’re stuck at a cabin with zero appliances. Good news: you can craft a thick, restaurant-worthy shake using just a jar and spoon. Forget lumpy disasters or watery failures; this guide delivers tested techniques from home cooks who’ve mastered blender-free shakes. Whether you’re camping, traveling, or dodging appliance cleanup, you’ll get silky-smooth results every time—no electricity required.
The secret? It’s all about temperature control and elbow grease. Ice cream that’s too hard won’t blend; too soft turns into soup. With the right container, precise ratios, and shaking rhythm, you’ll create shakes so creamy you’ll question why you ever needed a blender. Let’s dive into methods that work today with what’s already in your kitchen.
Best Containers for Shake Success (No Blender Needed)

Why a 16 oz Wide-Mouth Mason Jar Beats Everything Else
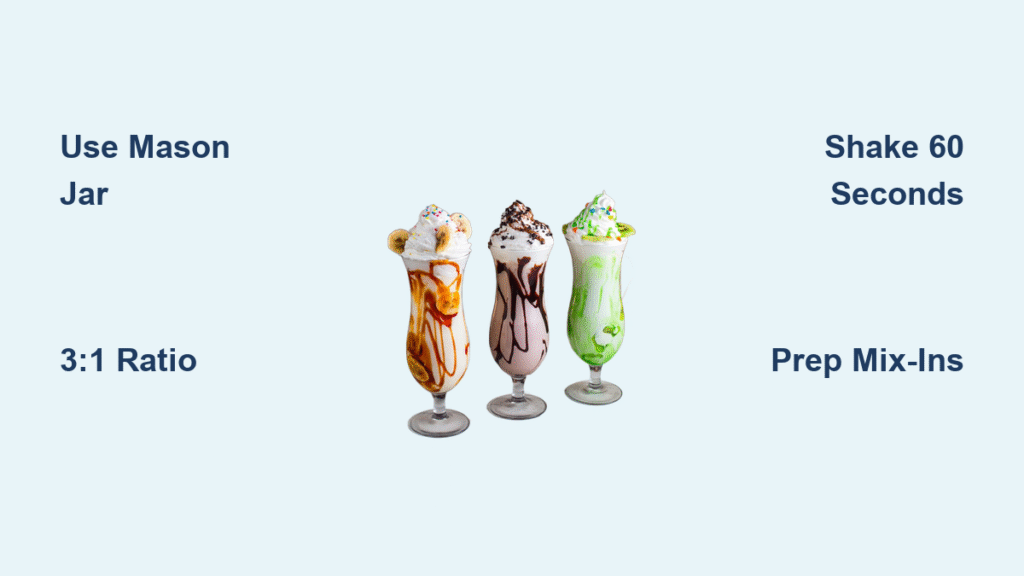
Skip plastic bottles or shaker cups—a 16 oz wide-mouth mason jar is your shake MVP. Its wide opening lets you stir stubborn lumps with a butter knife mid-shake, while glass won’t trap stale flavors like plastic. Crucially, fill it only halfway (never past ⅔ capacity). Overfilling causes leaks that turn your counter into a milkshake swamp. Pro tip: Chill the jar first for slower melting during shaking.
Scaling Up: Party-Size Shakes Without a Blender
Making two shakes? Use a 32 oz quart jar but keep the same fill line rule—halfway max. For groups, pre-portion ice cream into individual 16 oz jars, then let guests add milk and mix-ins. No mason jars? Grab a microwave-safe Tupperware with a tight lid, but wrap it in a kitchen towel for grip. Leaks happen when sweaty palms lose control during vigorous shaking—this simple trick prevents disasters.
Emergency Methods When You Have Zero Jars
Out of containers? A large mixing bowl + potato masher works for 3+ servings. Scoop ice cream directly into the bowl, add milk, and mash in a circular motion until smooth. For single-serve protein shakes, a drinking glass + spoon suffices if your ice cream is ultra-soft. Press the spoon against the glass wall while twisting—this mimics a blender’s vortex action.
Perfect Shake Ratios: Ice Cream to Milk Science

The 3:1 Rule That Prevents Watery or Cement-Like Shakes
Use 3 parts ice cream to 1 part milk as your foundation. For a single shake:
– Spoon-thick texture: 1 cup ice cream + 2–3 Tbsp milk
– Sip-through-straw texture: 1 cup ice cream + ¾ cup milk
Go beyond these ratios at your peril. Too little milk? You’ll be shaking for 5 minutes with zero results. Too much? Your shake thins into melted ice cream soup. When scaling up, add 1 Tbsp milk per extra ½ cup ice cream—this keeps consistency flawless.
Why Premium Ice Cream Demands Extra Patience
Häagen-Dazs or Tillamook creates richer shakes but fights back if rushed. Its high-fat content means it softens slower than budget brands. Budget ice cream (like store brands) whips up faster but yields lighter, less creamy results. Check the label: short ingredient lists (cream, milk, sugar, vanilla) = better shakes. Avoid “frozen dessert” buckets—they contain gums that create icy, artificial-tasting shakes.
Non-Dairy Milk Hacks for Creamy Vegan Shakes
Almond or oat milk works but lacks fat for richness. Boost creaminess by:
– Substituting heavy cream for milk (use half the amount)
– Adding 1 Tbsp coconut cream to almond milk
– Choosing full-fat canned coconut milk for tropical shakes
For protein shakes, soy milk holds up best due to its higher protein content.
Mason Jar Shake Technique: Room Temperature Mastery
Step-by-Step for Zero-Lump Shakes
- Scoop 1 cup ice cream into your 16 oz jar (use a rubber spatula to scrape every bit)
- Add 2 Tbsp milk + syrups (chocolate or caramel dissolves easiest)
- Wait 15 minutes—ice cream should dent when pressed but hold shape
- Seal tightly, grip with kitchen towel, and shake hard for 60 seconds (imagine shaking off stress!)
- Open and stir any lumps with a butter knife against the jar walls
- Pour into a chilled glass immediately—warmed glasses accelerate melting
Microwave Shortcut for Impatient Shake Lovers
When time’s short, microwave ice cream 15–30 seconds until edges just melt (no liquid pools!). This cuts shaking time to 30 seconds. Warning: Over-microwaving creates soup. Test with a spoon—if it squishes easily, stop.
Bowl Method: Family-Size Shakes Without a Blender
Mashing vs. Whisking: Texture Control Secrets
For 3–4 servings, combine 3 cups ice cream + 1 cup milk in a large bowl. Use a potato masher for nostalgic, chunky diner-style shakes. Switch to a whisk for silky-smooth results—vigorously whisk in small circles for 2 minutes. The bowl method shines for customization: divide the base mix, then let each person stir in their own Oreos or fruit.
Electric Hand-Mixer Hack (If You Own One)
This isn’t cheating—it’s smart. Mix on low speed for 30 seconds, scraping sides once. Stop immediately when smooth; over-mixing thins the shake. Perfect for protein shakes where powder clumps stubbornly.
Mix-In Mastery: No Chunks, No Problems

Prep Rules for Chunk-Free Bliss
- Candy bars: Chop into pea-sized pieces before adding (Reese’s cups melt better than Snickers)
- Cookies: Crush in a ziplock bag with a rolling pin until fine (Oreos work best)
- Nuts: Soak in milk for 5 minutes to soften—they’ll blend seamlessly
- Fresh fruit: Mash bananas or berries to pulp with a fork first—unmashed fruit creates icy bits
Syrups and Powders That Dissolve Effortlessly
Chocolate syrup, caramel, and protein powder mix in during shaking. For peanut butter, microwave 1 Tbsp for 10 seconds to liquefy it. Add powders before shaking—they distribute evenly as you agitate.
Fix These 4 Shake Emergencies (No Blender Rescue Needed)
Too Thick to Pour? The Instant Fix
Drizzle 1–2 Tbsp milk around the jar’s inner edge, reseal, and shake 10 seconds. The milk hits the thickest spots first. Never add milk directly onto ice cream—that creates uneven pockets.
Watery Shake Disaster? Reverse the Meltdown
Stir in ½ cup extra ice cream immediately. The cold ice cream re-thickens without diluting flavor. Budget ice cream works best here—it freezes faster than premium.
Ice Cream Lumps Refusing to Budge?
Let the mixture rest 2 minutes, then microwave 5–10 seconds. The brief heat softens only the lumps. Stir gently afterward—aggressive shaking now splatters.
Jar Leaking Everywhere? Seal Like a Pro
This always means overfilling or a dirty seal. Empty contents back into bowl, wipe the rubber lid ring with a damp cloth, and refill to the ½-mark. Test the seal by turning the jar upside down before adding ingredients.
Leftover Shake Storage: Avoid Icy Crystals
Freeze Once Only—Here’s Why
Pour leftovers into a jar, leaving ½-inch headspace for expansion. Freeze immediately. When thawing, let sit 10–15 minutes at room temperature, then stir vigorously. Premium ice cream (like Ben & Jerry’s) stays smoother after freezing; budget brands turn grainy. Never refreeze thawed shake—it creates icy, separated texture.
Beyond Milkshakes: 3 Blender-Free Variations
Protein Shake That Doesn’t Taste Chalky
Combine 1 scoop protein powder + ¾ cup milk + ½ cup ice cream in a jar. Shake 90 seconds (ice cream masks powder grit). For vegan, use banana instead of ice cream.
Fruit “Smoothie” That Actually Works
Mash ½ banana + ½ cup berries to pulp, add ½ cup yogurt + ¼ cup juice, then shake 45 seconds. Expect slight texture—it’s not a Vitamix, but the flavor pops.
Iced Coffee Shake Secret
Dissolve 1 tsp instant coffee in 2 Tbsp hot water, cool completely, then add to ice cream and milk. Chocolate ice cream + coffee creates a mocha magic—vanilla makes it subtle.
Single Vanilla Shake Recipe (5 Minutes, Zero Appliances)
You’ll need:
– 1 cup premium vanilla ice cream (softened 15 min)
– 2 Tbsp whole milk (or oat milk for vegan)
– Optional: 1 Tbsp chocolate syrup
Do this:
1. Combine ice cream and milk in 16 oz wide-mouth jar
2. Microwave 15 seconds or rest 15 minutes
3. Shake 60 seconds with kitchen towel grip
4. Stir any lumps with butter knife
5. Pour into chilled glass, top with syrup
Yield: One decadent 10-oz shake. Ready in under 5 minutes.
Stop letting appliance limitations kill your shake cravings. With these field-tested container hacks, ratio rules, and emergency fixes, you’ll make creamy, lump-free shakes anywhere—from a tent to a tiny apartment kitchen. The next time that midnight craving hits, grab a jar and shake it like you mean it. Your perfect shake is 60 seconds of elbow grease away.

