
You’re rushing to make your morning smoothie when your Ninja blender pitcher stubbornly refuses to click into place. Instead of that satisfying snap signaling it’s ready to blend, you’re twisting and pushing against an invisible barrier. This frustrating lock failure affects thousands of Ninja owners monthly—but here’s the good news: 90% of cases stem from five fixable issues you can resolve in under five minutes without special tools. When your Ninja blender won’t lock into base, you’re not dealing with a broken appliance but a preventable mechanical hiccup blocking the safety interlock system.
That flashing red light isn’t a death sentence—it’s your blender shouting that the pitcher isn’t fully engaged. Unlike lid-lock problems, base lock failures prevent the entire motor circuit from activating, leaving you with a silent, unresponsive unit. Whether you own a BL610 series or newer model, this guide cuts through the confusion with exact steps to diagnose and fix your lock issue. You’ll learn why your pitcher won’t seat properly, how to spot hidden damage, and when replacement is unavoidable—all using only your hands and household items.
Spot These 4 Lock Failure Signs on Your Ninja Blender
Your Ninja blender won’t lock into base if critical mechanical connections fail. Recognizing these specific symptoms prevents wasted effort on irrelevant fixes. The flashing red power light universally indicates incomplete lock engagement across all models—it means the safety interlock circuit remains open. This warning appears identical whether the issue involves debris, damaged tabs, or switch failure, so never assume it points to electrical problems.
Physical evidence confirms base lock failure before you even plug in. First, check handle positioning: On BL610 models, the handle must rotate to the front-right 45-degree position after clockwise twisting. If it stops short, the lock is incomplete. Second, inspect for visible gaps exceeding 2mm between the pitcher skirt and base rim—this tiny space should be nearly imperceptible when locked. Third, test for wobble by gently rocking the pitcher side-to-side; any movement beyond 1mm indicates failed locking tabs. Finally, verify the absence of the distinctive “click” during rotation, which signals successful tab engagement under the base collar lips.
Why Your Lid Might Be Fooling You
Many users mistakenly blame the lid when their Ninja blender won’t lock into base. Remember: The safety circuit requires simultaneous pitcher AND lid engagement. If both fail, inspect the pitcher rim first—hairline cracks here can twist the entire assembly, preventing base lock even when the pitcher appears seated. Remove the lid completely and attempt pitcher locking alone. If it clicks without the lid, your real issue is upper-rim damage or lid misalignment, not base connection failure.
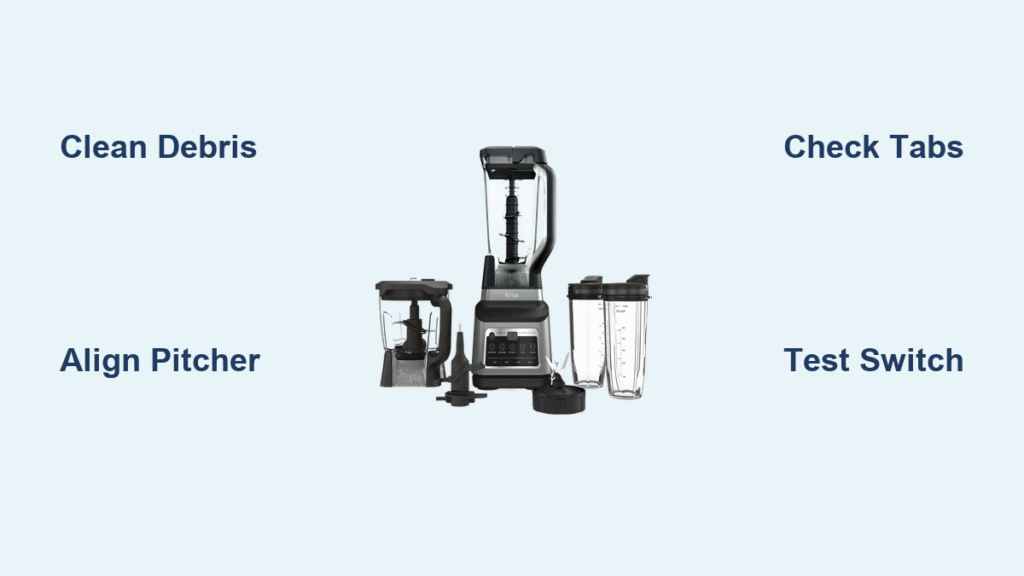
Remove Food Debris Blocking Your Ninja Blender Lock

Sticky residue jamming the drive coupling causes 80% of intermittent lock failures. Dried smoothie remnants—especially fibrous fruits like kale or sugary additives—create microscopic barriers that prevent full pitcher seating. This isn’t about visible chunks; that barely detectable sugar film on the splined metal shaft or inside the pitcher’s hexagonal recess is often the true culprit. Cleaning takes under two minutes and requires only tools you already own.
Step-by-Step Debris Removal Protocol
- Unplug and separate the pitcher from the base immediately—never attempt cleaning while connected
- Inspect the drive coupling (the splined metal shaft rising from the base) using a flashlight; look for embedded seeds or dried pulp in the grooves
- Examine the pitcher recess by flipping the pitcher upside down; check the star-shaped cavity for fibers clinging to the walls
- Dislodge debris using a wooden skewer or chopstick—never metal tools that could scratch surfaces
- Wipe both components with a damp microfiber cloth, focusing on the coupling splines and recess edges
- Test dry before reassembling—moisture can temporarily mimic debris blockage
Pro Tip: For stubborn sugar buildup, soak the pitcher recess in hot water for 90 seconds, then scrub with a soft toothbrush. The heat dissolves crystallized residues invisible to the naked eye. Always dry components completely before retesting the lock—residual moisture creates false failure diagnoses.
Align Your Ninja Pitcher Correctly: The 3-Step Method
Misalignment causes more lock failures than actual mechanical damage. Your Ninja blender won’t lock into base if the pitcher tabs miss the base collar’s engagement points—even by 2mm. Each model has precise orientation requirements stamped into the plastic, but owners often force the pitcher incorrectly when rushed. Mastering this sequence works for BL610, Auto-iQ, and Foodi models.
Universal Pitcher Placement Technique
- Start empty and dry—never attempt locking with ingredients inside, as pressure distorts alignment
- Position the handle according to your model’s embossed guides: Either front-center (older models) or 45° right (BL610 series)
- Place pitcher straight down without twisting—angle it even slightly and tabs won’t engage
- Rotate clockwise firmly until resistance increases, then push through to the audible click
- Verify final position—BL610 handles must end at 45° right; other models should have the handle flush against the base stop
Critical Visual Check: Look for alignment markers molded into the pitcher skirt. These arrows or lines must perfectly match raised ribs on the base rim. If they’re misaligned by even one tab position, the lock won’t engage. Forcing rotation past resistance risks tab damage—reposition and restart instead.
Check for Cracked Locking Tabs on Your Ninja Pitcher

Four small plastic tabs on the pitcher skirt are the unsung heroes of your locking system. When any tab cracks or wears down, your Ninja blender won’t lock into base no matter how perfectly you align it. Impact damage from drops or dishwasher heat warping creates telltale signs you can spot in seconds. Unlike debris issues, tab damage requires pitcher replacement—there are no user-repairable fixes for structural failures.
Tab Damage Identification Checklist
- Hairline fractures radiating from tab stress points (use magnifying glass if needed)
- Rounded or chipped edges instead of sharp 90-degree corners
- Missing chunks from tab surfaces where plastic has snapped off
- Asymmetrical wear—compare all four tabs for uneven degradation
Field Test for Tab Integrity: With the blender unplugged, place the pitcher on the base and attempt to rotate it counterclockwise. If you feel less resistance than usual or hear grinding, tabs are compromised. Then gently wiggle the pitcher side-to-side—any movement exceeding 1mm confirms tab failure. Replacement is mandatory here; continuing to use a damaged pitcher risks motor burnout from incomplete circuit engagement.
Diagnose a Faulty Interlock Switch on Ninja Blender Base
When your Ninja blender won’t lock into base despite clean components and intact tabs, suspect the spring-loaded micro-switch inside the base collar. This safety mechanism must depress when the pitcher seats properly to complete the motor circuit. If gummed up, bent, or internally damaged, it blocks operation even when the pitcher appears locked. Crucially, this switch failure triggers the same flashing red light as debris or alignment issues—so systematic testing is essential.
Unplugged Switch Verification Steps
- Remove the pitcher completely from the base
- Locate the switch lever—a small plastic or metal tab visible inside the base collar
- Gently depress the lever with a chopstick (never metal tools that could short circuits)
- Listen for the click and verify full spring return—sticking indicates failure
- Check for physical damage like bent levers or loose mounting
Failure Red Flags: No spring resistance when pressed, lever stuck in depressed position, or visible cracks near the switch housing. Unlike pitcher issues, base switch failures require entire base replacement—Ninja doesn’t sell standalone switches. If under warranty, contact support immediately with proof of purchase; out-of-warranty units often cost less to replace than repair.
Confirm Pitcher Warping from Dishwasher Damage
Warped pitcher bases account for less than 5% of lock failures but cause maximum confusion. Dishwasher heat or microwave misuse distorts the plastic skirt, preventing full seating on the base. The pitcher may appear locked but will rock slightly, refuse rotation, or trigger intermittent flashing lights. This damage voids Ninja’s 1-year warranty, so prevention is critical—once warped, the pitcher is unrepairable.
Warping Verification Test
- Unplug and remove the pitcher from the base
- Invert the pitcher onto a known flat surface (granite countertop or glass table)
- Check for rocking—any movement indicates warping
- Look for light gaps under the pitcher rim
- Confirm diagnosis by testing on multiple surfaces
Heat Damage Prevention: Hand-wash pitchers exclusively using warm water and mild soap. Never place in dishwasher (top or bottom rack) or microwave—even “dishwasher-safe” claims refer only to top-rack placement, which still risks warping over time. Warping shows as subtle bends near the handle attachment point—once detected, replacement is your only option.
Ninja Blender Lock Failure Troubleshooting Flowchart
Follow this diagnostic sequence to pinpoint your exact issue in under three minutes:
- Debris Check: Inspect coupling and recess; clean if needed
- Alignment Test: Re-seat pitcher using 3-step method
- Tab Examination: Verify no cracks or excessive wear
- Switch Verification: Manually test base interlock function
- Lid Elimination: Remove lid to isolate base lock issue
Replacement Decision Guide:
– ✅ Clean thoroughly if debris visible after step 1
– 🚫 Replace pitcher for cracked tabs or warping (steps 3 or 5)
– ⚠️ Replace base only if switch fails step 4 AND pitcher is undamaged
– 📞 Contact warranty if under 1 year with proof of purchase
Avoid Voiding Warranty: Critical Ninja Blender Safety Steps
Always unplug before any inspection—residual energy in the drive coupling can cause severe lacerations even when powered off. Ninja’s 1-year limited warranty covers manufacturing defects but excludes physical damage. Cracked tabs from impacts or warping from dishwasher use void coverage instantly, so retain your receipt. Never attempt disassembling the base unit; tampering with internal components invalidates all warranty claims.
When contacting Ninja support, specify “pitcher won’t lock into base” not “blender won’t work”—this directs them to mechanical diagnostics rather than electrical troubleshooting. For out-of-warranty units, genuine replacement pitchers cost $25-$40 versus $80+ for third-party bases. Never use epoxy on cracked tabs; failed adhesives can contaminate food during blending.
Most Ninja blender won’t lock into base issues resolve with a 60-second debris check and proper alignment. Start with the simplest solutions—your problem likely stems from overlooked residue or incorrect handle positioning. If cleaning and realignment fail, systematically test tabs and switches before replacing parts. Remember that flashing red light is your friend: it means safety systems work and points to mechanical fixes, not electrical doom. With these steps, you’ll restore that satisfying click and get back to blending in minutes, not days. Keep this guide handy—it solves nearly every lock failure Ninja owners face.


