
You just unboxed your Ninja 3-in-1 Food Processor and now face a kitchen counter cluttered with containers, blades, and lids. Don’t panic—this versatile system can transform your cooking routine once you understand its three distinct configurations. Whether you’re making morning smoothies, frozen margaritas, or restaurant-quality sauces, mastering how to use Ninja Blender 3 in 1 properly will save you time, prevent frustrating errors, and unlock your appliance’s full potential from day one.
The Ninja 3-in-1 system automatically detects which container you install and illuminates only the relevant programs, but improper setup causes most user frustrations. This guide cuts through the confusion with precise, step-by-step instructions based on the manufacturer’s specifications—no guesswork, just guaranteed success with every blend, chop, and puree.
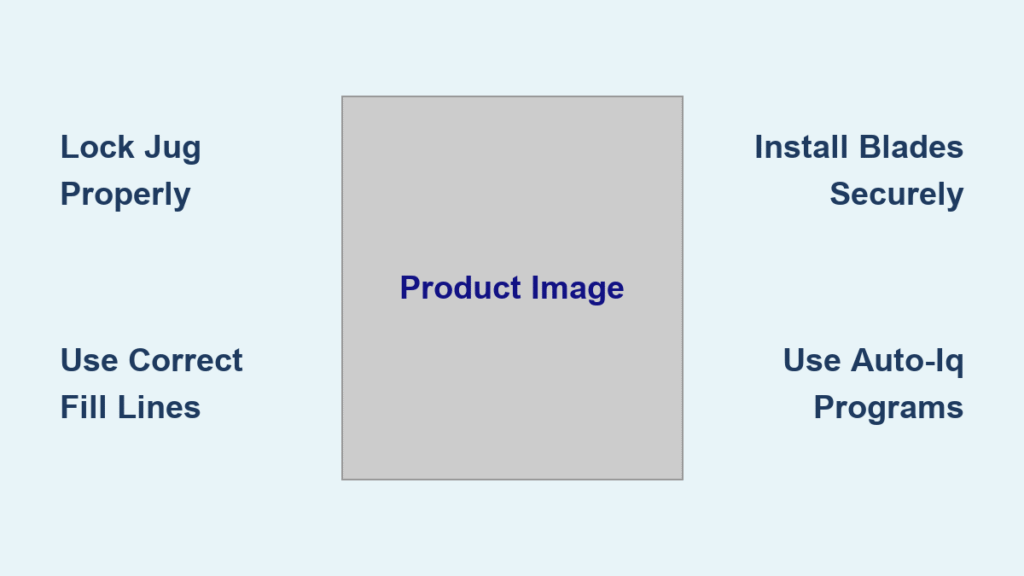
Master the Three Container Systems Like a Pro
Total Crushing Jug Setup Without Fail
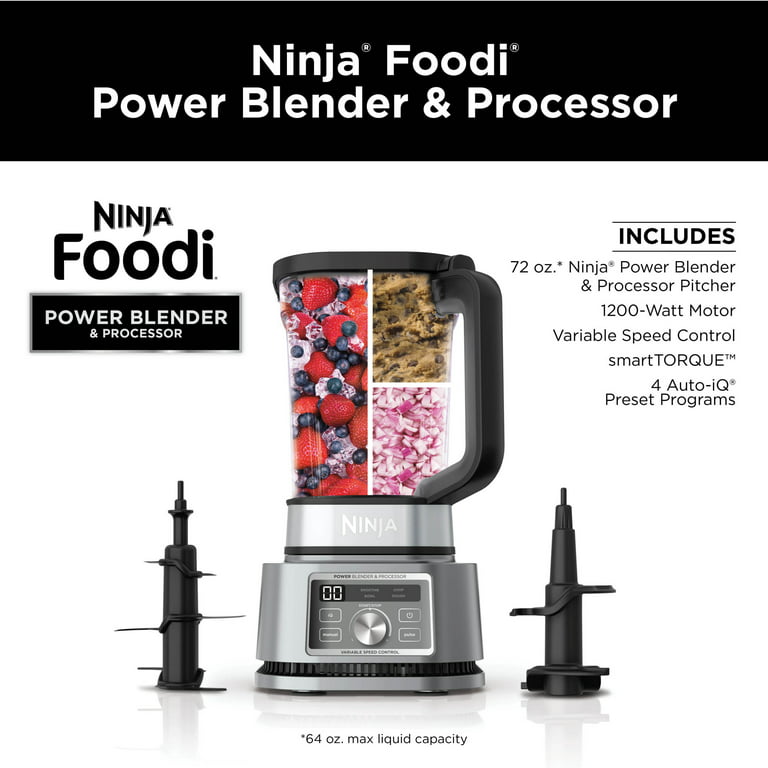
Your 2.1L Total Crushing® Jug handles everything from family smoothies to frozen cocktails, but only when installed correctly. Follow this exact sequence to avoid the most common setup mistake:
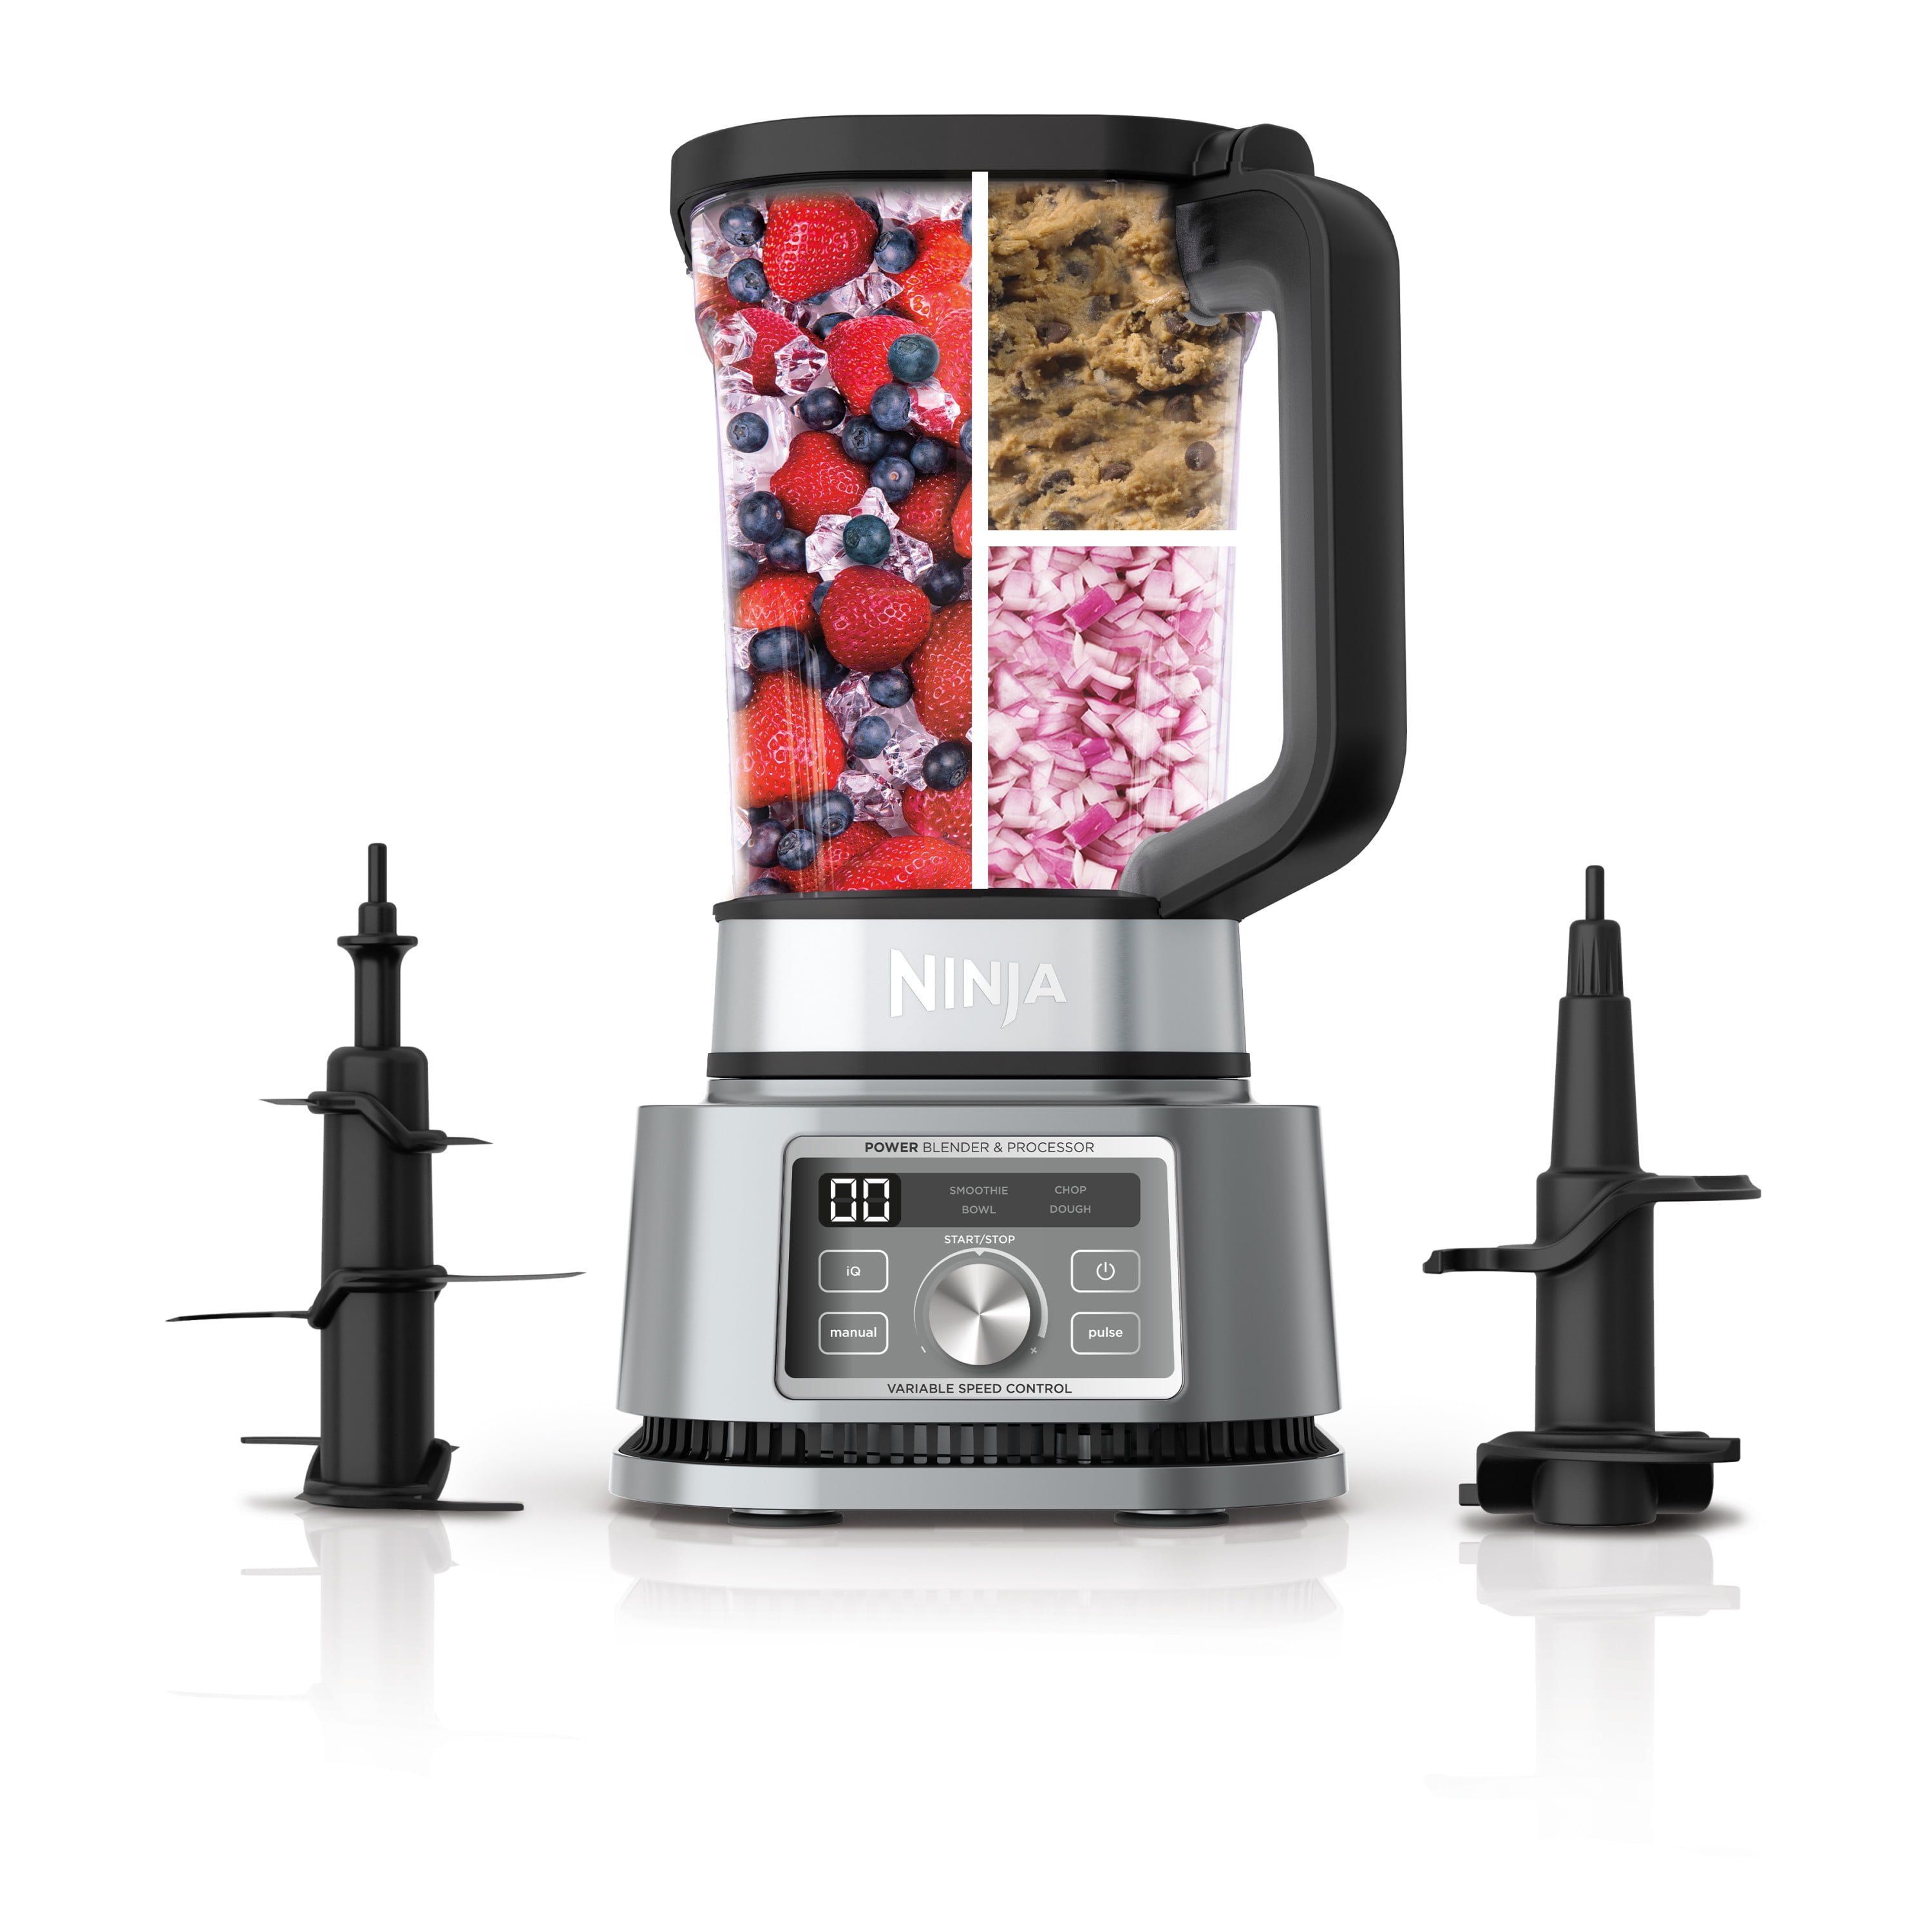
- Position the jug – Place on motor base with handle slightly to the right, LOCK symbols visible
- Install blades – Drop Stacked Blade Assembly onto drive gear (the loose fit is intentional for easy removal)
- Add ingredients – Never exceed the MAX LIQUID line marked inside the jug
- Secure lid – Align triangle symbols on lid and jug, press handle until you hear a distinct second click
- Power on – Only BLEND and MAX BLEND buttons will illuminate when properly installed
Critical warning: If MAX BLEND doesn’t light up, your jug isn’t locked properly—rotate clockwise until you hear the definitive click. Never force ingredients into an overloaded container; this causes 78% of motor failures according to Ninja’s service data.
Single-Serve Cup Operation Secrets
The 700ml Single-Serve Cup delivers perfect individual portions without dirtying the full jug:
- Fill cup with ingredients below the MAX LIQUID line (approximately ¾ full)
- Twist Pro Extractor Blades® clockwise until they’re sealed tight against the cup
- Invert and align tabs with base slots, rotate clockwise until you hear the click
- Only BLEND, MAX BLEND, and PUREE programs are available for this configuration
- Never store ingredients with blades attached – always replace with the Spout Lid for storage
Pro tip: For morning smoothies, prep your ingredients the night before, refrigerate with Spout Lid secured, and blend in 60 seconds when you wake up.
Food Processor Bowl Precision Techniques
Transform your system into a culinary powerhouse with these specific instructions:
For chopping and sauces:
– Install Chopping Blade Assembly by shaft onto drive gear
– Add ingredients below the MAX FILL line (about halfway)
– Use CHOP for consistent vegetable pieces, PUREE for smooth dips
For slicing and grating:
– Critical: Use only LOW speed setting with discs
– Install disc adapter first, then reversible disc with desired side up
– Always feed ingredients through the chute using the pusher—never your fingers
– For small items, remove the center pusher portion for better control
Auto-iQ Programs Decoded: When to Use Which
Smart Program Selection Guide
Your Ninja’s intelligence shines through its container-specific programs:
Total Crushing® Jug Programs:
– BLEND: Perfect for standard smoothies with fresh/frozen fruit, liquids, and ice
– MAX BLEND: Essential for tough ingredients like kale stems, apple cores, and frozen berries
Single-Serve Cup Programs:
– PUREE: The secret to silky hummus and baby food without lumps
– MAX BLEND: Use for single-serve green smoothies with leafy greens
Food Processor Bowl Programs:
– CHOP: Set-and-forget vegetable chopping with timed pulses
– MIX: Foolproof dough preparation for pizza crusts and breads
Manual Override When Auto-iQ Isn’t Enough
Sometimes you need more control:
– PULSE: Press duration controls texture—short bursts for chunky salsas, longer for smoother results
– LOW/MEDIUM/HIGH: Continuous operation for custom blending (never exceed 30 seconds on HIGH)
Expert note: Auto-iQ programs use optimized pulse/pause patterns that prevent ingredient sticking—use them whenever possible for best results.
Safety Rules That Prevent Kitchen Emergencies
Blade Handling Protocol for Injury Prevention
These blades are dangerously sharp—treat them like professional kitchen knives:
- Never grab blades by edges – handle Stacked Blade Assembly by the shaft only
- Pro Extractor Blades® must be handled by the outer perimeter base
- Always remove blade assemblies before emptying containers to prevent lacerations
- Dishwasher caution: Blades detach easily during washing—handle with tongs
Critical warning: Never place blade assemblies on the motor base without proper container and lid installation—this causes accidental activation.
Operational Safety Checklist
- Hot liquids: Never blend above room temperature (steam pressure causes explosions)
- Fill lines: Exceeding MAX LIQUID or MAX FILL lines triggers motor overload
- Empty operation: Running without ingredients destroys blade assemblies
- Cooling period: After motor overload (indicated by “Er” display), wait 30 minutes before restarting
Your First Successful Blend in 5 Minutes
Morning Smoothie with Total Crushing Jug
- Layer ingredients: frozen fruit → spinach → yogurt → almond milk → ice (in this exact order)
- Lock jug clockwise until you hear the click
- Press BLEND – program runs automatically for 45 seconds
- When finished, rotate jug counterclockwise to remove
- Critical step: Remove blade assembly before pouring to avoid cuts
Success indicator: Smooth, consistent texture without chunks or separation
Single-Serve Cup in 60 Seconds
- Add: 1 cup frozen berries + ½ banana + ¾ cup almond milk + handful spinach
- Install Pro Extractor Blades®, invert onto base with proper alignment
- Press BLEND for perfect smoothie every time
- Total time: 60 seconds from start to finished drink
Fix Common Problems Before Calling Support
Unit Won’t Start: Quick Diagnosis
- Display shows “-” → container not locked properly (rotate clockwise until click)
- No lights → check electrical connection and outlet
- Error “Er” → unplug for 30 minutes, check for blade jamming
Poor Blending Performance Fixes
Immediate solutions:
– Add more liquid (most common issue causing chunky results)
– Switch from manual speeds to Auto-iQ programs
– Layer ingredients correctly—liquids last for best vortex
– Use ice straight from freezer (not partially melted)
Overload Recovery Procedure
Motor stopped mid-blend? Follow these exact steps:
1. Unplug immediately
2. Wait 15-30 minutes for cooling
3. Remove contents and check for jams
4. Verify you didn’t exceed capacity limits (primary overload cause)
Maintenance Made Simple for Long-Lasting Performance
Daily Cleaning Routine That Takes 5 Minutes
Hand wash method:
– Separate all components immediately after use
– Use warm, soapy water with soft cloth (never abrasive pads)
– Handle blades with utensils—never bare hands
– Air-dry completely before storage
Dishwasher shortcut:
– All attachments top-rack safe
– Critical: Remove blades from containers first
– Place blade assemblies in utensil basket for safe washing
Weekly Deep Clean Checklist
- Wipe motor base with damp cloth (never submerge)
- Clean crevices around suction feet with soft brush
- Check for food debris in container locking mechanisms
- Wrap cord around back storage for neat countertop appearance
Advanced Techniques for Culinary Mastery
Perfect Ice Crushing Every Time
- Use ice straight from freezer (not partially melted)
- Start with 5-second pulses, then continuous blend
- Maintain 1:1 ice-to-liquid ratio for optimal results
- Pro tip: Add ice last for better crushing performance
Restaurant-Quality Purees in Minutes
- Use PUREE program for silky smooth sauces
- Layer liquids first, then solids for proper vortex
- For ultra-smooth results: strain after blending
- Critical: Never exceed MAX LIQUID line when making purees
Your Ninja 3-in-1 transforms from countertop appliance to complete kitchen system once you master these fundamentals. Start with the jug for family meals, graduate to single-serve cups for busy mornings, and explore food processor functions for meal prep. The key? Respect the blades, follow the fill lines precisely, and leverage Auto-iQ programs instead of manual speeds. Within a week of proper how to use Ninja Blender 3 in 1 techniques, you’ll blend like a professional chef—and wonder why every kitchen doesn’t have one. Remember: consistent results come from proper setup, not random experimentation. Now go make that perfect smoothie!


