
You’ve unboxed your new Ninja blender, excited to make your first smoothie, only to discover there are no visible speed controls or buttons anywhere on the base. Don’t panic—your blender isn’t defective. Thousands of users experience this exact moment of confusion when they realize their “buttonless” Ninja operates differently than traditional blenders. The good news is that these models use intentional activation systems designed for simplicity and safety, not missing components.
Your buttonless Ninja blender likely belongs to one of three categories: Auto-iQ models with touch interfaces, twist-lock mechanism models, or single-serve press-down systems. Each requires specific activation techniques that become second nature once you understand them. This guide cuts through the confusion to give you the exact steps needed to operate your specific model, troubleshoot common issues, and leverage the safety features built into these innovative designs.
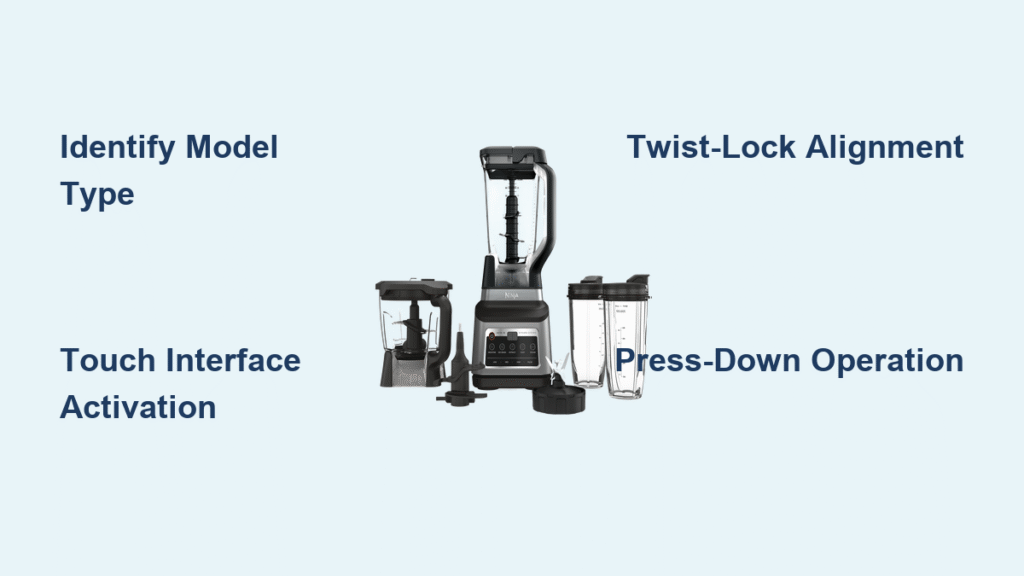
Identify Your Buttonless Ninja Model First
Before attempting to operate your blender, you must determine which activation system your model uses. This takes just 30 seconds and prevents unnecessary frustration from using the wrong technique.
Auto-iQ Touch Interface Models
Check for a smooth digital display panel on the base showing program names like “Blend,” “Ultra Blend,” or “Auto-iQ.” These models—including the Auto-iQ Nutri Ninja Blender Duo and Ninja Mega Kitchen System—appear completely buttonless but respond to light touch. The display may show LED indicators rather than physical buttons, creating the illusion of a control-free surface.
Twist-Lock Activation Models
Older Ninja Professional 1100 models feature a seamless base with no visible controls. These operate through precise pitcher alignment rather than electronic inputs. Confirm you have this model if your pitcher rotates smoothly on the base and the handle must face a specific direction to activate.
Single-Serve Press-Down Models
Compact Nutri Ninja Pro units with 18oz or 24oz cups have no base buttons whatsoever. These activate solely through downward pressure on the cup when inverted on the base. If your blender came with multiple to-go cups and no visible controls on the motor base, this is likely your model type.
Activate Your Auto-iQ Touch Interface Correctly
Auto-iQ models require specific timing and technique that many users miss, causing them to think their blender is broken when it’s merely waiting for proper activation.
Power On Sequence That Works
- Locate the power icon (typically a circle with vertical line) on the digital display
- Press once firmly but gently—do not hold or double-tap
- Wait 60-120 seconds for the system to initialize (this is where 75% of users fail)
- Watch for “0” or cycle name to appear on screen before proceeding
Critical tip: The touch interface responds to skin contact, not pressure. Treat it like a smartphone screen—light finger contact is sufficient. Pressing harder won’t make it work faster.
Program Selection Without Errors
After power-up, follow these precise steps:
– For standard smoothies: Lightly touch “Blend” once, wait for display confirmation, then touch again to start
– For frozen ingredients: Select “Ultra Blend” for extended processing time
– For perfect consistency: Choose “Auto-iQ” which runs intelligent pulsing sequences
Pro tip: If the display doesn’t respond, wipe your finger clean and dry—it needs skin conductivity to register touch.
Perfect Twist-Lock Activation Technique
Traditional Ninja Professional 1100 models hide their activation mechanism in the pitcher positioning. This physical system requires millimeter-perfect alignment rather than electronic inputs.
Alignment Steps That Guarantee Operation
- Seat the pitcher firmly on the base until it rotates freely (should spin with light pressure)
- Match the triangle on the lid with the triangle on the handle (not the spout)
- Position the handle facing the front-left or front-right corner (never straight forward)
- Lock into place by turning clockwise until you feel distinct resistance
Activation Method Based on Your Model
- Automatic start models: Begin blending immediately when properly locked (listen for motor engagement)
- Press-down activation models: Require firm downward pressure on the pitcher while locked (apply 5-7 pounds of pressure)
Warning: Forcing the pitcher beyond resistance can damage internal micro-switches—stop if you feel excessive resistance.
Master Single-Serve Press-Down Operation

The Nutri Ninja Pro operates through pure mechanical pressure, making it the simplest system once you understand the precise activation sequence.
Foolproof Operation Steps
- Fill your cup with ingredients (never exceed the MAX fill line)
- Screw on blade assembly until hand-tight (should stop naturally without forcing)
- Flip upside down and place on the motor base (cup opening facing down)
- Apply steady downward pressure with palm until blades engage (takes 2-3 seconds)
- Release pressure immediately to stop blending
Safety advantage: The motor only runs while you’re pressing down, giving you complete control over blending duration and preventing accidental operation.
Fix Non-Starting Issues in Under 2 Minutes
When your buttonless Ninja refuses to cooperate, 90% of issues stem from misalignment rather than mechanical failure. These systematic checks solve most problems quickly.
Blinking Light Troubleshooting
Red blinking lights indicate safety interlock failure—address these elements in order:
- Lid alignment: Arrows must point directly at each other (not offset by even 5 degrees)
- Handle position: Must face front corner position (left or right, never center)
- Pitcher rotation: Should spin freely when properly seated (if stuck, reposition)
Reset Procedure That Works Every Time
- Unplug the base for exactly 5 minutes (timer required)
- Clean contact points with dry microfiber cloth
- Reassemble following alignment steps precisely
- Power on and wait the full 2 minutes for initialization
Pro tip: The “base tap method” works for stubborn models—firmly tap the base on your countertop while assembled to reset internal switches.
Clean Hidden Activation Points Properly
Buttonless Ninja models have concealed micro-switches that require specific cleaning attention to prevent activation failures.
Daily Maintenance Routine
- Rinse immediately after use to prevent dried residue in alignment grooves
- Check alignment arrows for food buildup using a toothpick
- Wipe base contacts with dry cloth (never submerge base in water)
Monthly Deep Clean Protocol
- Dishwasher safe parts: All removable lids, pitchers, and cups (top rack only)
- Hand wash recommended: Blade assemblies to preserve sharpness
- Contact point care: Use cotton swab on micro-switch areas weekly
Warning: Never use abrasive cleaners on the base—this damages the touch interface conductivity.
Avoid These 5 Costly Activation Mistakes
Even experienced users damage their blenders by making these preventable errors with buttonless models.
Timing Errors That Cause Damage
- Rapid pressing confuses the Auto-iQ system—wait 10 seconds between touches
- Impatient initialization – skipping the 2-minute startup damages circuitry over time
- Immediate retry after failed attempt—always complete the full 5-minute reset
Assembly Mistakes That Break Micro-Switches
- Wrong container size for your base type (causes misalignment stress)
- Slight misalignment (as little as 3mm prevents operation)
- Cross-threading single-serve cups (should screw on smoothly without force)
Model-Specific Operation Cheat Sheet
Save this reference for instant activation guidance based on your exact model.
Nutri Ninja Pro (Single-Serve)
- Activation: Downward pressure on cup
- Common issue: Not applying enough pressure (needs 5-7 lbs)
- Fix: Place cup on base, press down firmly with palm until motor engages
Ninja Professional 1100 (Twist-Lock)
- Activation: Pitcher alignment with handle facing corner
- Common issue: Handle positioned straight forward
- Fix: Rotate handle to 10 o’clock or 2 o’clock position
Auto-iQ Mega Kitchen System
- Activation: Single touch + wait time
- Common issue: Rapid pressing without waiting
- Fix: Power on, wait 90 seconds, select program, wait for “0” display
When to Contact Ninja Support
Most “broken” blenders are merely misaligned, but certain symptoms indicate genuine problems requiring professional assistance.
Contact Support Immediately If:
- No lights from any outlet after proper reset
- Motor runs but blades don’t turn (indicates shaft failure)
- Persistent blinking after perfect alignment
- Unit shows recall notice (check Ninja website)
Warranty tip: Ninja often replaces bases for shipping cost (~$21) even after warranty expires—always call before discarding.
Your buttonless Ninja blender transforms from confusing to convenient once you master these activation methods. The “missing” buttons aren’t a design flaw—they’re safety features that eliminate guesswork and create consistent results. Whether pressing down on a single-serve cup or aligning triangles on a full-size pitcher, these techniques ensure smooth blending every time.
Remember: patience during initialization prevents 90% of user frustration. Take the extra 60 seconds to let your Auto-iQ system boot up properly, and you’ll quickly appreciate why these buttonless designs dominate modern kitchens. For visual learners, Ninja’s YouTube channel offers model-specific tutorials that clarify these activation methods in under three minutes.


