
Your morning smoothie session turns into a sticky disaster when brown liquid starts oozing from the base of your Ninja blender. That worn rubber seal has finally failed, but don’t reach for the trash can just yet—replacing your Ninja blender rubber seal takes just 15 minutes, costs under $10, and requires no special skills. Whether you’re battling leaks from an authentic Ninja Professional 900W or discovered your “Ninja” is actually an Oster MyBlend BLSTPB-WPK, this guide delivers the exact steps to stop leaks permanently. You’ll learn how to identify your specific model, source the correct replacement seal, and install it properly to prevent costly motor damage.
The most critical step before replacing your Ninja blender rubber seal is identifying your exact model—many users mistakenly believe their Oster MyBlend is a Ninja. Authentic Ninja blenders have model-specific seals that aren’t interchangeable, while the pink and white Oster MyBlend BLSTPB-WPK uses a standard Oster part #124461-000-000. Getting this wrong means wasting money on incompatible parts. By the end of this guide, you’ll know precisely which seal to buy and how to install it correctly the first time.
Pinpoint Your Exact Blender Model Before Ordering
Don’t guess—verify your model to avoid buying the wrong rubber seal. Many users waste money replacing their Ninja blender rubber seal only to discover their unit isn’t actually a Ninja.
Locate Your True Model Number
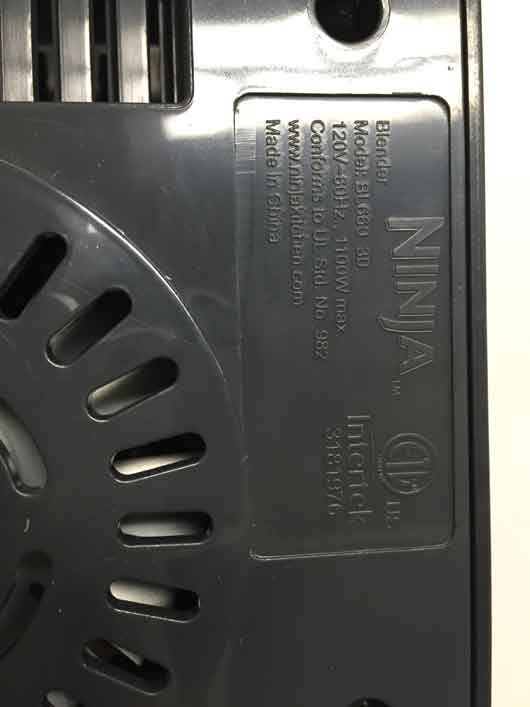
- Check the motor base sticker: Unplug your blender and flip it over to find a white label with model information
- Authentic Ninja units: Look for “Ninja” branding followed by model codes like BL660 (Professional), BL480 (Nutri Ninja), or BL770 (Mega Kitchen System)
- Oster MyBlend giveaway: If you see “BLSTPB-WPK” on the base, you have an Oster MyBlend—not a Ninja—despite similar appearance
Critical Seal Compatibility Differences
- Oster MyBlend (BLSTPB-WPK): Uses simple removable Oster part #124461-000-000 silicone ring costing $6-8
- Ninja Professional 900W: Has integrated seal requiring full blade assembly replacement ($20-35)
- Nutri Ninja models: Feature model-specific gaskets that won’t fit Professional series units
Recognize These 5 Urgent Rubber Seal Failure Signs

Immediate Replacement Indicators
- Visible split in seal: A clear gap in the circular rubber ring means liquid will escape during blending
- Warped or stretched shape: When the gasket no longer forms a perfect circle, it can’t create a tight seal
- Rapid leaking: Liquid escaping within 10 seconds of starting your blender signals critical failure
- Pitcher wobble: Container won’t tighten securely due to compromised seal integrity
- Lid popping off: Pressure loss from seal failure forces the lid to dislodge during operation
Hidden Damage Warnings
- Electrical burning smell: Indicates liquid has reached motor components—stop using immediately
- Smoke from base: Visible smoke means motor damage has already occurred
- Cracked plastic: Hairline fractures around blade assembly accelerate seal failure
Gather These 5 Essential Tools for Seal Replacement
You need only basic household items to replace your Ninja blender rubber seal:
– New compatible seal (verify model first)
– Small flathead screwdriver or plastic pry tool
– Warm soapy water and soft-bristled brush
– Clean microfiber towel
– Flashlight for inspection
Pro tip: Keep a paring knife handy for stubborn residue removal, but be extremely careful not to nick the new seal during installation. Compressed air helps dry hard-to-reach areas completely—any moisture prevents proper sealing.
Remove Old Seal Without Damaging Your Blender
Critical Safety Preparations
- Unplug and cool: Wait 30 minutes after last use to prevent electrical hazards
- Clear workspace: Remove all liquids to avoid contamination
- Document assembly: Take photos of blade unit before disassembly
Model-Specific Removal Process
For Oster MyBlend (BLSTPB-WPK):
1. Flip blade assembly upside down to access seal groove
2. Insert pry tool gently at one point under gasket edge
3. Work slowly around circle lifting seal evenly to avoid scratching plastic
4. Remove all fragments—even tiny pieces prevent proper sealing
For Authentic Ninja Models:
– Professional series: Entire blade assembly must be replaced—seal is not removable separately
– Nutri Ninja: Some models allow gasket removal with careful prying
Deep Clean Seal Groove for Perfect Installation
Professional-Grade Cleaning Method
- Soak for 5 minutes in warm, soapy water to soften residue
- Scrub thoroughly with soft brush around entire groove
- Use flashlight to spot hidden debris in shadowed areas
- Rinse until water runs clear—any residue compromises seal
- Dry completely with microfiber towel and air dry 10 minutes
Critical Inspection Points
- Check for cracks in plastic around seal area—replace entire assembly if found
- Verify blade sharpness—dull blades cause vibration that breaks seals
- Examine container threads for damage that prevents tight sealing
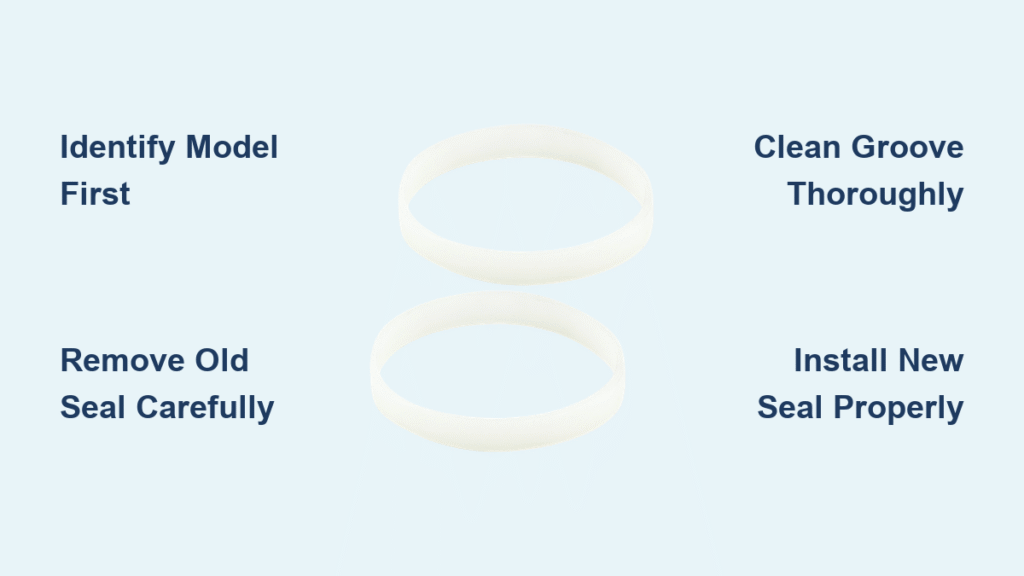
Install New Rubber Seal for Leak-Proof Performance
Precision Installation Steps
- Hold seal flat between thumb and forefinger to avoid twisting
- Start at one point in the groove and press gently into place
- Work around circle ensuring even pressure and seating
- Run finger around seal to confirm no kinks or gaps exist
Validation Checklist
- No visible twists: Gasket forms perfect, smooth circle
- Finger test: Runs smoothly around entire circumference
- Test fit: Blade assembly attaches securely without wobble
- Visual inspection: No part of seal sits above groove level
Test Your Ninja Blender Rubber Seal Repair
30-Second Leak Verification
- Fill pitcher with 2 cups water (no blades installed)
- Secure assembly firmly but don’t over-tighten
- Invert blender and hold for 15 seconds
- Check base for any moisture leakage
- Blend test: Run 10 seconds on medium speed if initial test passes
Troubleshooting Persistent Leaks
- Re-seating required: Remove and reinstall seal ensuring perfect alignment
- Container damage: Hairline cracks near threads require pitcher replacement
- Lid issue: Verify lid locks properly before blaming the seal
- Blade vibration: Sharpen dull blades that create excessive movement
Extend Your New Seal’s Lifespan With These Pro Tips
Monthly Maintenance Routine
- Visual inspection: Check for cracks or stretching before each use
- Post-blend cleaning: Rinse immediately after use to prevent residue buildup
- Deep cleaning: Remove seal monthly for thorough washing in warm soapy water
- Proper storage: Store with lid slightly ajar to prevent seal compression
Seal Longevity Boosters
- Hand wash preferred: Dishwasher heat degrades silicone seals faster
- Avoid over-tightening: Excessive force deforms seals within weeks
- Annual replacement: Heavy users should replace seals yearly as preventive maintenance
- Upgrade container: Switch to stainless steel pitcher for durability with high-torque blending
Source Correct Parts From These Verified Suppliers
Authentic Replacement Sources
- NinjaKitchen.com: Guaranteed genuine parts for authentic Ninja models
- Oster.com: Direct source for MyBlend BLSTPB-WPK gaskets
- Amazon: Search “Oster 124461-000-000” for verified MyBlend seals
- Local appliance stores: Often stock common gaskets for immediate replacement
Cost Comparison Guide
| Model Type | Genuine Part Cost | Quality Aftermarket | Savings |
|---|---|---|---|
| Oster MyBlend | $7.99 | $4.99 | 38% |
| Ninja Professional | $29.99 | $19.99 | 33% |
| Nutri Ninja | $24.99 | $15.99 | 36% |
When to Stop DIY and Call a Professional
Discontinue repairs immediately if you notice:
– Motor smoking or burning electrical smell
– Visible liquid inside motor housing
– Cracks in plastic base around blade assembly
– Repeated leaks despite correct seal installation
Contact manufacturer service centers for warranty-safe repairs on electrical components or structural damage. Attempting further DIY repairs on these issues creates serious electrical hazards and voids any remaining warranty coverage.
Final Tip: A $10 rubber seal replacement prevents $100+ motor damage from liquid leaks. Always verify your exact model before ordering parts—most “Ninja” leaks actually stem from Oster MyBlend units requiring part #124461-000-000. Complete this 15-minute fix during your lunch break and enjoy leak-free blending tomorrow morning. For heavy users, set a calendar reminder to inspect your Ninja blender rubber seal every 3 months—prevention beats emergency repairs every time.


