
Whipped cream elevates everything from morning coffee to elaborate desserts, but not everyone owns a stand mixer or handheld whisk. Your Ninja blender can transform cold cream into fluffy peaks in under a minute—when you know the precise technique. Unlike traditional whipping methods, the Ninja’s powerful blades require careful timing and temperature control to avoid turning your cream into butter. This guide delivers the exact settings, ingredient ratios, and visual cues you need to master whipped cream creation in your Ninja blender, eliminating guesswork and wasted ingredients.
The frustration of over-whipped cream or failed attempts disappears when you understand your blender’s unique mechanics. With these proven techniques, you’ll consistently achieve restaurant-quality whipped cream that holds its shape for hours. Whether you’re preparing last-minute toppings or planning dessert presentations, this method works reliably across multiple Ninja models. Let’s transform your blender from a smoothie maker into a professional dessert tool.
Cold Ingredients: Your Secret Weapon for Perfect Peaks
Why Temperature Determines Success
Chilling your heavy cream to 35-40°F before blending creates the ideal environment for fat molecules to trap air. Warm cream won’t incorporate air properly, resulting in thin, runny texture that never achieves proper peaks. Place your cream in the refrigerator for at least 12 hours before use, and don’t skip chilling your Ninja pitcher and blade assembly for 15 minutes prior to blending.
Optimal Fat Content for Ninja Blending
Use heavy cream with 35-40% milk fat content—the sweet spot for Ninja blenders. Lower fat creams like whipping cream (30-35% fat) often fail to stabilize, while ultra-pasteurized varieties with higher fat content can over-whip in seconds. Check your carton’s label carefully, as fat percentages vary between brands. When in doubt, opt for standard heavy whipping cream from reputable dairy producers.
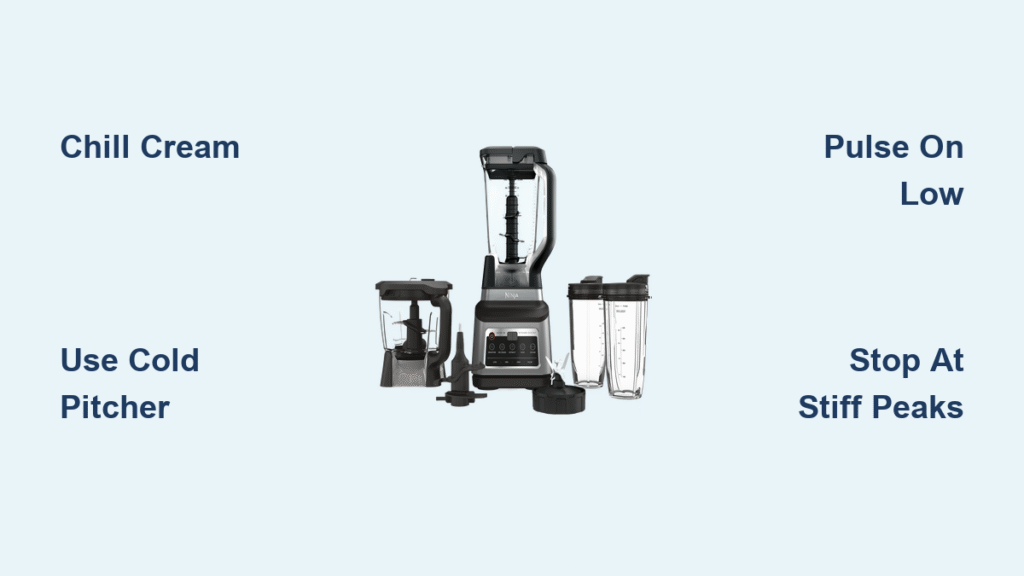
Ninja Blender Model-Specific Techniques

Matching Pitcher Size to Cream Volume
Using the smallest pitcher that accommodates your cream volume creates proper vortex action. For single servings (½ cup cream), use the 16-ounce pitcher; for standard batches (1 cup cream), the 24-ounce container works best. Oversized containers prevent adequate air incorporation, yielding thin, flat whipped cream. Never fill your pitcher more than one-third full—whipped cream expands 2-3 times during processing.
Blade Configuration Matters
Standard multi-blade assemblies work for basic whipping, but single-tier blades generate superior air circulation. If your Ninja model includes both options, choose the single blade for lighter, fluffier results. The blade’s position in the pitcher base affects performance—ensure it’s securely locked with no wobble before adding ingredients. For models with dual-layer blades, remove the top layer to prevent over-processing.
Precise Blending Protocol for Flawless Results
Stage 1: Gentle Incorporation
Add 1 cup chilled heavy cream and 1-2 tablespoons of your chosen sweetener to the pre-chilled pitcher. Secure the lid tightly and pulse 3-4 times on LOW (speed 1) for 2-second intervals. This initial phase combines ingredients without incorporating excessive air. Listen for the sound change from liquid sloshing to a thicker consistency before proceeding.
Stage 2: Air Infusion Process
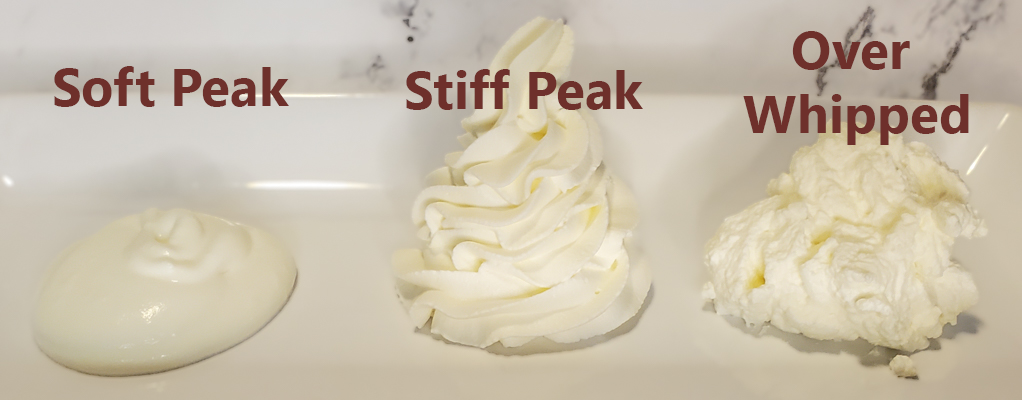
Switch to MEDIUM speed (speed 3) and blend continuously for exactly 15 seconds. Watch through the pitcher as the cream thickens and doubles in volume. Stop immediately if you see the cream pulling away from the pitcher walls—this signals over-whipping has begun. The ideal texture at this stage resembles softly beaten egg whites with visible ribbons when lifted.
Stage 3: Final Peak Development
Increase to HIGH speed (speed 5) for 20-30 seconds while monitoring through the pitcher. Perfect stiff peaks form when the cream stands straight up with sharp edges when lifted. Critical warning: Stop blending the moment you achieve desired consistency—Ninja blenders can turn cream to butter in 5-10 seconds past this point. Total processing time ranges from 45-90 seconds depending on cream temperature and desired firmness.
Rescue Techniques for Common Whipping Failures
Saving Over-Whipped Cream
If your cream develops a grainy texture or separates, immediately stop blending and add 2 tablespoons of unwhipped cold cream. Pulse 2-3 times on LOW speed to reintegrate the fat molecules. This technique works up to the point where butter granules become visible—once distinct yellow specks appear, recovery is impossible. Prevention is better than cure: set a timer and watch closely during the final high-speed phase.
Fixing Runny Whipped Cream
When cream won’t thicken despite proper timing, chill the entire pitcher in the freezer for 5 minutes, then resume blending on MEDIUM speed for 10-second intervals. Never add more cream to thin mixtures—this dilutes the fat content further. If using room-temperature ingredients was the culprit, start over with properly chilled components. Check your cream’s expiration date, as older dairy products lose whipping ability.
Flavor Customization Without Compromising Texture

Stable Flavor Infusions
Add ½ teaspoon pure vanilla extract or 1 tablespoon sifted cocoa powder with your sweetener before blending. For mocha flavor, dissolve ½ teaspoon instant coffee in 1 teaspoon hot water, then cool completely before adding. Avoid liquid flavorings exceeding 1 tablespoon per cup of cream—they weaken the protein structure. Always add flavorings during the initial incorporation phase for even distribution.
Stabilized Whipped Cream for Extended Use
For cream that holds shape up to 24 hours, incorporate 1 tablespoon instant vanilla pudding mix or ½ teaspoon unflavored gelatin powder dissolved in 1 tablespoon cold water. These stabilizers prevent weeping without affecting flavor. The additional ingredients slightly increase processing time—add 5-10 seconds to your high-speed phase while monitoring closely for over-whipping.
Storage Solutions and Make-Ahead Strategies
Proper Refrigeration Technique
Transfer whipped cream to an airtight container with minimal headspace. Press plastic wrap directly onto the surface before sealing to prevent skin formation. Store in the coldest part of your refrigerator (not the door) for up to 24 hours. Important: Never freeze whipped cream in its blended form—this destroys the air structure. Instead, pipe dollops onto parchment paper, freeze solid, then transfer to freezer bags for up to 2 months.
Reviving Deflated Cream
If stored cream loses volume, transfer to a clean Ninja pitcher and pulse 3-4 times on LOW speed for 2-second intervals. Over-processing during revival causes immediate separation. For best results, whip cream fresh whenever possible—revived versions work well for toppings but won’t hold intricate piping shapes.
Ninja-Specific Pro Tips for Foolproof Results
Sound-Based Timing Method
Learn to recognize the audio shift from liquid sloshing to thick whirring that occurs during proper whipping. This auditory cue provides critical timing information beyond visual observation. When the motor sound becomes higher-pitched and consistent, check for peaks immediately—this typically occurs at the 45-second mark with properly chilled ingredients.
Batch Size Optimization
Process no more than 1 cup of cream per batch for optimal results. Larger quantities require extended blending that risks uneven texture. For parties, prepare multiple small batches rather than one large one. Work efficiently—have all ingredients measured and equipment chilled before starting, as delays during the process warm the cream and compromise results.
Immediate Cleanup Protocol
Rinse your Ninja pitcher and blades with cold water immediately after use. Warm water causes fat to adhere permanently to surfaces, creating difficult-to-remove residue. Soak stubborn buildup in cold water with a drop of dish soap for 10 minutes before washing. Never use hot water on cream-coated components—it essentially “cooks” dairy onto the plastic.
Mastering whipped cream in your Ninja blender transforms it from a kitchen appliance into a dessert essential. By following these precise temperature controls, timing protocols, and model-specific techniques, you’ll consistently create perfect peaks that elevate every sweet creation. Remember that cold ingredients, proper pitcher selection, and vigilant monitoring are your keys to success—your Ninja blender can outperform traditional methods when used correctly. The next time you need fresh whipped cream, skip the cans and let your Ninja deliver restaurant-quality results in under a minute.


