
Tired of spending $4 on store-bought oat milk that separates in your coffee? Your Ninja blender holds the secret to barista-quality oat milk in under 5 minutes—without the slimy texture that ruins most homemade batches. Unlike standard blenders that heat oats during processing, Ninja’s unique Frozen Drink setting prevents starch activation that turns your milk into liquid oatmeal. You’ll save money, avoid additives, and create a creamier alternative perfect for lattes and baking. This guide reveals the exact Ninja-optimized techniques professional baristas use, transforming basic pantry staples into dairy-free perfection.
Forget pre-soaking oats or expensive additives. The key lies in controlling temperature and blend time—two factors where Ninja blenders outperform competitors. By leveraging your blender’s Chill functionality and precise 20-second cycles, you’ll extract maximum creaminess while avoiding gummy results. Whether you own a Ninja Hot & Cold or standard model, these science-backed methods work every time. Get ready to make oat milk so smooth, you’ll never buy it again.
Why Ninja Blenders Prevent Slimy Oat Milk
Ninja blenders solve the #1 problem in homemade oat milk: heat-induced starch activation. Standard high-speed blenders create friction that warms oats during blending, triggering the same process that makes stovetop oatmeal gummy. Your Ninja avoids this through two critical features:
Frozen Drink Setting stops blade momentum from heating your mixture by pulsing at optimal intervals. Chill Functionality maintains ice-cold temperatures throughout the 20-second cycle, preventing starch breakdown. This dual approach keeps oats below 85°F—the temperature threshold where sliminess begins.
Pro Tip: On non-thermal Ninja models, blend in three 7-second pulses with 10-second rests. This mimics the Frozen Drink setting’s cooling effect while giving you precise time control.
Choose Ninja-Approved Oats (Avoid These Mistakes)
Rolled oats only—not steel-cut or quick oats—deliver perfect Ninja results. Steel-cut oats resist full breakdown, creating gritty milk. Quick oats over-process instantly due to pre-cooking, flooding your mixture with starch. Always select certified organic, gluten-free rolled oats to avoid glyphosate contamination and wheat cross-contact.
Critical Warning: Never use instant oats—they contain stabilizers that guarantee slimy results. Store oats in your freezer for extra-cold blending and 6-month freshness.
Ninja-Optimized Water-to-Oat Ratios
| Texture Goal | Oats | Water | Ninja Setting |
|---|---|---|---|
| Barista Cream | 1 cup | 2 cups | Frozen Drink (15 sec) |
| Standard Creamy | 1 cup | 3 cups | Frozen Drink (20 sec) |
| Light & Pourable | 1 cup | 4 cups | Frozen Drink (25 sec) |
Ice-cold water is non-negotiable. Room-temperature water activates starches immediately, creating glue-like texture. Fill 1 cup of your water measurement with ice cubes if your fridge isn’t cold enough. For best results, chill water overnight in glass containers.
Ninja Blending Sequence: 20-Second Method
Setup for Success (90 Seconds)
- Add 1 cup frozen rolled oats directly to Ninja pitcher
- Pour 3 cups ice-cold water (with 1 cup ice if needed)
- Skip pre-soaking—it creates mucilage that guarantees sliminess
Exact Blending Protocol
- Secure lid with locking mechanism engaged
- Select Frozen Drink setting and start timer
- Blend exactly 20 seconds—stop immediately at 20
- Check texture: Should resemble thin cream, not foam
Warning: If pitcher feels warm, restart with colder water. Over-blending by just 5 seconds triggers starch release—set phone timer as backup.
Strain Like a Pro: Zero-Slime Technique

Ninja Straining Setup
- Place nut milk bag over large measuring cup
- Pour mixture in ¼-cup batches to prevent overflow
- Never squeeze pulp—let gravity drip for 5+ minutes
Critical Straining Errors
- ❌ Shaking container mixes starch into milk
- ❌ Pressing pulp forces gummy residue through
- ❌ Using cheesecloth (too porous for fine starch)
Pro Move: Strain into clear glass—watch creamy top layer separate from sediment. Discard final 10% where starch concentrates.
Flavor Boosters That Won’t Ruin Texture
Ninja-Safe Additions (Blend 5 Extra Seconds)
- Salt: ⅛ tsp (enhances natural oat sweetness)
- Maple syrup: 1-2 tbsp (liquid sweeteners blend instantly)
- Vanilla: ½ tsp (adds depth without graininess)
Advanced Ninja Variations
- Mocha: 1 tbsp cocoa powder + 1 tbsp maple syrup
- Protein Oat Milk: 1 scoop unflavored powder (blend 25 sec max)
- Cinnamon Spice: ½ tsp cinnamon + pinch nutmeg
Warning: Avoid dates—they won’t fully break down in short cycles and create gritty texture.
Storage Secrets for 7-Day Freshness
Glass mason jars prevent flavor absorption from plastic. Fill containers to the brim to minimize oxidation. Your Ninja oat milk lasts 5-7 days refrigerated—separation is normal (shake gently before use). Discard immediately if sour smell develops.
Freezer Hack: Pour into ice cube trays for smoothie portions. Thaw overnight in fridge—keeps 3 months without texture loss.
Troubleshooting Ninja Oat Milk Problems
| Issue | Cause | Ninja Fix |
|---|---|---|
| Gummy texture | Over-blending | Reduce to 15 seconds; add ice |
| Watery consistency | Too much water | Use 2.5 cups water per 1 cup oats |
| Bitter aftertaste | Old oats | Freeze fresh oats overnight before use |
| Excess sediment | Warm water | Chill pitcher in freezer 10 minutes pre-blend |
Critical Insight: If milk thickens after refrigeration, it’s over-blended. Restart with colder oats and 18-second blend time.
Best Uses for Ninja Homemade Oat Milk
Coffee Perfection
- Hot lattes: Creates microfoam better than store-bought
- Iced coffee: Zero separation even in cold brew
- Mocha: Cocoa blends smoothly without clumping
Baking Successes
- 1:1 dairy substitute in muffins and cakes
- Overnight oats: Adds creaminess without sliminess
- Pancakes: Creates golden-brown exterior
Avoid These Applications
- ❌ Frothing (lacks fat for stable foam)
- ❌ Hot chocolate (thickens into pudding)
- ❌ Savory sauces (oat flavor competes)
Transform Ninja Oat Pulp Leftovers
Don’t waste pulp—it’s packed with fiber. Make these in under 5 minutes:
Instant Pulp Recipes
- Breakfast booster: Stir 2 tbsp into morning oatmeal
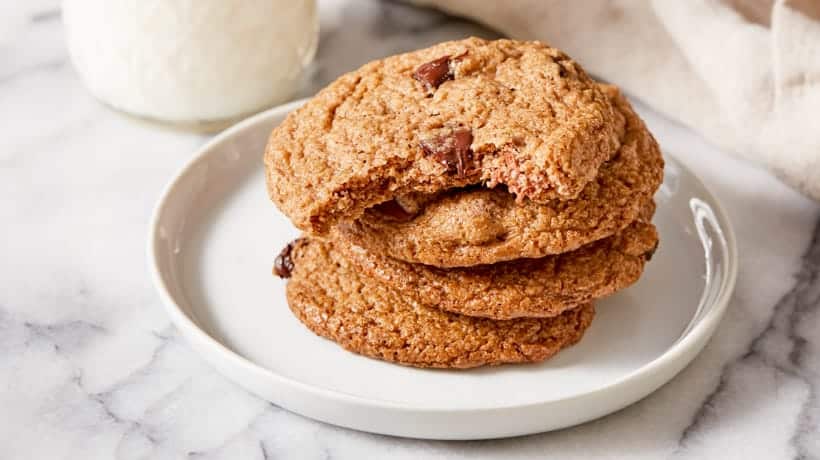
- Cookie enhancer: Replace ¼ cup flour in chocolate chip cookies
- Smoothie thickener: Adds creaminess without ice
Skincare Hack
Mix pulp with honey for 15-minute face mask—exfoliates while soothing skin. Rinse with cold water for glow.
Timing Your Ninja Oat Milk Batch
Total active time: 4 minutes 30 seconds
Passive straining: 8 minutes (perfect for coffee prep)
Yield: 2.5 cups from 1 cup oats
Pro Efficiency: Make double batches on Sundays—Ninja oat milk keeps 7 days and saves daily cleanup. Freeze extras in labeled jars with use-by dates.
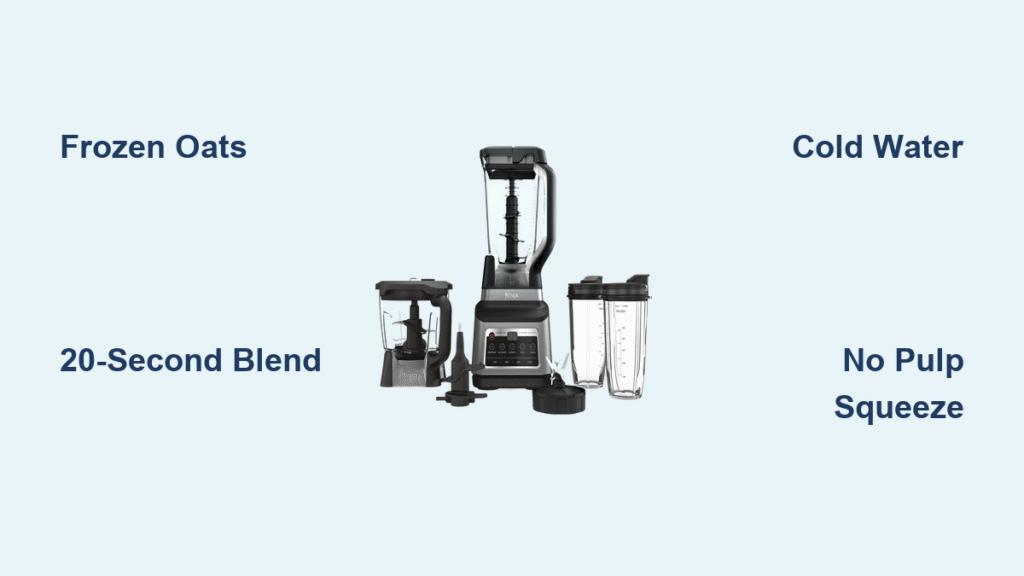
Final Tip: Your Ninja blender makes oat milk that costs pennies per cup and outperforms store brands in coffee. The trifecta for success? Frozen oats, 20-second blends, and hands-off straining. Master these three Ninja-specific techniques, and you’ll enjoy creamy, slime-free milk that transforms your morning routine. For perfect results every time, bookmark this guide and share your Ninja oat milk creations with #NinjaOatMilk. Ready to skip the grocery store? Grab your pitcher and oats—your first batch takes less time than brewing coffee.


