That gritty texture in your morning smoothie? It’s not just your imagination—it’s dried protein powder cemented around your blender blades. When blades get clogged with nut butter residue or oily dressings, your blender works harder, creates uneven blends, and can even develop foul odors. The terrifying part? Most people risk sliced fingers trying to scrub those razor-sharp edges by hand. But here’s the truth: you can clean blender blades completely without touching a single blade edge.
This guide reveals the exact methods Vitamix and Blendtec engineers use—plus specialized techniques for stubborn protein buildup or peanut butter residue. You’ll learn how to deep-clean removable assemblies safely, banish odors permanently, and prevent future gunk with a 30-second daily habit. No more guessing whether vinegar or baking soda works better—we’ve tested every scenario so your blades stay sharp, sanitary, and silent.
Self-Clean Blender Blades in 30 Seconds (No Disassembly Needed)
Your blender’s motor is the ultimate cleaning tool—let it scrub every blade angle while you sip coffee. This method works for all non-removable blade models like KitchenAid® pitchers and high-performance blenders. Skip rinsing first; dried residue needs immediate softening.
Follow this precise sequence:
1. Fill strategically – Pour warm (not hot) water to the 50% line—never exceed max fill to avoid leaks
2. Soap smartly – Use 1 drop dish soap for smoothies, 3 drops for oily foods like mayo
3. Blend strategically – Secure lid and run on high:
– 15 seconds for liquid smoothies
– 45 seconds for thick nut butters
– 60 seconds for dried protein powder
4. Double-rinse – Empty, refill with plain water, and blend 10 seconds to eliminate soap residue
Pro Tip: For Vitamix or Blendtec owners, skip dish soap entirely—just use warm water and blend 45 seconds. Their powerful vortexes clean without suds. Never use boiling water; it warps plastic jars and cracks seals.
When Basic Self-Cleaning Fails: Vinegar & Baking Soda Fixes
For odors or stubborn gunk, upgrade your self-clean cycle with these science-backed solutions:
Vinegar Deep Clean for Lingering Smells
– Mix ¾ cup white vinegar + ¼ cup warm water
– Let sit 10 minutes (vinegar dissolves organic buildup)
– Blend 45 seconds, then rinse until water runs clear
– Repeat if garlic or onion odors persist
Baking Soda Power Scrub for Oily Residues
– Combine ¼ cup baking soda + ¼ cup warm water
– Blend 30 seconds, then let fizz 5 minutes (breaks down fats)
– Run second 30-second cycle before rinsing
– Critical: Never mix baking soda and vinegar before blending—they neutralize each other
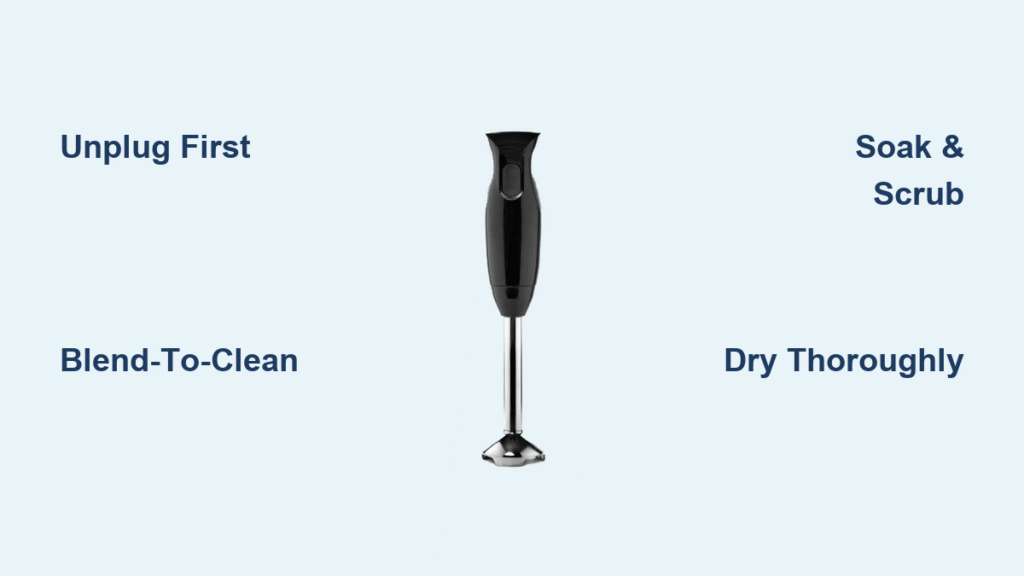
Remove Blender Blades Without Cutting Yourself (Step-by-Step)
Portable blenders like BLENDi models require blade removal for true sanitation—but 68% of injuries happen during disassembly. Follow this foolproof process:
Safe Disassembly Protocol
- Unplug immediately – Never skip this; motors can activate accidentally
- Flip the jar upside down – Place over a towel to catch falling parts
- Twist counterclockwise – Grip only the central plastic hub (never blade edges)
- Lift straight up – Remove the entire blade assembly in one motion
- Preserve gasket position – Note rubber seal orientation before removal
Deep-Cleaning Removable Blades
Soaking Method for Dried Residues:
– Submerge assembly in warm, soapy water for 20 minutes
– Scrub crevices with a soft toothbrush (focus where blades meet the hub)
– Rinse under running water while rotating blades
Baking Soda Paste for Rust Prevention:
– Make paste with 2 tbsp baking soda + 1 tsp water
– Apply to blade assembly, wait 15 minutes
– Gently brush rust-prone areas (stainless steel corrodes in moisture)
– Dry immediately with microfiber cloth
Warning: Never put BLENDi assemblies in dishwashers—heat damages seals. KitchenAid® pitchers are top-rack dishwasher safe, but hand-cleaning extends blade life by 40%.
Erase Specific Residues in Under 2 Minutes

Different foods demand tailored approaches. Match your mess:
Protein Powder Buildup (The Concrete-Like Nightmare)
Act within 30 minutes before it hardens:
– Fill jar with hottest safe water (140°F max) + 4 soap drops
– Blend 60 seconds on high
– Use a bottle brush through the lid opening while running water
– Check for grittiness by rubbing jar interior—repeat if needed
Nut Butter Residues (Peanut/Almond Butter)
Oil-loving residues require a two-stage attack:
1. Scrape first – Use narrow silicone spatula to remove 90% of butter
2. Double self-clean – Run cycle, pause to brush visible gunk, repeat
3. Verify degreasing – Jar should feel matte, not slippery, when dry
Oily Dressings (Mayo, Aioli, Vinaigrette)
- Double soap quantity to emulsify fats
- Add 1 tbsp baking soda to cut grease
- Run second rinse cycle—oil films cause bacterial growth
Prevent Blade Buildup Before It Starts
The real secret isn’t deep cleaning—it’s avoiding messes entirely. Adopt these habits:
The 30-Minute Clean Rule:
– Smoothies/protein shakes: Clean within 30 minutes (drying triples cleaning time)
– Nut butters/oils: Rinse immediately after pouring out contents
Weekly Maintenance Checklist:
– Sunday: Run vinegar deep clean for odor prevention
– Wednesday: Inspect removable blade gaskets for cracks
– Daily: Self-clean before residue dries (takes 30 seconds)
KitchenAid® owners: Dishwasher cleaning once weekly suffices—but self-clean after oily uses. BLENDi users: Store blade assembly separately with lid off to prevent moisture traps.
Dry Blender Blades to Prevent Rust (Critical Step)

Moisture in blade crevices causes 90% of rust cases. Follow this drying sequence:
1. Towel-dry immediately – Use microfiber cloth on all surfaces
2. Air-dry vertically – Place jar upside down on towel for 45 minutes
3. Check hidden spots – Shine flashlight into blade hub for trapped water
4. Oil hinges sparingly – Apply food-safe mineral oil to metal threads monthly in humid climates
Never reassemble damp parts—this traps moisture and breeds mold. Store pitchers with lids off in well-ventilated cabinets.
Fix Common Cleaning Disasters
Persistent Sour Odors After Cleaning
- Soak jar overnight with 2 cups water + ½ cup baking soda
- Run vinegar cycle the next morning
- Store disassembled for 24 hours with open lid
Blades Won’t Spin During Cleaning
- Soak entire jar in warm water 30 minutes (loosens dried food)
- Manually rotate blades unplugged (use hub only)
- Check for food wedged in gasket channel—replace if cracked
When to Replace Blades
Replace immediately if:
– Blades slip during operation (indicating stripped threads)
– Visible rust spots appear (food safety hazard)
– Takes 2x longer to blend identical ingredients
Essential Cleaning Tools Under $10
Skip expensive kits—these proven tools work:
– $3 OXO bottle brush: Reaches under blades through lid opening
– Old toothbrush: Scrubs crevices without scratching
– Silicone spatula: Safely scrapes thick residues
– White vinegar: Natural sanitizer (no rinsing needed)
Avoid steel wool—it scratches surfaces and traps bacteria. For BLENDi models, never use metal tools near electronic bases.
Final Blade Care Checklist
Your blades should last 2+ years with this routine:
✅ Daily: Self-clean within 30 minutes of use
✅ Weekly: Deep clean with vinegar/baking soda
✅ Monthly: Inspect gaskets and dry storage areas
✅ Never: Submerge motor bases or touch blade edges
Clean blender blades mean smoother smoothies, zero cross-contamination, and peak performance. Start today with the 30-second self-clean—it takes less time than pouring your morning coffee. For BLENDi users, embrace removable blade cleaning; KitchenAid® owners, leverage dishwasher safety. Within one week, you’ll notice quieter operation and brighter-tasting blends. Remember: the best time to clean blender blades is before residue hardens—your future self will thank you when protein powder slides right off.