
Ever tried making a single-serving smoothie or tiny batch of pesto in your Vitamix only to have ingredients splatter uselessly against the container walls? You’re not alone. The frustration of watching your powerful blender fail with minimal quantities stems from physics, not faulty equipment. Vitamix blenders require sufficient volume to create the vortex action that transforms ingredients into smooth blends. When you’re working with just a handful of ingredients, that crucial friction disappears.
This guide reveals exactly how to blend small amounts in Vitamix without wasting precious ingredients or compromising texture. You’ll discover container strategies, loading techniques, and professional workarounds that turn your powerful blender into a precision tool—even when working with just ¼ cup of ingredients. Stop fighting your Vitamix and start mastering small-batch blending today.
Standard Container Loading Mistakes to Avoid
Why Your 48oz Container Fails with Small Batches
When your Vitamix splatters ½ cup of ingredients instead of blending them, it’s not broken—it’s physics. Standard containers need 1-2 cups minimum to generate the friction required for proper vortex formation. Without enough volume, ingredients simply ride the blade edges without circulating. This explains why halving your almond butter recipe from 4 cups to 2 cups fails; the reduced quantity can’t sustain the necessary action to transform solids into smooth butter.
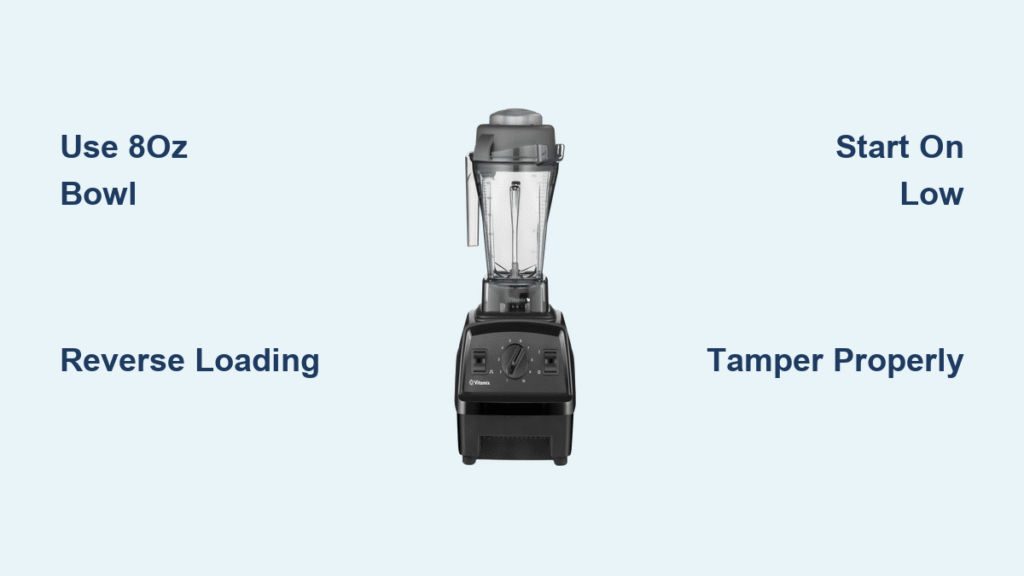
Reverse Loading Sequence for Minimal Volumes
Traditional loading order must be flipped when blending small amounts. For best results with quantities under 2 cups:
- Liquids first (directly over blades)
- Powders and seasonings
- Soft ingredients
- Frozen items last
This configuration prevents air pockets—the enemy of small-batch blending. The liquid creates immediate blade contact while heavier ingredients push lighter ones down into the action. Your Vitamix’s lid plug doubles as a precision measuring tool—use those ½ ounce and 1 ounce markings to add just enough liquid without over-diluting your blend.
Container Capacity Thresholds
Know your minimums before starting. Standard Vitamix containers struggle below these volumes:
– Smoothies: Minimum 1 cup total volume
– Nut butters: Minimum 2 cups of nuts
– Hummus: Minimum 1½ cups
– Thick sauces: Minimum 1 cup
Attempting to blend below these thresholds guarantees failure. Instead of wasting ingredients, either scale up your recipe or switch to a smaller container designed for minimal volumes.
Personal Container Strategies for Single Servings

20oz Container Loading Protocol
The personal container flips the game—literally. Since it mounts upside-down on the base, you must load ingredients in reverse order:
- Frozen items at the bottom (which becomes the top when flipped)
- Soft ingredients
- Powders
- Liquids last
This inverted approach ensures proper vortex formation despite minimal quantities. For single-serve smoothies or tiny sauce batches, these compact containers create better blade-to-ingredient ratios, keeping your minimal ingredients engaged with the blades throughout blending.
8oz Bowl Techniques for Micro-Batches
For truly tiny quantities (¼-½ cup), the 8oz blending bowls become essential. Load ingredients directly into the bowl, secure the lid, then flip onto the Vitamix base. Start on low speed for 5 seconds before gradually increasing to high. The tight circumference forces ingredients into constant blade contact—perfect for single-serve dressings, baby food portions, or spice grinding.
Wet vs. Dry Container Selection
Choose your container based on texture goals. The standard wet container excels at silky purees but often fails with small wet ingredients. The dry container’s reverse vortex pattern actually benefits tiny dry ingredient quantities—ideal for grinding spices or making small flour batches. For wet ingredients like dressings, stick with wet containers but increase liquid ratios by 25%.
High-Speed Blending Techniques for Minimal Volumes
Speed Progression for Small Quantities
Small batches need immediate high-speed action. Start on low for just 3 seconds, then ramp to high within 5 seconds. Extended low-speed blending with minimal ingredients causes overheating and triggers Automatic Overload Protection. High speed creates the powerful vortex necessary to process small amounts efficiently—your tiny batch should finish in 15-30 seconds rather than the usual 60-90.
Tamper Tactics for Air Pocket Prevention
The tamper becomes critical with small volumes. Master these movements:
– Press toward the four corners, not the center
– Apply steady, gentle downward pressure
– Never fill past two-thirds capacity when tamping
– The tamper won’t hit blades if your lid locks properly
Without proper tampering, air pockets form instantly with minimal ingredients, causing splattering and incomplete blending.
Pulse Technique Over Continuous Blending
For better control with small amounts, use short pulse bursts instead of continuous blending. Three 5-second pulses often outperform one 15-second continuous blend when working with minimal quantities. This approach prevents overheating while ensuring even processing—especially crucial for thick small batches like nut butters or hummus.
Smart Workarounds for Impossible Small Batches

The Thinning Technique for Thick Blends
Can’t get your ½ cup of almond butter to cooperate? Add ¼ cup cashew milk and half a banana after initial processing. This creates a smoothie while cleaning your container—zero waste, maximum efficiency. The added liquid provides just enough volume to complete the blending process while transforming your failed attempt into a usable product.
Strategic Batch Cooking Approach
Some recipes simply won’t scale down. When your pesto needs 2 cups of basil but you’ll only use 2 tablespoons, prepare the full batch. Freeze portions in ice cube trays—each cube equals about 2 tablespoons of concentrated flavor. This approach respects your Vitamix’s physics while meeting your small-batch needs through smart storage.
Combination Method for Multiple Small Needs
Group compatible small-batch requirements together. Need salad dressing, smoothie base, and herb oil? Combine compatible ingredients in one larger blend, then portion and season separately. This maximizes your Vitamix’s capacity while efficiently meeting multiple small-batch needs without compromising quality.
Cleaning After Small-Batch Blending
Zero-Waste Cleaning Technique
Thick small batches like hummus or nut butter stick stubbornly. Instead of wasting water rinsing, blend 1-2 cups of nut milk with a banana to create an instant smoothie while cleaning. This technique removes 90% of residue while creating a bonus treat—perfect for those times when your small batch attempt failed but left behind stubborn residue.
Precision Cleaning Protocol
For lighter small batches: fill halfway with warm water and one drop of dish soap. Run on high for 30 seconds, then rinse. Adjust your soap-to-water ratio—use less soap since you’re cleaning smaller residue amounts. The standard cleaning cycle works well for small batches, but reduce water volume to match your actual residue level.
Practical Limitations to Accept
Minimum Volume Thresholds
Accept that some recipes have absolute minimums. Nut butters need at least 2 cups of nuts to generate sufficient friction. Hummus requires 1½ cups minimum for proper processing. Rather than fighting physics, adjust your planning or use alternative methods. Your Vitamix isn’t designed for micro-batches without proper technique—understanding these limitations prevents frustration and wasted ingredients.
Strategic Storage Solutions
When recipes won’t reduce, embrace smart storage. Portion and freeze smoothie bases in silicone molds. Store herb oils in ice cube trays. Freeze pesto in 1-tablespoon dollops on parchment paper, then transfer to freezer bags. These portions defrost quickly for future small-batch needs, making your full-batch preparation efficient for single servings.
Mastering how to blend small amounts in Vitamix transforms your cooking flexibility. While your powerful blender prefers volume, these techniques let you create everything from single-serve smoothies to tiny batches of gourmet sauces. Accept the physics, use the right container, and apply proper loading techniques to waste less, create more, and unlock your Vitamix’s full potential—even when cooking for one. The key lies in understanding your blender’s requirements and working with them, not against them.


