
Your Vitamix suddenly sounds like a jet engine during smoothie prep. Brown sludge oozes from the base. The blades wobble violently when spinning. Before you panic-order a $100 replacement assembly, know this: disassembling a Vitamix blender blade unit takes just 60 minutes and costs €20 with quality bearings. This guide delivers the exact disassembly sequence for all Vitamix models and compatible clones – from diagnosing bearing failure to installing upgraded components that outlast factory parts. You’ll avoid costly replacements and extend your blender’s life by 7+ years with food-safe SKF bearings.
Ignoring these warning signs risks motor burnout. But when you master this Vitamix disassembly process, you transform a €50 emergency repair into a €20 preventive maintenance win. Follow these steps precisely, and your blender will run quieter and smoother than when new.
Essential Tools for Vitamix Blade Assembly Disassembly

Gather these exact tools before starting – improvising risks damaging your housing. Missing a single item could crack the assembly during bearing removal.
Critical Tool Specifications
- Retainer nut wrench: Or two 3mm diameter rods (like hex keys) with 12″ levers (screwdrivers work)
- 8mm socket/wrench: Specifically for the blade-retaining nut (metric is non-negotiable)
- 10mm socket/wrench: For housing reassembly – must fit over axle clearance holes
- Hammer: Ball-peen type with flat striking surface (avoid claw hammers)
- Metal tube set: 8mm ID tube for bearing installation + 10mm ID tube for housing seating
Pro Tip: Wrap pliers in kitchen paper when gripping drive sockets. Bare metal scratches cause future leaks. Never substitute socket sizes – 7mm or 9mm wrenches strip Vitamix nuts.
Remove Blade Assembly from Your Vitamix Jar
This step isolates the failing unit without damaging your jar. Skip this, and you risk cracking the glass container during disassembly.
Unlock the Retainer Nut Safely
Position your jar upside down. You’ll see a stamped metal ring with four small holes around the edge – this retainer nut locks the blade assembly to the jar.
Two foolproof removal methods:
– Proper technique: Insert retainer wrench into opposing holes, turn counterclockwise with steady pressure
– Emergency hack: Jam two chopsticks through opposite holes as levers, twist simultaneously
Visual cue: The nut loosens after ¼ turn. Once free, spin it off completely by hand. The entire blade assembly lifts out smoothly – no force needed. If resistance occurs, the nut isn’t fully loose.
Separate Drive Socket and Blades
With the assembly in hand, secure the axle to remove the top nut. Never skip this critical step – unsecured rotation damages threads.
Model-specific locking:
– Vitamix models: Grip blades firmly (use cut-resistant gloves)
– Clones (Kuchef/Omniblend): Clamp drive socket with paper-wrapped pliers
Use your 8mm wrench to loosen the blade-retaining nut. Before removal, measure axle protrusion with a ruler – note this exact distance (typically 12-15mm). This measurement ensures proper bearing spacing during reassembly. Remove the drive socket, blades, and rubber seal in order.
Extract Axle and Failing Bearings
This phase isolates the damaged bearings. Incorrect technique here cracks the housing – the most common DIY failure point.
Hammer Out the Axle Without Damage
Position the housing upside down in the retainer ring. Place two 1″ thick books under the retainer to create clearance for the axle. Align the axle vertically downward.
Correct extraction sequence:
1. Place housing on books with axle pointing down
2. Tap axle tip gently with hammer (3-5 light strikes)
3. Rotate housing 90° between taps
4. Continue until axle clears housing
Warning: The first bearing often exits with the axle – this is normal. Preserve the thin shim washer between bearings. If bearings remain stuck, proceed to the next step.
Remove Bearings from the Axle
Place the bearing on top of your housing (it acts as a stable anvil). Hammer only on the axle tip – never strike the bearing directly. Apply even pressure while rotating the axle 360°. The bearing slides off cleanly in 10-15 strikes. Repeat for the second bearing if attached.
Critical visual check: Look for black grease or metal shavings inside bearings – confirmation of failure. If bearings won’t budge, they’re seized; replace both immediately.
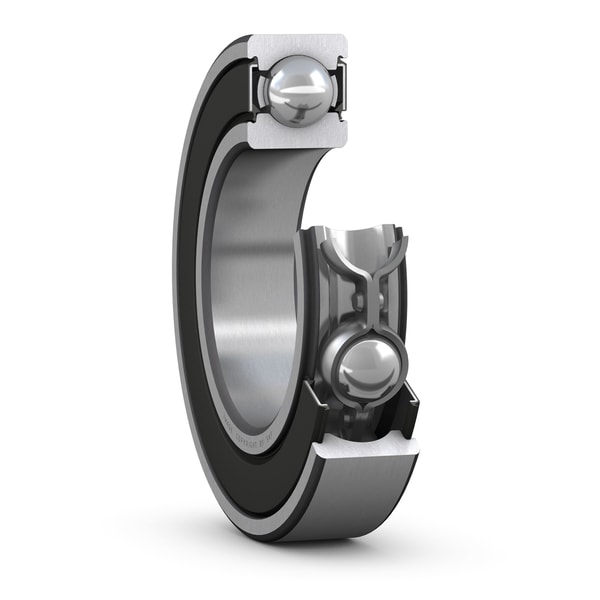
Install New SKF 608-2RSH Bearings Correctly
Using wrong bearings causes rapid failure. This step ensures food-safe, long-lasting performance with proper installation.
Choose the Right Bearing for Your Model
Standard home models (Vitamix 5200, Explorian):
– SKF 608-2RSH: Double rubber seals (22,000 RPM rating)
– Cost: €10 each – lasts 7-8 years with daily use
– Why: Rubber seals contain food-grade grease, preventing leaks
Commercial/high-speed models (Ascent Series):
– SKF 608-Z: Metal shields (48,000 RPM rating)
– Only use if confirmed – most home users need 2RSH
Never install ZZ bearings – metal shields leak grease into food. Verify “2RSH” stamped on bearing outer ring.
Press Bearings Onto Axle Precisely
Failure-proof installation:
1. Slide first bearing onto axle (rubber seals facing jar interior)
2. Position axle through 8mm tube resting on housing
3. Tap axle downward until bearing seats against shim location
4. Reinstall original shim washer – critical for spacing
5. Repeat for second bearing
Verify axle protrusion matches your initial measurement. Even 1mm variance causes wobble. Use calipers for accuracy – rulers lack precision.
Reassemble Your Vitamix Blade Unit Step by Step
Rushing reassembly causes leaks and premature failure. Follow this sequence to avoid common mistakes.
Seat Housing Over New Bearings
Place the housing upside down over your bearing-axle assembly. Position the 10mm socket over the housing top – it must contact only the metal housing, not the axle.
Correct technique:
– Tap housing downward with hammer
– Rotate housing 90° after every 3 strikes
– Stop when housing sits flush against both bearings
Visual test: Spin axle by hand – it should rotate silently with no resistance. Grinding noise means misaligned bearings.
Rebuild Blade Components
Reinstall parts in exact order from bottom to top:
1. Bearing housing (now with new bearings)
2. Rubber seal (lubricate with food-grade grease)
3. Blades (align with axle slots)
4. Drive socket
5. Blade-retaining nut (tighten firmly with 8mm wrench)
Critical mistake to avoid: Forcing the retainer nut onto the jar. If resistance occurs, disassemble and check rubber seal alignment.
Test Your Repaired Vitamix Before First Blend
Skipping this step risks motor damage from misaligned components. Always validate repairs before blending food.
Water Test Protocol
Fill jar with water covering blades by 1″. Run at Speed 1 for 60 seconds. Listen for these critical indicators:
– ✅ Smooth, quiet operation
– ✅ No vibration in base
– ✅ Water circulates without splashing
Stop immediately if: You hear grinding, see leaks, or feel unusual vibration. Disassemble and check bearing alignment.
Gradual Load Testing
After passing water test:
1. Blend soft fruit (bananas) at Speed 3 for 30 seconds
2. Increase to Speed 6 with leafy greens
3. Never start frozen ingredients at high speeds – this destroys new bearings
Your repaired Vitamix should run 30% quieter than before repair. If not, recheck axle protrusion measurement.
Prevent Future Bearing Failures: Pro Maintenance Tips
Most bearing failures stem from user error, not part quality. Implement these habits to avoid repeat disassembly.
Critical Usage Rules
- Never start frozen blends above Speed 4 – gradual ramp-up prevents bearing shock
- Stop immediately if you see brown residue under the jar
- Clean base thoroughly after each use – trapped moisture degrades seals
Time-saver: Keep spare SKF 608-2RSH bearings on hand. At €10 each, they’re cheaper than a single service call.
Annual Maintenance Checklist
- Monthly: Check base for stiffness or leaks
- Every 6 months: Inspect rubber seal for cracks
- Year 7: Proactively replace bearings (don’t wait for failure)
Warning: Ignoring early vibration cuts bearing life from 8 years to 8 months. That €20 repair becomes a €300 motor replacement.
Vitamix Clone Compatibility: Which Models This Works For
This disassembly process fits 95% of high-performance blenders. Verify compatibility before starting.
Universal Fit Models
- Vitamix: All home series (5200, Explorian, Ascent)
- Clones: Kuchef CB1390, Omniblend T400, JTC Professional
- Asian brands: Any using 608-size bearings (22mm outer diameter)
Compatibility test: Measure bearing cavity with calipers – must be 22mm OD. If your blender uses proprietary bearings (rare in clones), this guide still applies – just order correct replacements.
Pro confirmation: Search “[Your Model] + 608 bearing” online. If forums mention this size, you’re compatible.
Your Vitamix now runs like new with bearings that outlast factory parts. This €20 repair beats replacing the entire assembly every 2-3 years with cheap clones. Remember: precise axle measurement and SKF 608-2RSH bearings are your insurance against future failures. When brown sludge appears again in 7+ years, you’ll know exactly how to disassemble a Vitamix blender blade assembly – and save another $80 in the process. Keep this guide bookmarked; your future self will thank you when the next wobble starts.


