
Your Vitamix whirrs through morning smoothies, hearty soups, and frozen desserts without complaint—until it doesn’t. That cloudy film on the container, lingering protein smells, and mysterious gunk under the blades? Daily rinses can’t tackle these hidden buildups. Left unchecked, mineral deposits choke performance and odors ruin your next blend. This how to deep clean Vitamix blender guide eliminates every trace of residue using professional techniques that work across all models—from the classic 5200 to smart Ascent series. You’ll restore crystal-clear clarity, banish stubborn smells, and add years to your blender’s life with methods backed by Vitamix engineering standards.
Essential Deep Cleaning Supplies

Core Cleaning Solutions
Forget harsh chemicals—your kitchen already holds the perfect how to deep clean Vitamix blender arsenal. White distilled vinegar (5% acidity) dissolves mineral crusts in hard water areas. Aluminum-free baking soda creates a gentle abrasive paste for stubborn stains without scratching. Use mild, bleach-free dish soap for daily cycles, and fresh lemon juice to neutralize odors after vinegar soaks. For protein-heavy diets, keep enzymatic cleaner on hand—it breaks down stubborn residue like nut butter or yogurt that water alone can’t touch.
Professional Tools Required
Skip makeshift brushes that scratch your container. A 12-inch flexible bottle brush reaches under blades where residue hides. Pair it with a nylon angled brush for gasket grooves and blade crevices. Use 400 GSM microfiber cloths—they grab lint-free without leaving fibers. Keep wooden skewers for precision cleaning in safety interlocks and lid vents. For tough stains, grab a white melamine sponge (the non-scratch kind) that lifts discoloration without abrasives. Never use steel wool or metal scrapers—these permanently damage Vitamix’s aircraft-grade containers.
Daily Quick Clean Method
Post-Use Power Clean Cycle
Don’t let residue harden—clean immediately after blending. Fill your container halfway with warm water, add 2–3 drops of dish soap, and secure the lid. Run on high for 30–60 seconds. This self-cleaning cycle blasts particles from blade edges to container walls. Empty the foamy water, then rinse twice with cold water until runoff runs clear. Invert on a drying rack—gravity pulls moisture from the drive socket, preventing mold-prone dampness. For protein shakes or nut butters, add one tablespoon baking soda to the cycle; its alkaline action dissolves sticky films before they set.
Stubborn Residue Rescue
When daily cleaning leaves particles behind, skip aggressive scrubbing. Fill the container with warm water and one tablespoon baking soda, then blend for 45 seconds. The bubbling action loosens dried-on food. Immediately follow with your bottle brush, using circular motions under the blades. Focus on the seam where the blade meets the container—this gap traps seeds and pulp. Rinse thoroughly until water flows clear. If residue persists, repeat with an enzymatic cleaner soak for 10 minutes before blending again.
Weekly Vinegar Deep Clean
Overnight Soak Method
Mineral deposits cause cloudy containers and dull performance. Mix two cups warm water with one cup white vinegar in your container. For heavy buildup (common in hard water areas), let it soak 12 hours overnight. Light maintenance? Four hours suffices. After soaking, blend the solution on high for 90 seconds—this agitation reaches crevices brushes miss. Use your bottle brush to scrub the blade shaft and container base, where calcium crystals accumulate. Rinse four times with cold water, then run a final 30-second cycle with lemon juice and water to erase vinegar traces.
Baking Soda Paste for Stains
Yellowish stains near the blades signal protein absorption. Create a thick paste with three tablespoons baking soda and one tablespoon water. Apply it directly to discolored areas, especially around the blade assembly. Let it dwell for 30 minutes—this gives time for chemical breakdown. Gently work the paste into stains with your angled brush using short strokes (never press hard). Rinse until no white residue remains. For severe discoloration, repeat after a vinegar soak; the acid-soda combo lifts even years-old stains.
Monthly Complete Disassembly
Safe Blade Assembly Inspection
Always unplug first—safety trumps speed. Remove the container and inspect the blade assembly for cracks or wobble. For Personal Series models (S30/S50), twist blades counterclockwise to detach. Clean the rubber gasket by soaking it in vinegar solution for 20 minutes, then scrubbing with a soft toothbrush. Rinse completely and air-dry for 24 hours before reinstalling—damp gaskets breed mold, the hidden source of most “mystery odors.” Never force stuck blades; if resistance occurs, soak the assembly in warm water for 15 minutes first.
Lid Deep Cleaning Protocol
Disassemble removable lid parts (varies by model). Soak seals and vent caps in soapy water for 10 minutes. Use a toothpick to clear clogs from lid vents—these tiny holes trap smoothie splatter that later molds. For Ascent series touchscreens, dampen a microfiber cloth with screen-safe cleaner (never spray directly!) and wipe gently. Dry immediately with a second cloth to prevent moisture seepage into electronics. Reassemble only when all parts are bone-dry to avoid triggering safety shutdowns.
Model-Specific Deep Cleaning

Classic Series (5200, 7500, Professional)
Non-removable blades demand extra care. Extend vinegar soaks to 6 hours for these workhorses. Clean the drive socket—the metal nub that connects to the base—with a rubbing alcohol-dipped cotton swab. This removes residue causing vibration. Never submerge the container base; wipe it with a damp cloth instead. These models tolerate aggressive cleaning but avoid bleach, which degrades polycarbonate over time.
Ascent Series Smart Features
Smart Detect technology fails if moisture enters contact points. Never soak container bases—wipe contact rings with a dry microfiber cloth only. After deep cleaning, recalibrate touch controls by holding the power button for 10 seconds while plugged in. For touchscreen smudges, use minimal moisture and dry within 5 seconds. Skip vinegar soaks for these models; baking soda cycles are safer for electronics.
Troubleshooting Deep Cleaning Issues
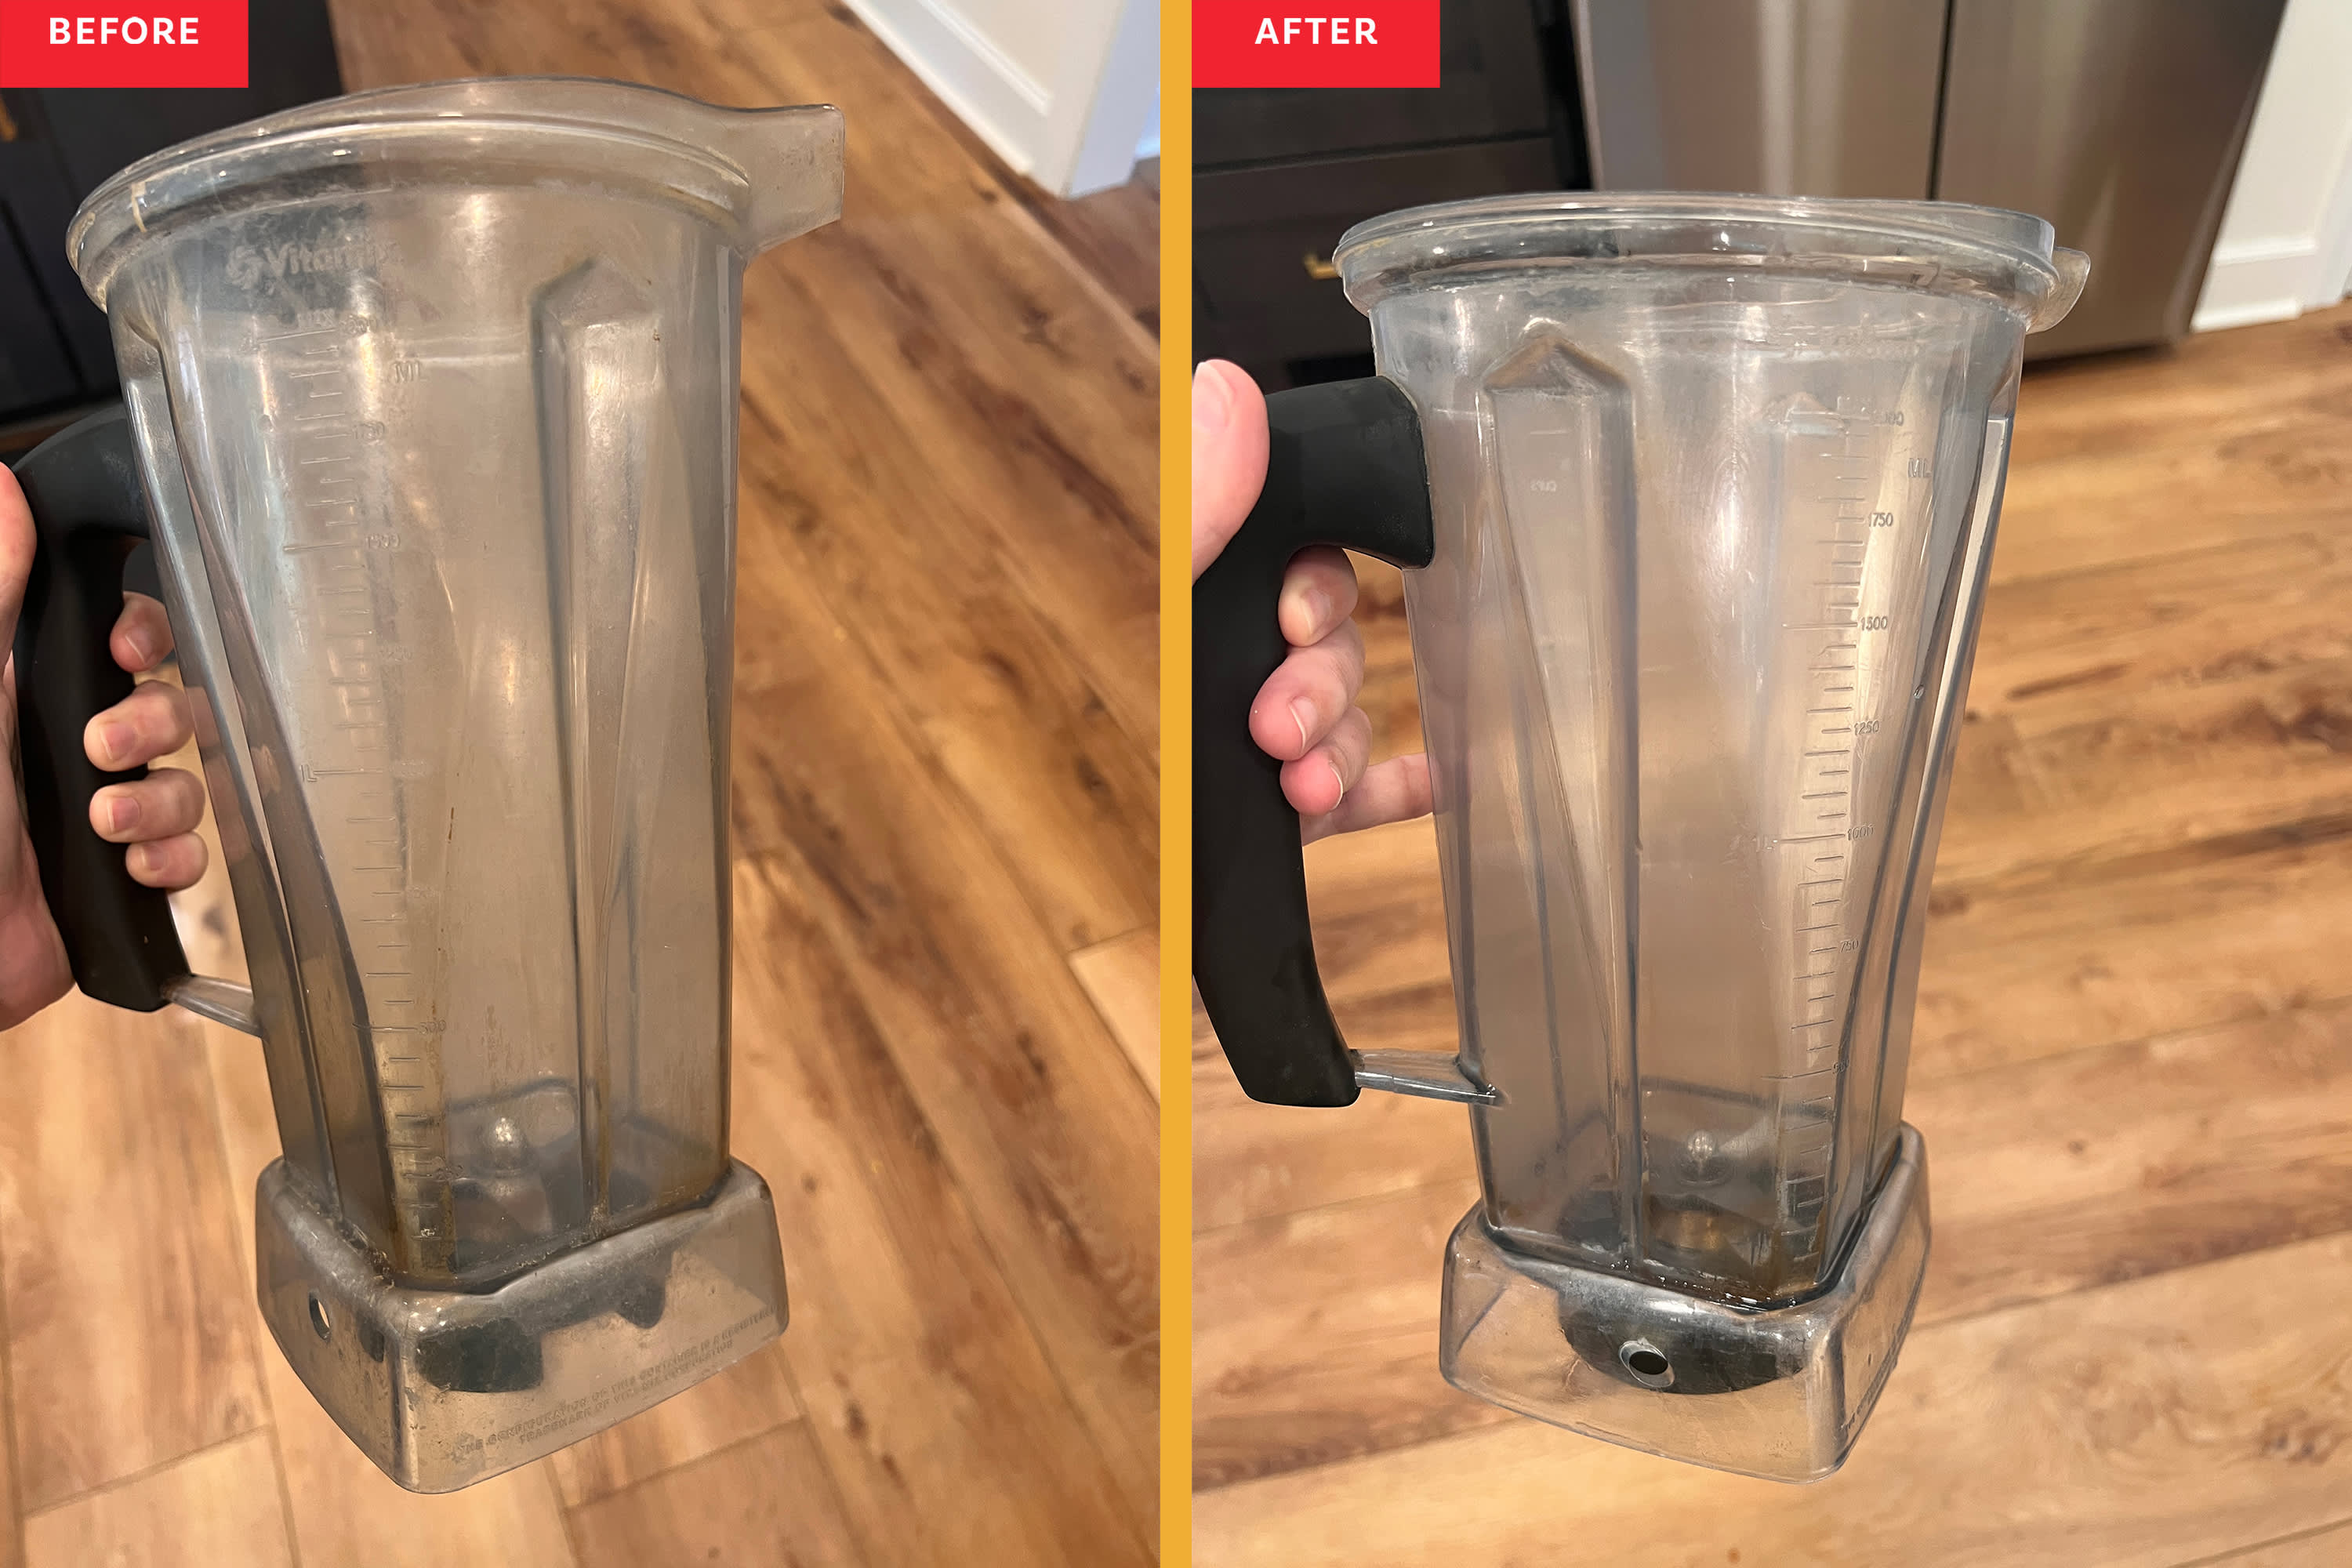
Cloudy Container Recovery
Hard water minerals create permanent-looking haze. Fill your container with equal parts vinegar and water. For severe cloudiness, soak 24 hours (Classic Series only—Ascent models max out at 8 hours). Scrub with a melamine sponge using light pressure. Rinse six times to remove all acid traces. Cloudiness vanishes as minerals dissolve—no need for replacement unless cracks appear.
Eliminating Persistent Odors
If smells linger after standard cleaning, protein residue or mold is hiding. For protein odors (common with nut milks), soak overnight in warm water with two tablespoons baking soda per cup. For mold, blend two cups water with juice from two lemons for 30 seconds, let sit one hour, then re-blend. Worst-case? Seal two tablespoons activated charcoal in your dry container for 48 hours—it absorbs odors at a molecular level.
Performance Optimization After Deep Clean
Post-Cleaning Verification
After reassembly, test with two cups of water on high for 30 seconds. Check for three critical signs: leaks at the blade base (indicates gasket failure), grinding noises (debris in drive socket), and uneven speed transitions (electronics issue). If problems persist, repeat gasket cleaning—90% of “broken blender” calls stem from improperly seated seals. Never operate without verifying these checks; moisture in the base unit causes irreversible motor damage.
Maintenance Schedule for Peak Performance
Daily: Rinse immediately after use with the 30-second power clean cycle. Weekly: Full vinegar deep clean for Classic models; baking soda cycles for Ascent. Monthly: Disassemble and inspect gaskets—replace if cracked or stiff. Quarterly: Swap blade assemblies (heavy users) or clean commercial air filters. Always unplug before cleaning, and never immerse the base unit. Handle blades like surgical tools—they stay razor-sharp for decades.
Your Vitamix now operates like new, blending silkier smoothies and heating soups faster thanks to unobstructed blade action. This how to deep clean Vitamix blender routine prevents the slow decline that turns premium appliances into paperweights. Stick to the monthly disassembly schedule, and you’ll avoid 95% of performance-killing buildup. Next time you hear that familiar high-pitched whir, know it’s working at factory-fresh efficiency—ready to crush ice, emulsify dressings, and outlast cheaper blenders by a decade. The secret isn’t magic; it’s just smart cleaning done right.


