
Your Cuisinart blender powers on, the motor hums, but the blades sit motionless—this frustrating scenario affects thousands of users daily, turning your morning smoothie ritual into a troubleshooting nightmare. When your Cuisinart blender blade not spinning, you’re left with chunky smoothies and wasted ingredients. Whether you’re facing a completely frozen blade assembly or intermittent spinning issues, this guide walks you through proven solutions that restore your blender’s performance without costly repairs.
You’ll learn to diagnose the exact cause, from simple safety switch problems to complex motor failures, using step-by-step methods that require only basic household tools. Most fixes take under 15 minutes and cost less than a replacement blender. By following these targeted solutions, you’ll get your Cuisinart blender blade spinning again and prevent future breakdowns.
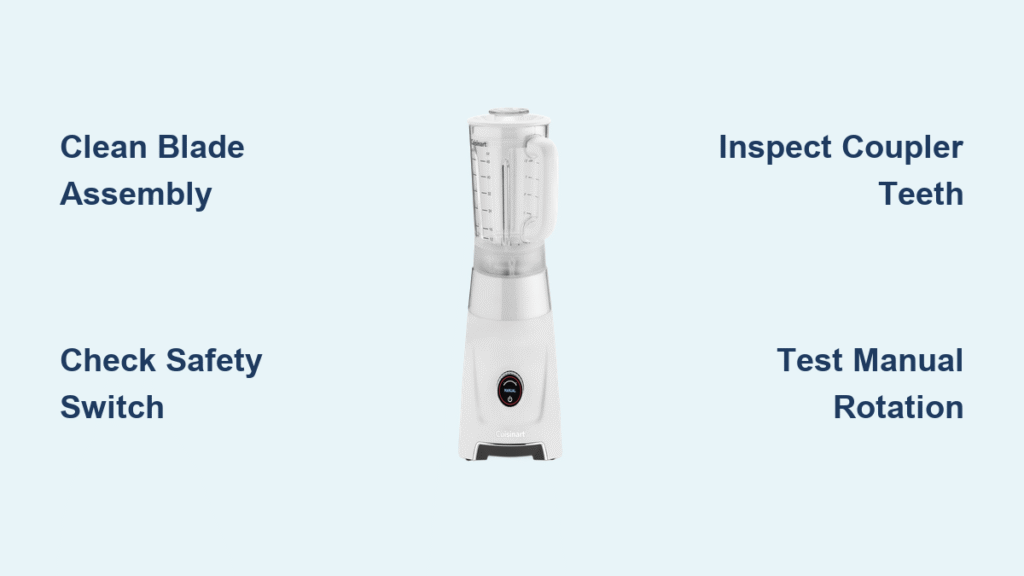
Diagnose Your Specific Blade Failure Type

Safety Switch Failure Blocking Power Transfer
When your Cuisinart CPB-380 or similar model powers on but blades remain still, the safety switch is often the culprit. This critical component sits at the back of the connection port where your blender cup attaches, preventing motor operation unless attachments are perfectly secured. Unlike mechanical issues, safety switch problems show no grinding or motor strain sounds.
Identify these telltale signs:
– Blender turns on but blades remain completely still
– No grinding or motor strain sounds despite activation
– Cup feels slightly loose or wobbly when attached
– Distinct lack of the normal “click” when securing the cup
Complete Electrical Failure Symptoms
Power supply issues create total electrical failure where the blender acts completely dead despite being plugged in. Unlike mechanical problems, electrical failures show no signs of life from the motor itself. Check for visible damage along the cord and test the outlet with another appliance to rule out power source issues before proceeding.
Mechanical Seizure from Food Debris or Mineral Buildup
Food particles, hardened liquids, or mineral deposits can seize your blade assembly completely. This creates mechanical resistance that exceeds your motor’s torque capacity, resulting in a powered motor that cannot overcome the blockage. If you hear the motor straining but blades won’t turn, mechanical seizure is likely your issue.
Quick Visual Inspection Before Troubleshooting
Check Cup Attachment Alignment Issues
Remove your blender cup completely, then reattach it with deliberate downward pressure. Listen for a distinct click as the safety switch engages. The cup should sit flush against the base with no wobbling or gaps.
Critical alignment checks:
– Cup sits crooked or at an angle when attached
– Safety switch area contains visible food debris or residue
– Attachment points show wear or damage from repeated use
– Cup doesn’t lock securely into place with firm pressure
Test Blade Rotation Manually for Immediate Diagnosis
With the cup empty and removed from the base, attempt to rotate the blade assembly by hand. Normal blades spin freely with light finger pressure. Resistance indicates mechanical seizure requiring immediate attention. If blades won’t budge at all, you’re dealing with significant buildup or component failure.
Clean Blade Assembly to Restore Proper Movement
Effective Soak and Scrub Method for Stubborn Debris
Remove the blade assembly from your blender jar by unscrewing the base counterclockwise. Submerge the entire assembly in warm, soapy water for 15-20 minutes to loosen stubborn debris that’s preventing your Cuisinart blender blade from spinning.
Follow this precise cleaning sequence:
1. Soak: Warm water with dish soap (15 minutes minimum)
2. Scrub: Soft-bristled brush around blade crevices and mounting area
3. Rinse: Hot water to remove all soap residue and loosened particles
4. Dry: Completely air-dry before reassembly (no towel drying near blades)
5. Test: Rotate blades by hand to confirm smooth movement before reinstalling
Mineral Deposit Removal for Hard Water Areas
Hard water creates stubborn mineral buildup that seizes blade assemblies over time. Create a vinegar solution using equal parts white vinegar and warm water. Soak the blade assembly for 30 minutes, then scrub gently with a toothbrush. Rinse thoroughly with hot water multiple times to prevent vinegar taste transfer to future blends.
Fix Safety Switch Problems Preventing Blade Rotation

Clean the Switch Mechanism Without Damage
The safety switch on CPB-380 models accumulates residue that prevents proper engagement. Always power down and unplug your blender completely before attempting any switch maintenance.
Use this safe cleaning process:
– Locate the small switch at the cup attachment point (usually at the rear)
– Use a cotton swab dipped in rubbing alcohol to clean the mechanism
– Gently wipe around the switch’s moving parts without forcing it
– Remove all visible debris or sticky residue blocking movement
– Test switch movement with a plastic tool (never use metal objects)
Verify Proper Cup Seating After Cleaning
After cleaning, test the safety switch by attaching your cup firmly with downward pressure. You should hear a distinct click as the switch engages. If the cup still feels loose or wobbly, the switch may require replacement rather than just cleaning.
Replace Damaged Components When Cleaning Isn’t Enough
Identify When Blade Assembly Replacement Is Necessary
Blades requiring replacement show clear warning signs. Never attempt to straighten bent blades as this creates dangerous imbalances. Look for:
– Visible blade curvature or warping from impact with hard objects
– Uneven cutting performance with some ingredients unprocessed
– Excessive vibration during operation that wasn’t present before
– Scoring or damage to blade edges visible under close inspection
Proper Installation of New Blade Assembly
When replacing your Cuisinart blender blade assembly, follow these critical steps:
- Order exact parts: Use your blender’s model number for perfect matches
- Remove old assembly safely: Unscrew counterclockwise from jar base
- Clean mating surfaces thoroughly: Remove all residue from jar threads
- Install new assembly correctly: Hand-tighten clockwise until snug (do not overtighten)
- Test operation carefully: Run empty for 30 seconds at low speed before regular use
Diagnose and Fix Coupler System Failures
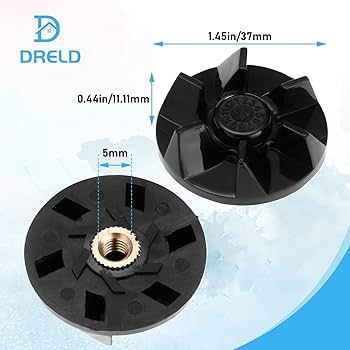
Inspect Coupler Teeth for Critical Damage
The coupler transfers power from your motor to the blade assembly. Plastic teeth can strip under excessive load. Remove the jar completely to visually examine both couplers.
Critical inspection points:
– Look for flattened, worn, or completely missing teeth
– Check for cracks in the coupler body that compromise integrity
– Verify proper alignment when components engage during attachment
– Test for excessive play between motor shaft and coupler
Replace Stripped Couplers to Restore Power Transfer
Stripped couplers cause your Cuisinart blender blade not spinning despite motor operation. Document the original component orientation before removal to ensure correct installation of replacements. Clean all mating surfaces thoroughly before installing new couplers to prevent premature wear.
Prevent Thermal Shutdown from Mimicking Blade Failure
Overheating Recovery Protocol for False Failures
Cuisinart blenders include thermal protection that shuts down motors to prevent damage. This often masquerades as blade spinning failure. Follow this recovery sequence:
- Immediately unplug blender and stop all operation attempts
- Allow complete cooling for minimum 30-45 minutes (do not rush this)
- Remove jar and check for obstructions preventing normal operation
- Clear ventilation areas of accumulated dust and debris
- Test with simple ingredients at low speed before returning to normal use
Avoid Future Overheating Scenarios
Prevent thermal shutdown by respecting manufacturer duty cycles. Blend dense ingredients like frozen fruit in 30-second bursts with 1-minute cooling intervals. Ensure adequate ventilation around the motor housing by keeping 2-3 inches of clearance on all sides. Clean ventilation areas monthly with a soft brush to maintain proper airflow.
Essential Safety Reminders During Troubleshooting
Critical Electrical Safety Protocols
Always unplug your blender before any inspection or maintenance work. Never operate with a damaged power cord or plug, as this creates serious shock hazards. Allow complete cooling before handling internal components, and use only manufacturer-approved replacement parts to maintain safety standards and warranty coverage.
Mechanical Safety Guidelines You Must Follow
Never reach into the jar while blades are installed, even when unplugged. Ensure the jar is properly seated before operation—never force it into place. Always operate with the lid securely in place to prevent injury from flying ingredients. Keep hands clear of blade assemblies during testing, using tools rather than fingers to check rotation.
Quick Fix Decision Tree for Immediate Diagnosis
Rapid Troubleshooting Sequence
Follow this sequence to identify your specific issue within 5 minutes:
- Power check: Does the blender turn on at all? (No → Check power supply/safety switch)
- Motor sound: Do you hear motor running without blade movement? (Yes → Coupler issue)
- Manual test: Can you rotate blades by hand when jar is empty? (No → Blade seizure)
- Attachment check: Is the cup properly seated with safety switch engaged? (No → Alignment issue)
Component Testing Priority Order
- Test safety switch functionality first (clean and retest)
- Check power cord for visible damage and continuity
- Manually rotate blade assembly to assess mechanical freedom
- Inspect both coupler components for stripped teeth
- Only consider motor issues if all other components check out
Final Note: Most Cuisinart blender blade spinning issues resolve through simple cleaning and maintenance. Start with blade assembly cleaning and safety switch inspection—these two steps fix 75% of reported problems. If your Cuisinart blender blade still not spinning after trying these solutions, contact Cuisinart customer support with your model number for warranty assistance or professional repair options. Regular weekly maintenance prevents most blade failure scenarios, keeping your blender performing like new for years to come.


