
Nothing beats whipping up a morning smoothie in under a minute, but if your NutriBullet sits unused because you’re unsure how to work a NutriBullet blender safely, you’re missing out. This compact powerhouse transforms frozen fruit into silky smoothies, nuts into fresh butter, and veggies into nutrient-packed soups—once you master its simple operation. Learning how to work a NutriBullet blender correctly prevents leaks, extends motor life, and guarantees restaurant-quality results every time. Whether you’re unboxing your first model or struggling with inconsistent blends, this guide delivers foolproof techniques straight from the manufacturer’s specifications.
Most users abandon their NutriBullet within weeks due to leaks, overheating, or lumpy results—but these issues vanish when you follow the exact loading sequence, fill ratios, and blending rhythm designed for its unique inverted system. Skip the guesswork: In the next 10 minutes, you’ll learn why your blade isn’t spinning, how to avoid dangerous pressure buildup, and the one ingredient combination that damages blades permanently.
Identify Critical NutriBullet Components Before Operating

Your NutriBullet’s performance hinges on three precision-engineered parts working in sync. The 600-watt (standard) or 900-watt (Pro) Power Base contains alignment notches flanking the logo—these must lock with your blade assembly’s circular bumps. Never submerge this component; wipe spills immediately with a damp cloth to prevent electrical hazards.
Blending cups come in 18 oz, 24 oz, and 32 oz sizes, each etched with a max fill line ½ inch below the rim. Exceeding this line causes explosive leaks during high-speed rotation. Blade assemblies dictate your recipe success:
– Extractor Blade (4-prong): Use for smoothies, soups, or juices. Its cross-pattern serrated blades pulverize frozen fruit and leafy greens.
– Milling Blade (2-prong): Essential for dry processing like nut butters or flours. Its flat edges cut without splashing liquids.
Why Blade Selection Determines Blend Quality
Confusing these blades causes 70% of user failures. Attempting almond butter with the extractor blade jams the motor, while using the milling blade for smoothies leaves chunky residue. Always match the blade to your recipe type—the extractor blade’s angled design pulls liquids upward during inversion, whereas the milling blade’s straight edges create downward force for dry ingredients.
Pre-Blend Ingredient Prep That Prevents Motor Strain
Uniform 1-inch ingredient cuts are non-negotiable for smooth operation. Large apple chunks or whole carrots create uneven resistance, forcing the motor to work 40% harder and triggering automatic shutoff. Remove all pits, seeds, and hard stems—cherry pits contain cyanogenic compounds that release toxins when crushed, while celery strings wrap around blades.
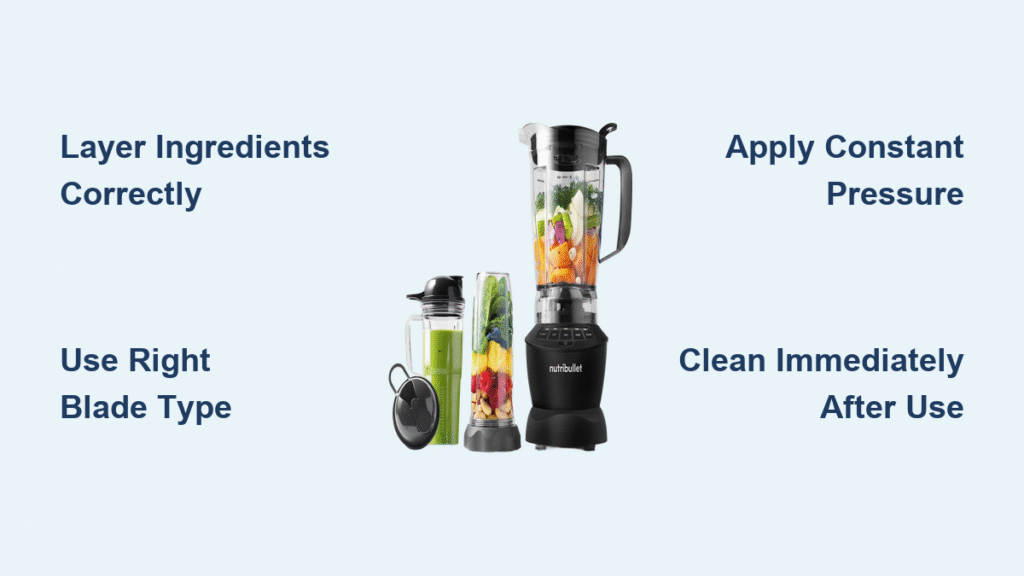
Strategic Layering Sequence for Zero Air Pockets
Layer ingredients in this exact order:
1. Liquids first (water, milk, or juice)
2. Soft ingredients next (yogurt, bananas, or spinach)
3. Frozen items last (berries or ice cubes)
This sequence ensures liquids cushion the initial blade impact, preventing splatter and allowing immediate vortex formation. Critical mistake: Adding leafy greens first traps air pockets that halt blending within seconds.
Loading Your Cup Without Leaks or Overflows

Respect the 50% solids rule for dry processing—exceeding this strains the milling blade’s torque limits. For nut butters, never load more than 1 cup almonds; for flaxseed powder, cap at ½ cup. Liquid ratios make or break texture:
– Thick smoothies: 1:1 liquid-to-solids ratio (e.g., 1 cup spinach + 1 cup almond milk)
– Thin juices: 2:1 liquid-to-solids ratio (e.g., 2 cups water + 1 cup cucumber)
Temperature and Liquid Restrictions That Protect Your Motor
Never add liquids above 180°F—steam pressure cracks cups within 3 blends. Carbonated beverages like seltzer foam violently due to trapped CO₂, damaging seals. Frozen ingredient tip: Let frozen fruit thaw 5 minutes first; blending rock-solid items halts the motor in 10 seconds.
Assembly Process That Ensures Leak-Proof Operation
Tighten the blade assembly clockwise until hand-tight (3 full rotations). Check for gaps by holding the cup up to light—any visible space between blade and cup threads guarantees leaks. Critical alignment step: After attaching the blade, invert the cup and match its circular bumps to the Power Base’s notches. Press straight down with steady pressure; tilting misaligns the motor shaft.
Why Continuous Pressure Is Mandatory During Blending
Unlike traditional blenders, the NutriBullet requires constant downward force to maintain electrical contact. Releasing pressure even slightly interrupts power, causing uneven blending. Hold firmly for the full duration—you’ll feel subtle vibration indicating proper engagement.
Master Pulse Blending for Restaurant-Quality Results
Start with 3-5 second pulses for 10 seconds to break up large chunks before continuous blending. This prevents the “chunky center” syndrome where ingredients clump mid-cup. For thick mixtures like nut butters, blend 30 seconds max—the motor automatically stops at 60 seconds to prevent overheating.
Troubleshoot Stuck Ingredients Without Injury
If ingredients climb the cup walls:
1. Release pressure to stop the blade
2. Lift cup straight off the base
3. Shake side-to-side 2-3 times
4. Re-engage immediately
Never insert utensils while the blade is attached—the motor activates instantly upon base contact. For stubborn jams, add ¼ cup liquid, reassemble, and pulse.
Post-Blend Disassembly Safety Protocol
Wait 5-10 seconds after blending before removing the blade—centrifugal force holds contents against the cup walls, reducing splatter risk. Twist counterclockwise while supporting the cup base; forcing it cracks threads. Refrigerate leftovers immediately in airtight containers; smoothies stay fresh 24-48 hours but lose 30% of nutrients after day one.
Advanced Techniques for Ice and Nut Butters
Limit ice to 1-2 standard cubes per blend—crushed ice works better as it distributes evenly. Always add ice last to prevent premature melting that dilutes flavor. Never blend ice alone; without soft ingredients to cushion impact, it chips blade edges.
Dry Processing Without Overheating
For almond butter:
1. Use the milling blade only
2. Process 2 cups roasted nuts in 30-second intervals
3. Wait 30 seconds between cycles for cooling
4. Total time: 8-12 minutes for smooth consistency
Overheating warning: If the cup feels hot, stop immediately—continuous dry processing melts plastic components.
Daily Cleaning That Prevents Rust and Odors
Rinse blades within 5 minutes of use—dried residue requires aggressive scrubbing that dulls edges. For quick cleaning:
1. Fill cup ⅔ with warm water
2. Add 2 drops dish soap
3. Attach milling blade (easier to clean)
4. Blend 10-15 seconds
5. Rinse thoroughly
Component-Specific Maintenance
- Blades: Hand-wash only; dry immediately to prevent rust. Never dishwasher—harsh detergents corrode stainless steel.
- Cups: Top-rack dishwasher safe, but hand-washing preserves measurement markings. Remove stains with baking soda paste.
- Power Base: Unplug and wipe with damp cloth. Clean vents with cotton swabs monthly.
Fix Leaks and Power Failures in 60 Seconds
When the NutriBullet won’t start:
1. Verify electrical outlet function
2. Check cup alignment with base notches
3. Clean notches with a toothpick (debris blocks connection)
Persistent leaks? Tighten the blade assembly first. If leaking continues, inspect cup threads for hairline cracks—replace immediately as pressure buildup risks shattering.
Overheating Emergency Response
If the motor feels hot:
– Stop all operation
– Wait 10 minutes for full cooldown
– Reduce blend time to 30 seconds max
Continuous operation beyond 60 seconds trips the thermal fuse—repeated overheating voids warranties.
Safety Rules That Prevent Serious Injury
Never blend peach, cherry, or apricot pits—they release cyanide when crushed. Avoid starfruit seeds due to neurotoxic compounds. Critical operational rule: Keep hands, hair, and loose clothing 6+ inches from the base during operation—the blade spins at 10,000 RPM and activates instantly upon contact.
Perfect Smoothie Formula for Consistent Results
Start with this science-backed ratio:
– 1 cup liquid base (water, milk, or juice)
– 1 cup frozen fruit (mango, berries, or pineapple)
– ½ cup leafy greens (spinach or kale)
– 1-2 tbsp add-ins (chia seeds, nut butter, or protein powder)
Layer liquids first, then greens, then frozen fruit. Pulse 10 seconds, then blend continuously for 30 seconds. Pro tip: Add ¼ avocado for creaminess without dairy—it emulsifies ingredients for a velvety texture.
Final Note: Mastering how to work a NutriBullet blender transforms it from a dusty countertop ornament into your most reliable kitchen ally. Remember: precise ingredient layering prevents 90% of leaks, respecting the fill line avoids motor strain, and immediate cleaning after use extends blade life by years. Start with the foolproof smoothie formula, then experiment with nut butters using the milling blade’s 30-second interval technique. Within a week, you’ll create restaurant-quality blends in 60 seconds flat—no more lumpy disasters or mysterious shutdowns. Your NutriBullet’s full potential awaits; all it takes is the right pressure, pulse rhythm, and respect for its engineering limits.


